Plum & Blackberry Crumble & a Plum-Picking Adventure!

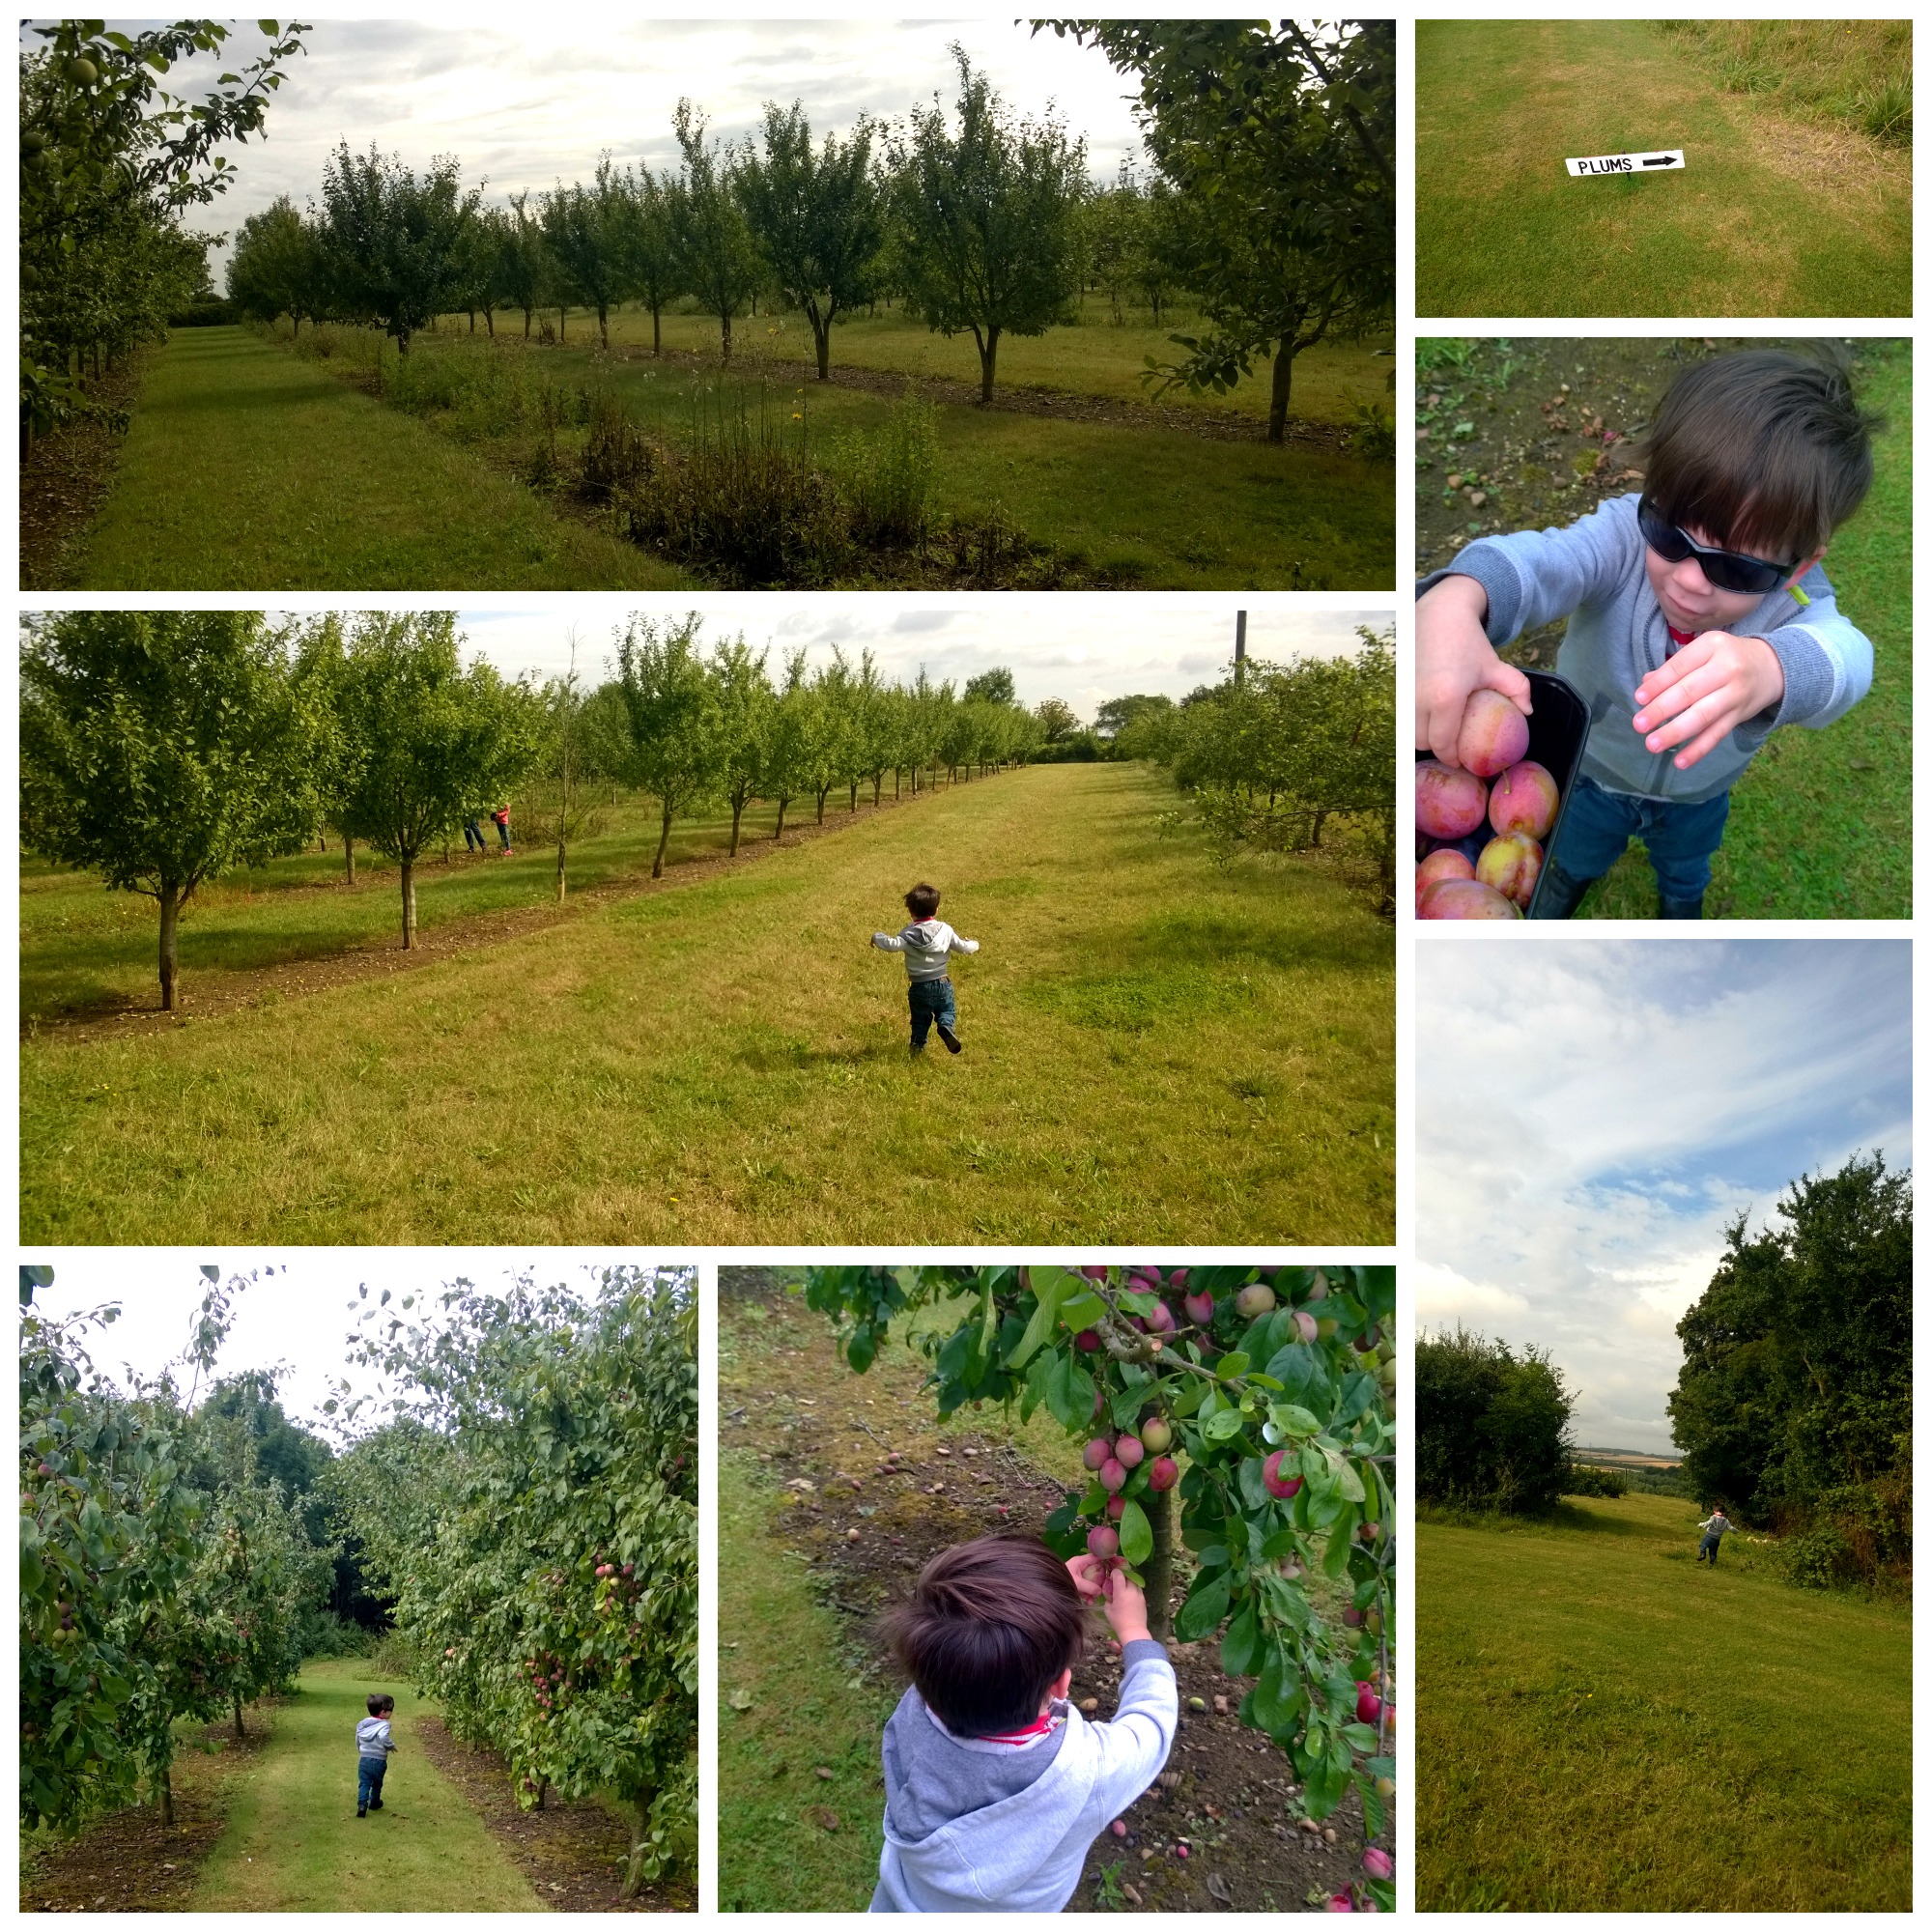
We have a lovely little ‘pick your own’ farm a really short distance from where we live. I vaguely remember going as a child to pick strawberries and had planned on taking Monkey to pick strawberries, but alas we missed the season this year. My neighbour went though and also went recently and said they had the most delicious plums! Plums aren’t a fruit regularly eaten in our house but my neighbour really wanted Monkey and I to join her and her kiddies on a pick your own expedition, and I thought Monkey would enjoy it so off we went.

Monkey absolutely loved it at the farm, so many open spaces to run about bless him and he just kept running around shouting “Berry, berry, berry!” lol. He was quite helpful with picking the plums, although he also tried picking some very underripe ones, and some less than lovely looking ones off the floor! He did try though!

plums

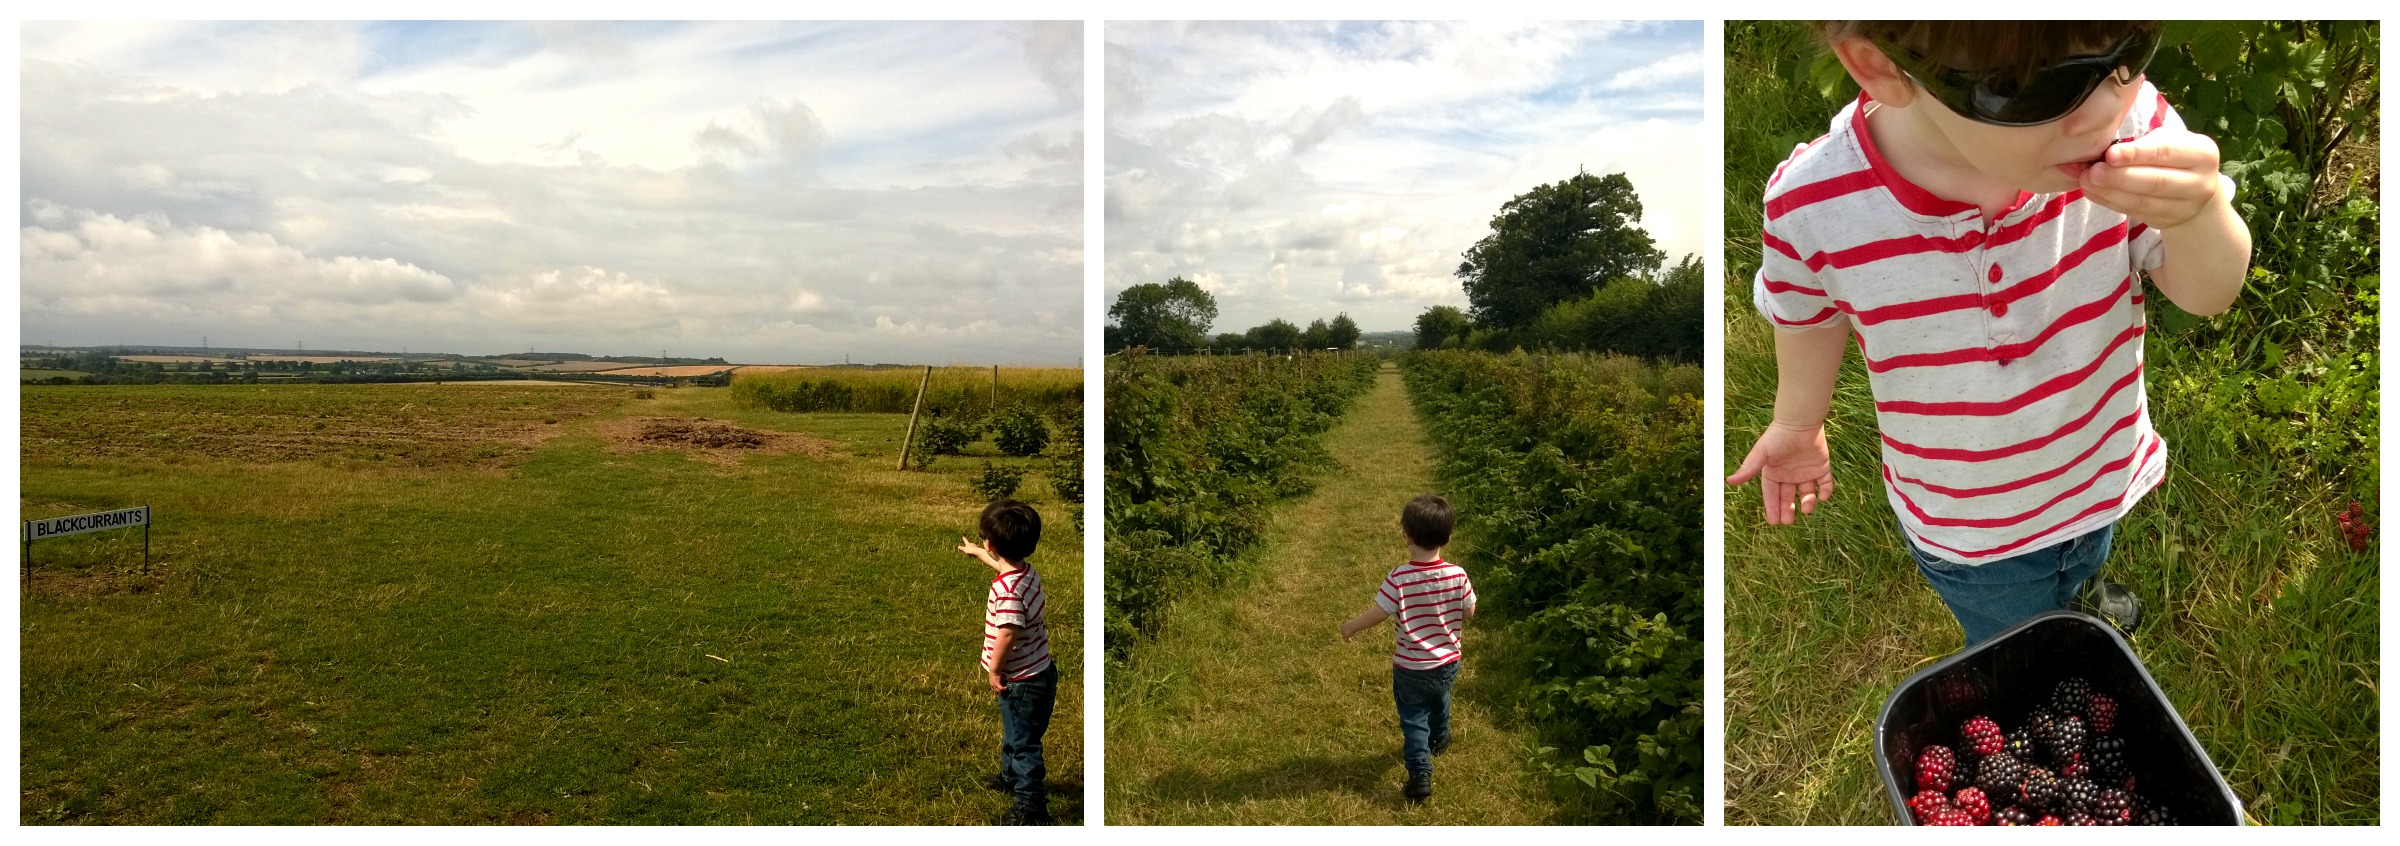
I didn’t realise they also had blackberry bushes and we love a blackberry crumble in our house so we picked some of those too. I was worried he would hurt himself on the thorns but he managed really well and actually tried to eat some of the blackberries and plums, though he isn’t very good with fresh fruit and pretty much spat it all out.

blackberries

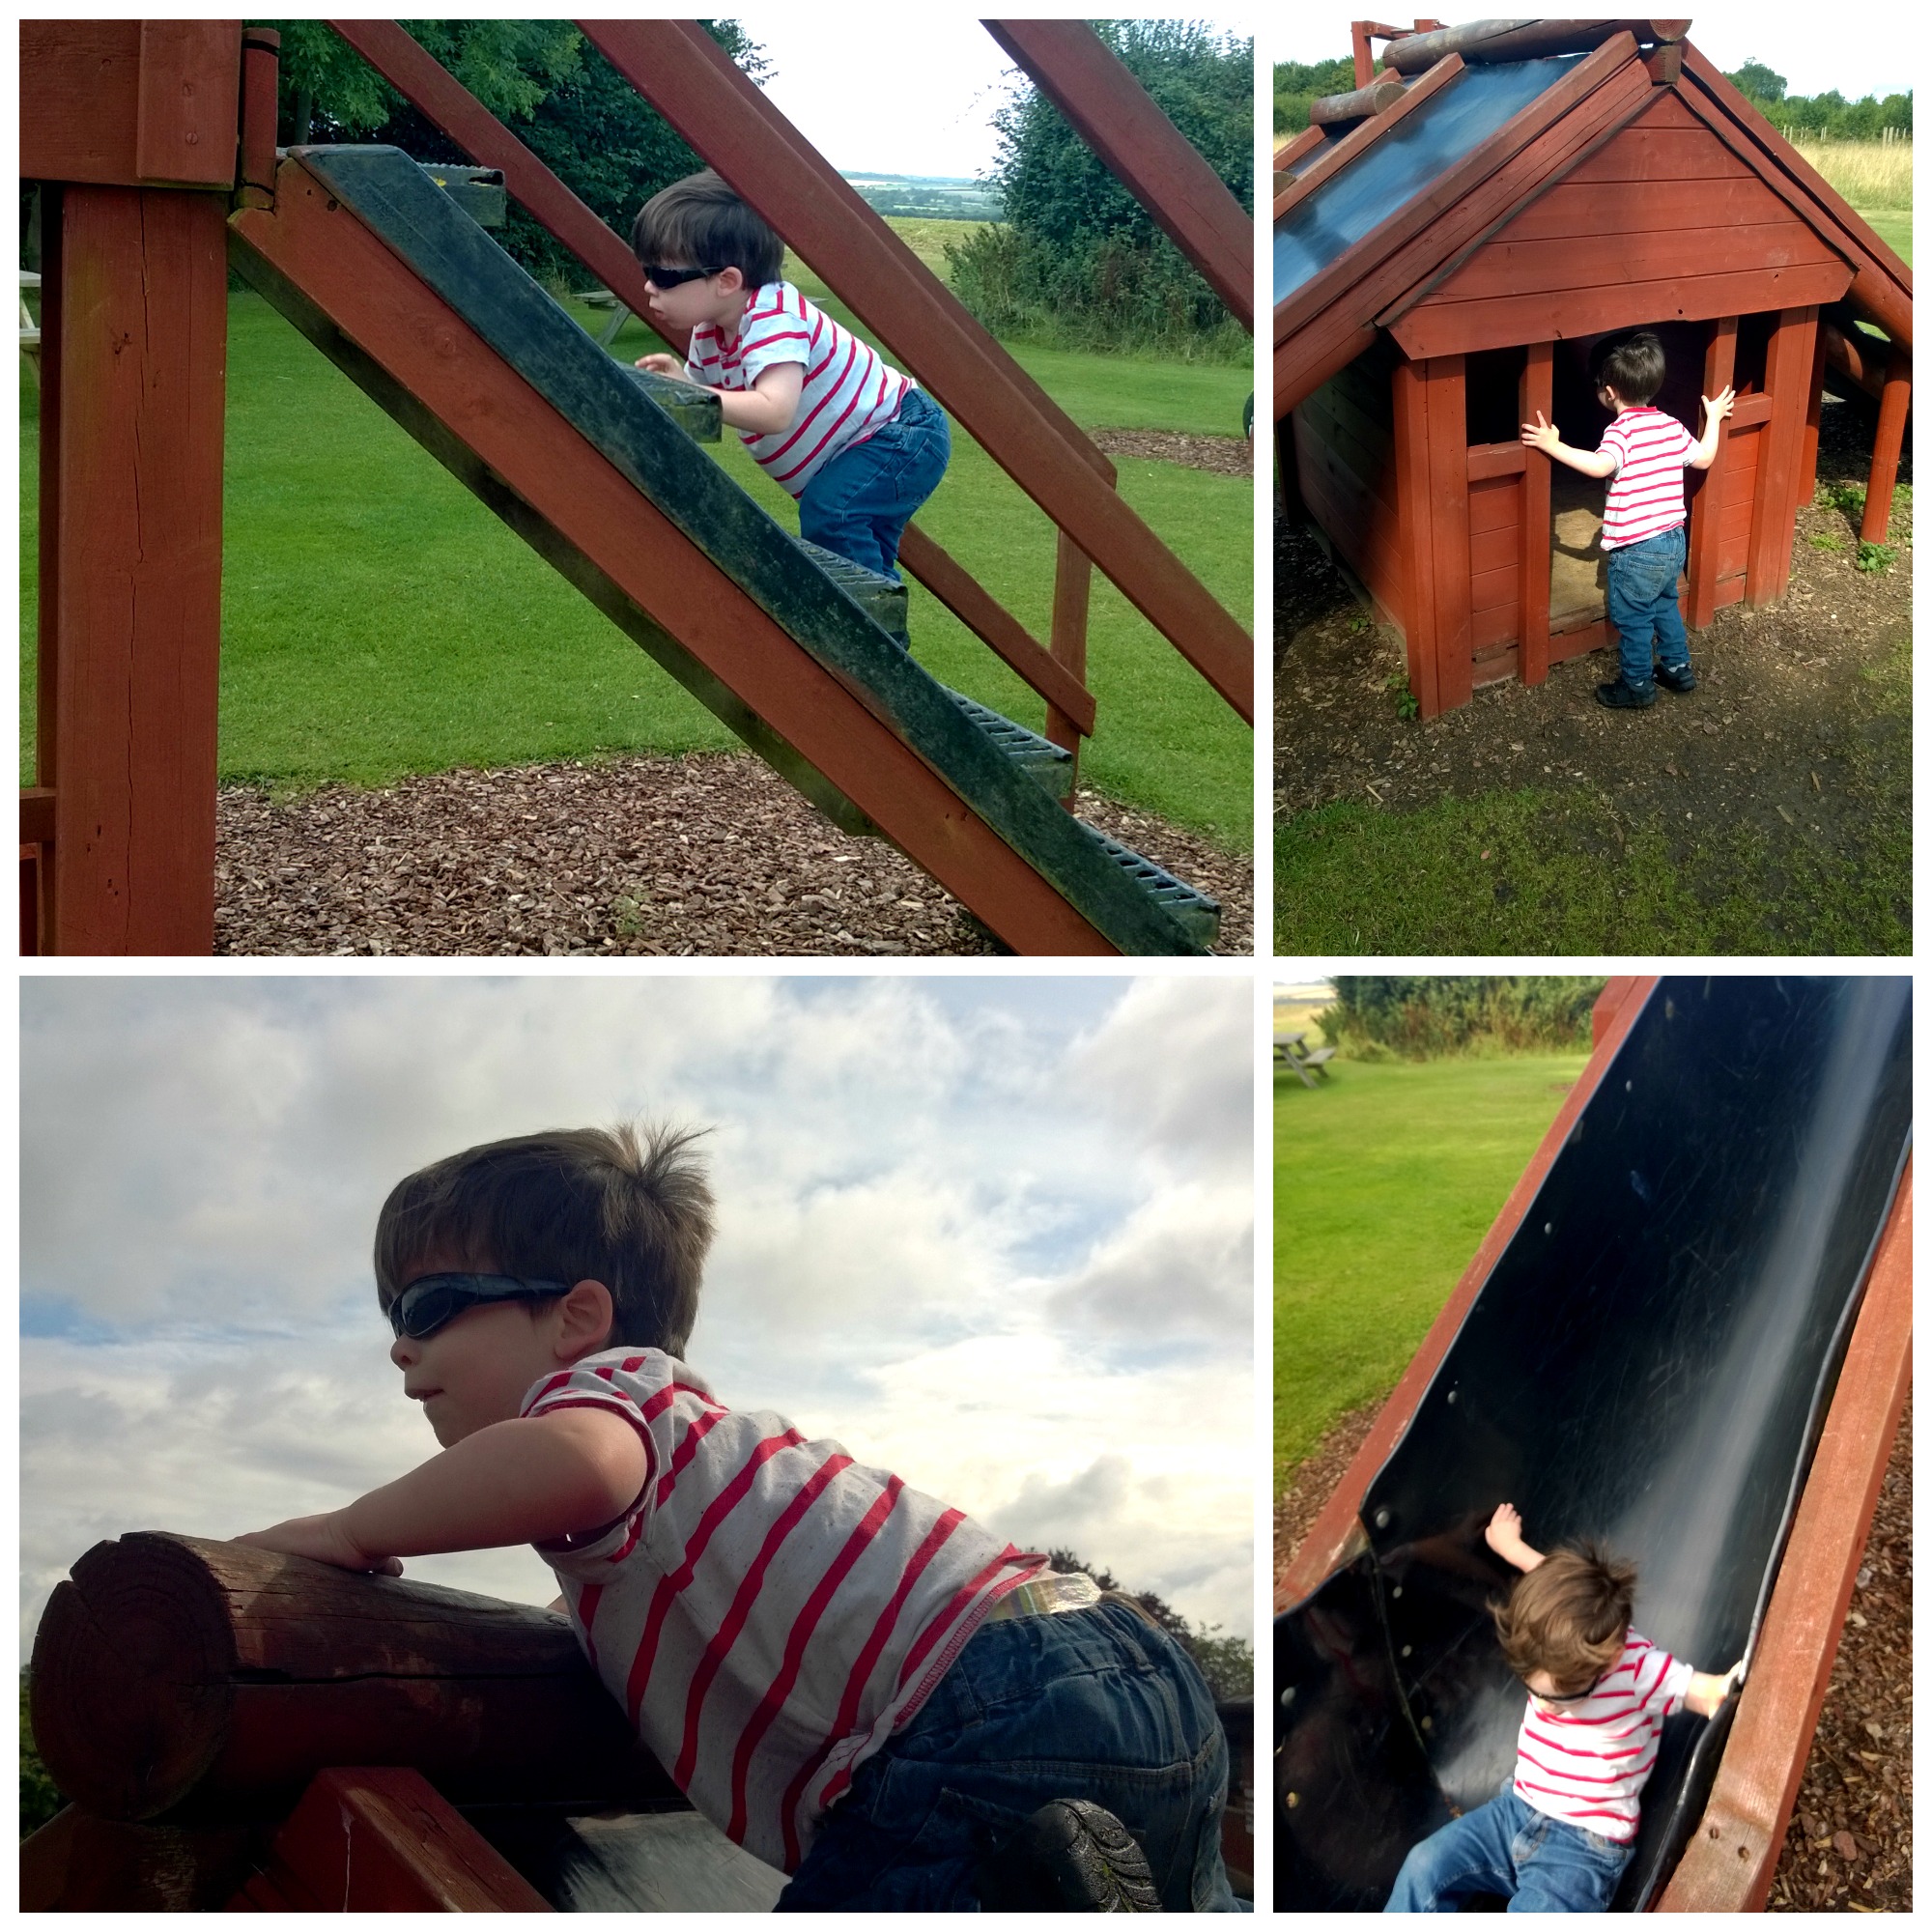
We then had a play on their fabulous play park before we headed home. It was a lovely place and we will definitely go fruit picking there again!

playground

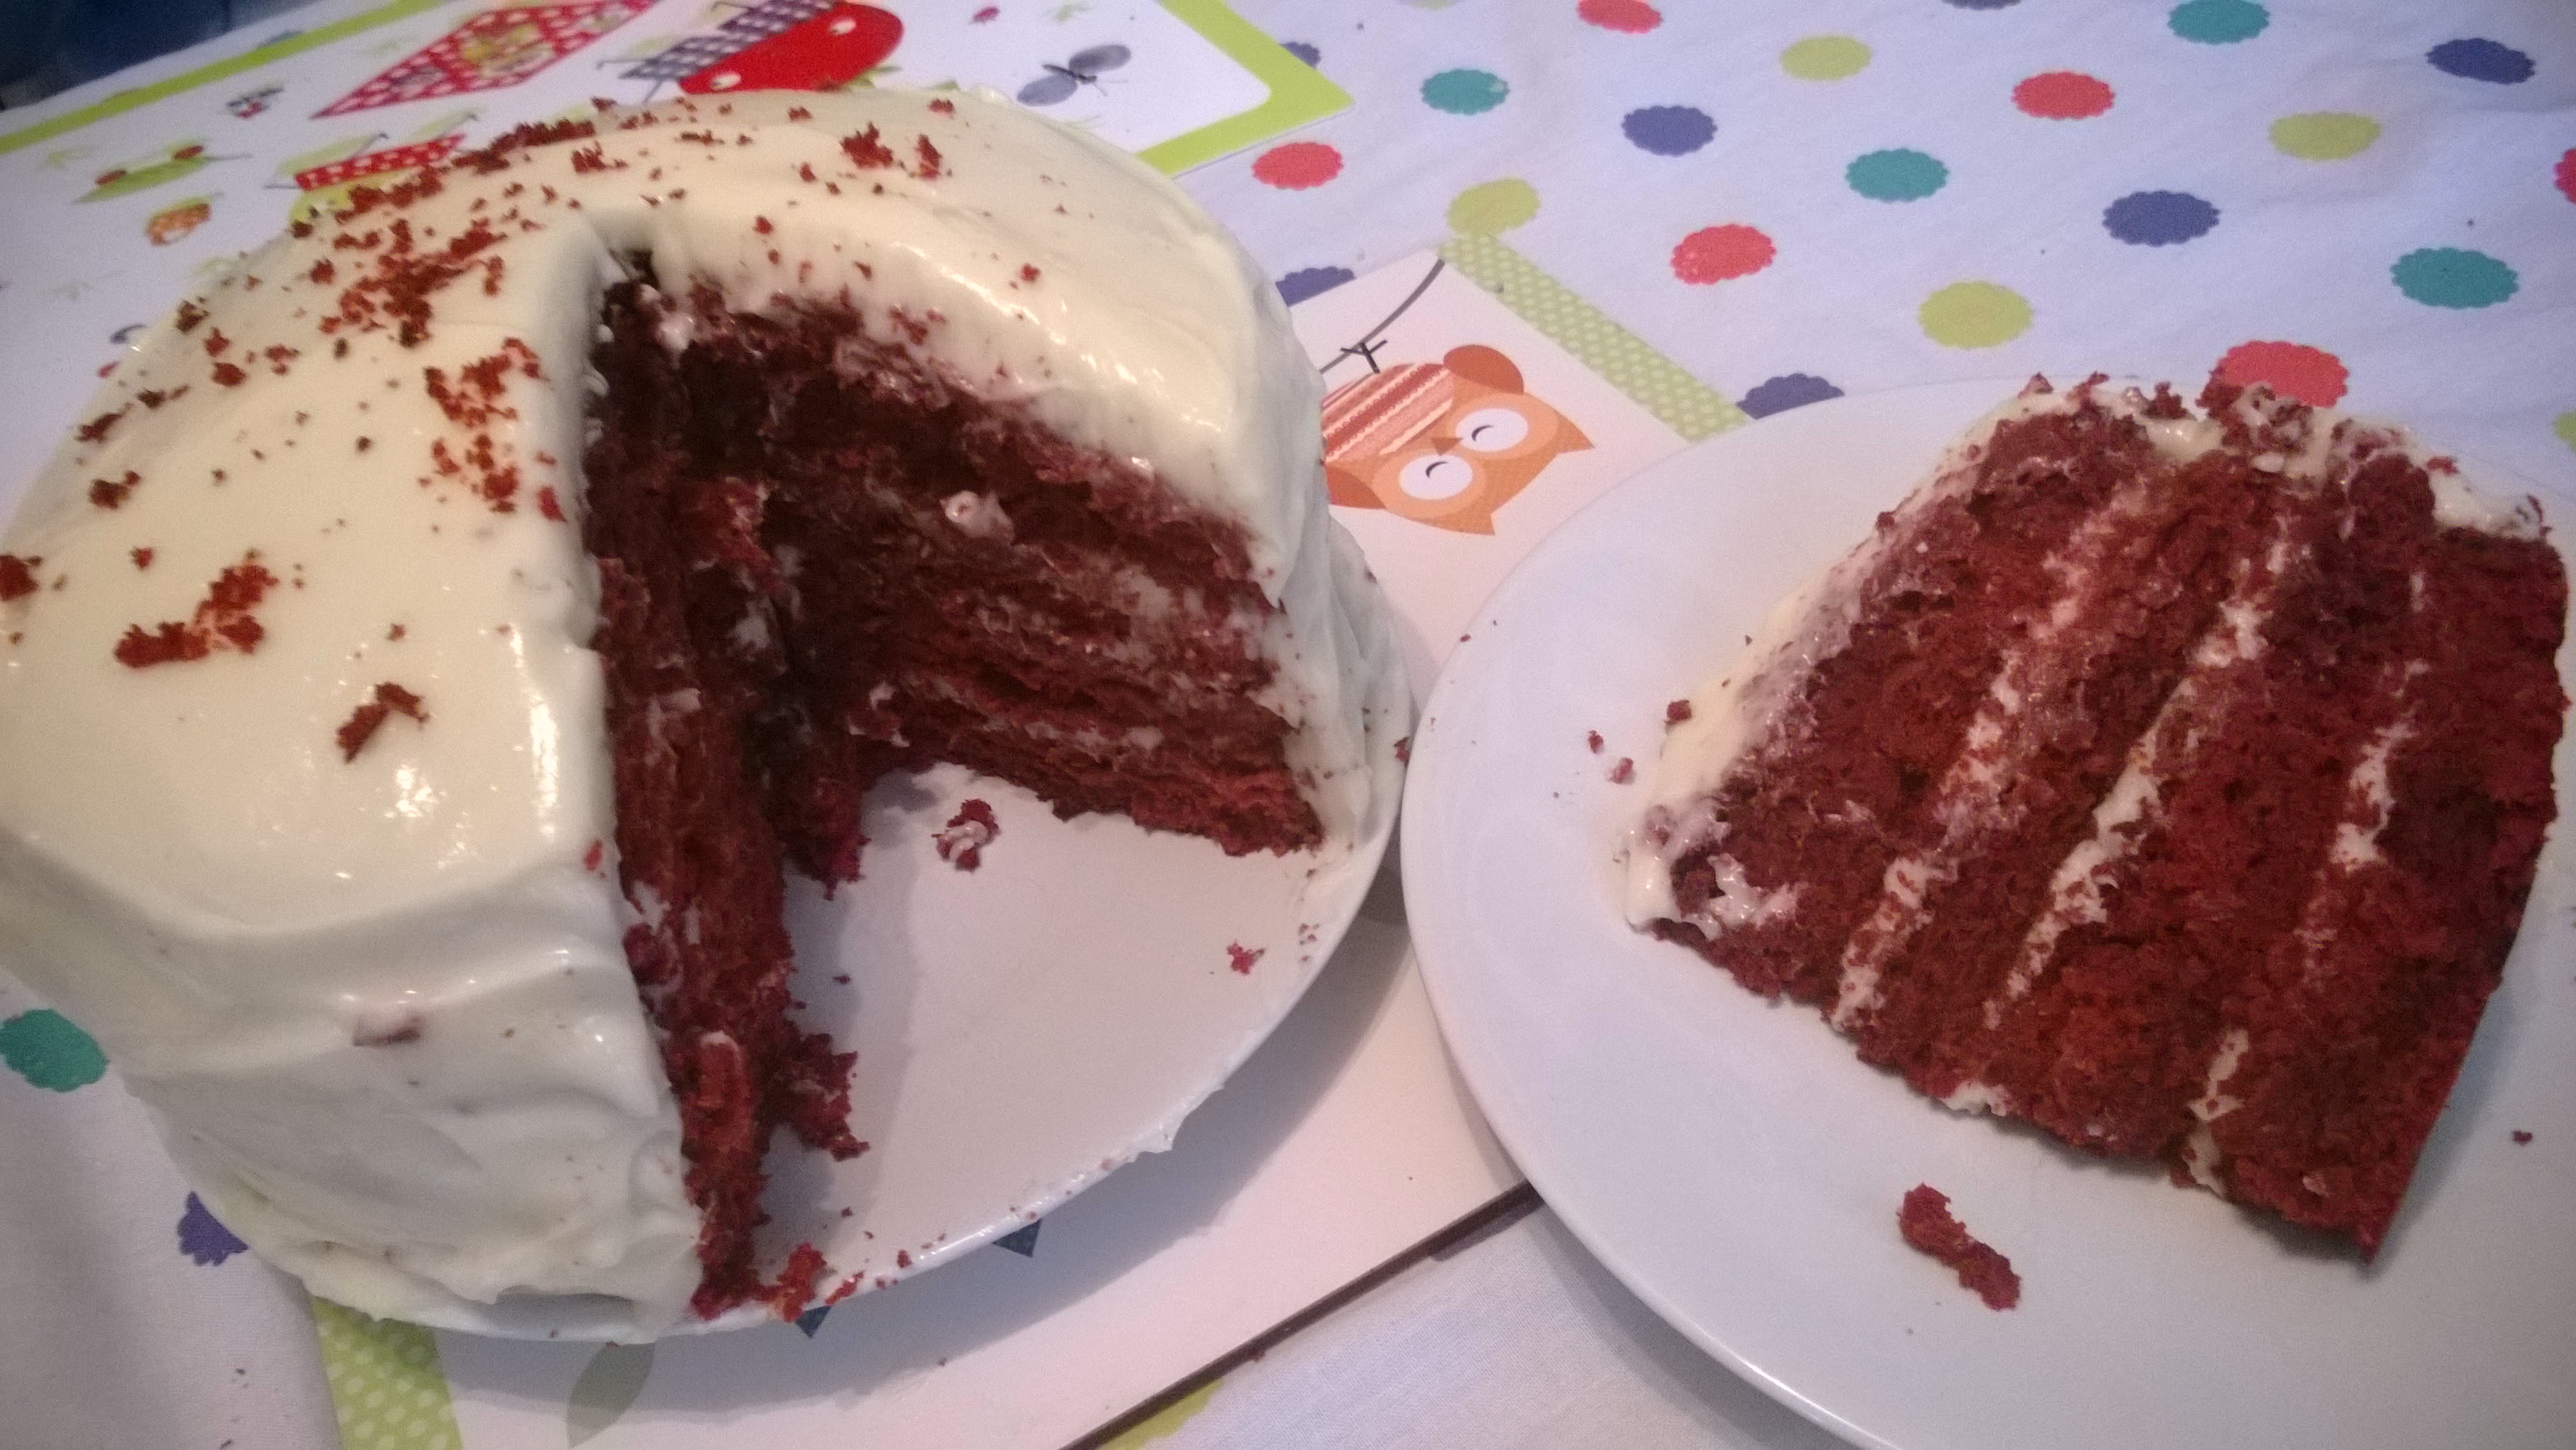
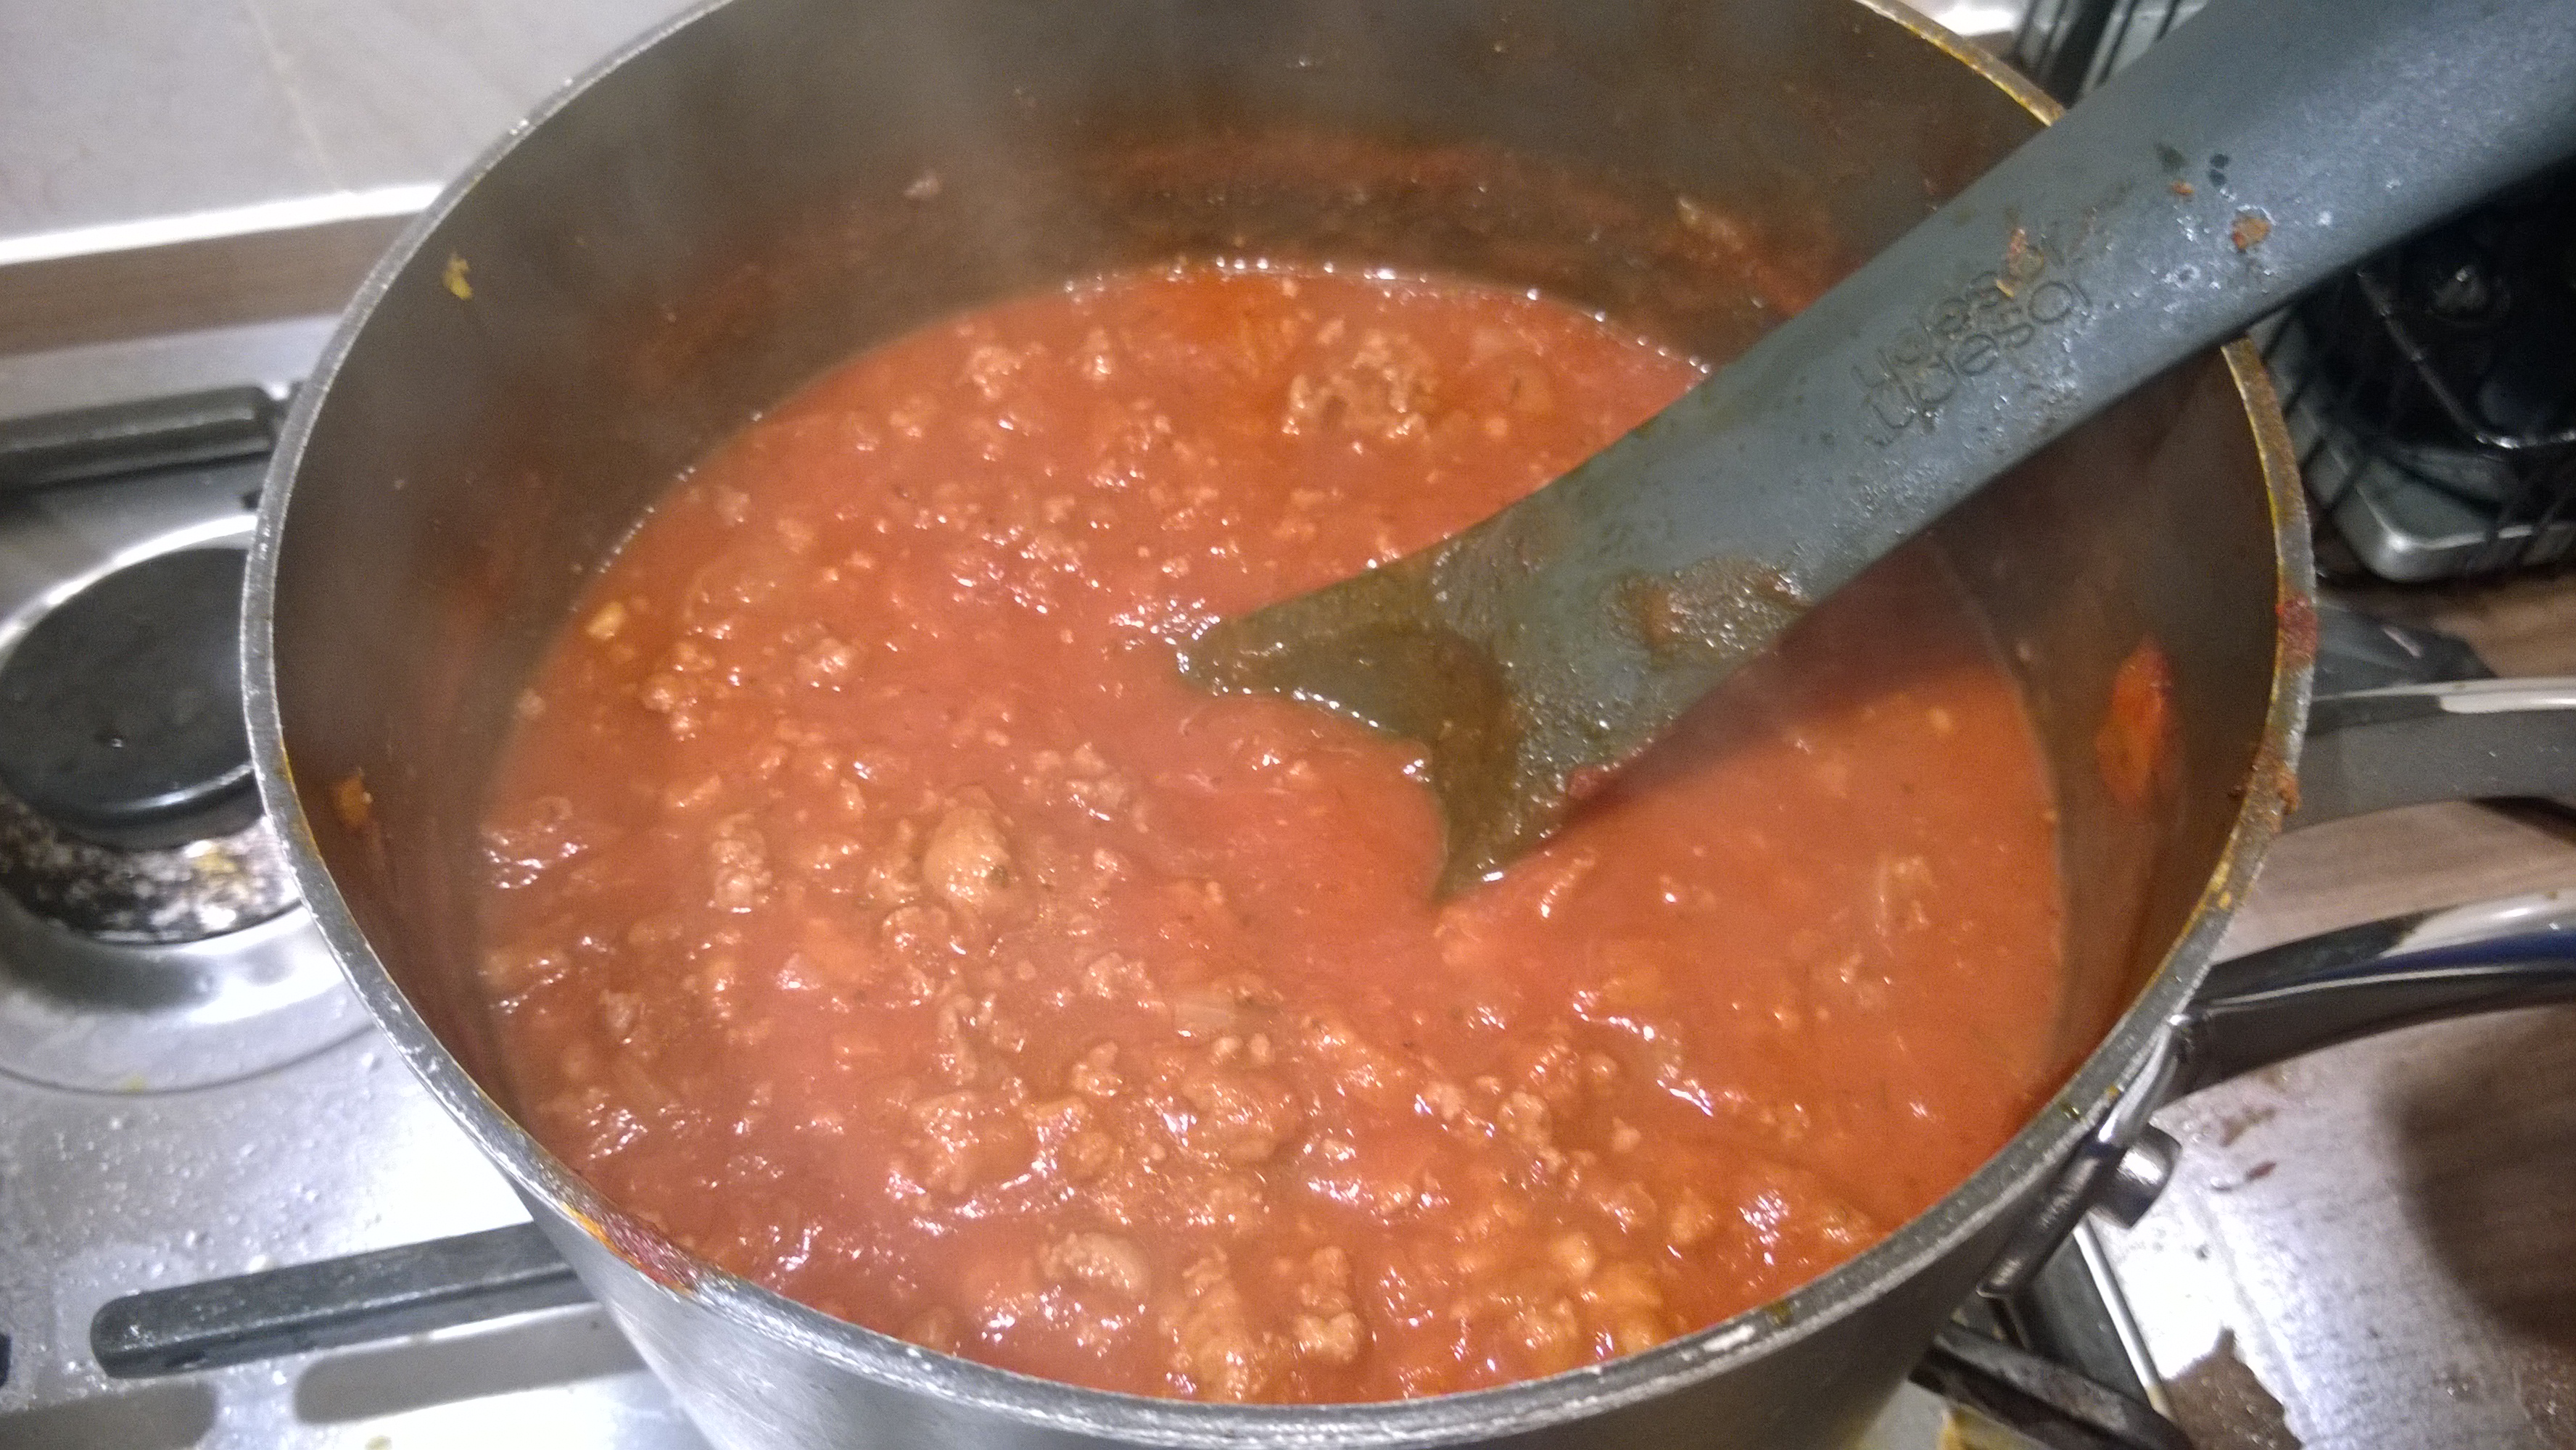
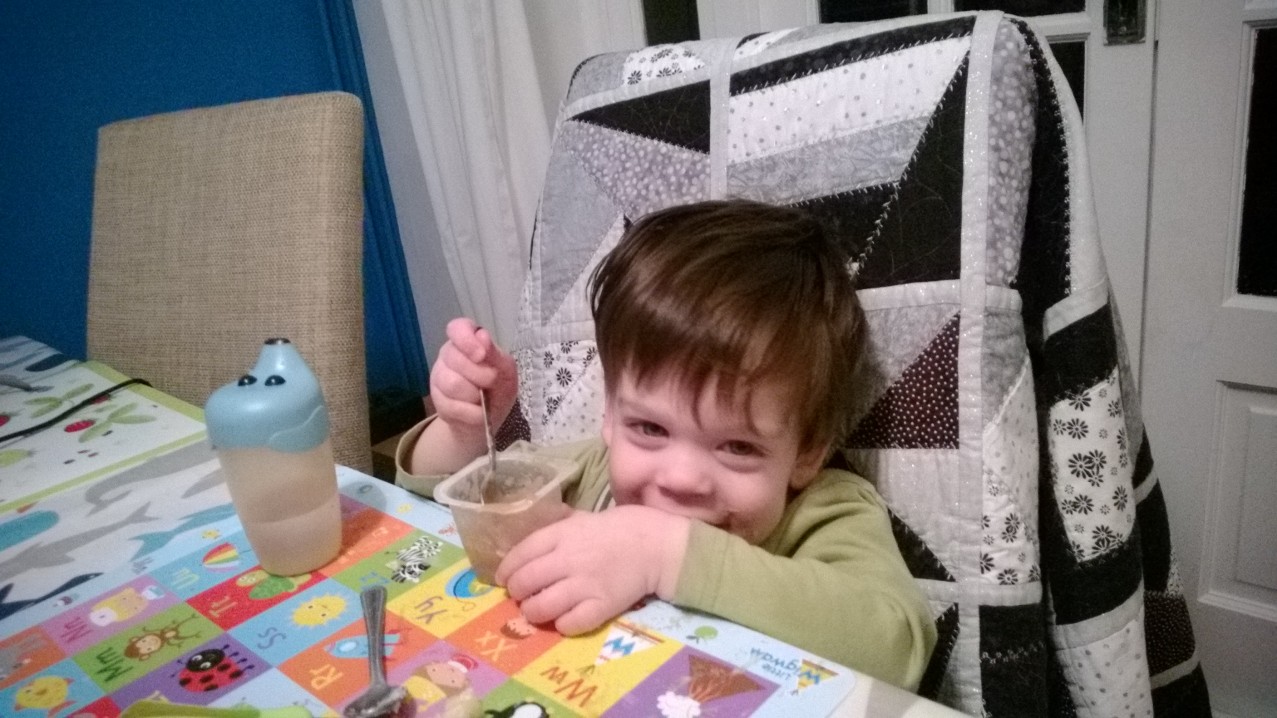
I wasn’t sure what to do with the fruit to start with as neither hubby or Monkey are big fans of fresh fruit, and I don’t really have the energy to make anything complicated. So it didn’t take long for me to decide to make a Plum & Blackberry crumble. I love making crumbles mainly because they are so easy to make, are absolutely yummy and get some fruit inside us (albeit with a lot of sugar involved!)

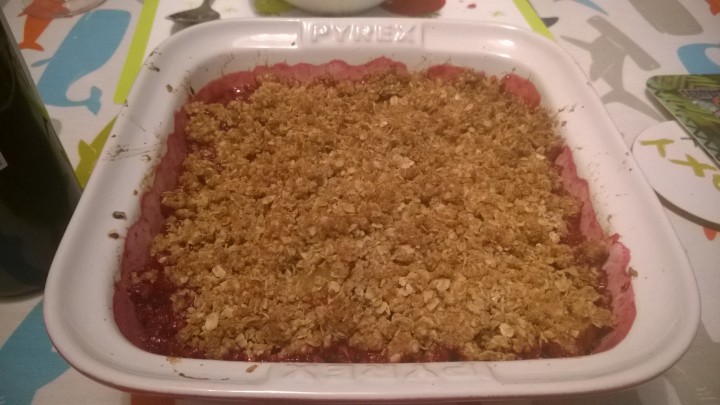
Here is our recipe for a lovely crumble. My fruit measurements are very vague and can be interchangeable with a lot of fruits. I originally used this recipe to make a rhubarb crumble, though with rhubarb you also need 50ml of water, which I left out in this case as the plums were so juicy in themselves!

Plum & Blackberry Crumble Ingredients

WP_20140816_19_15_38_Pro
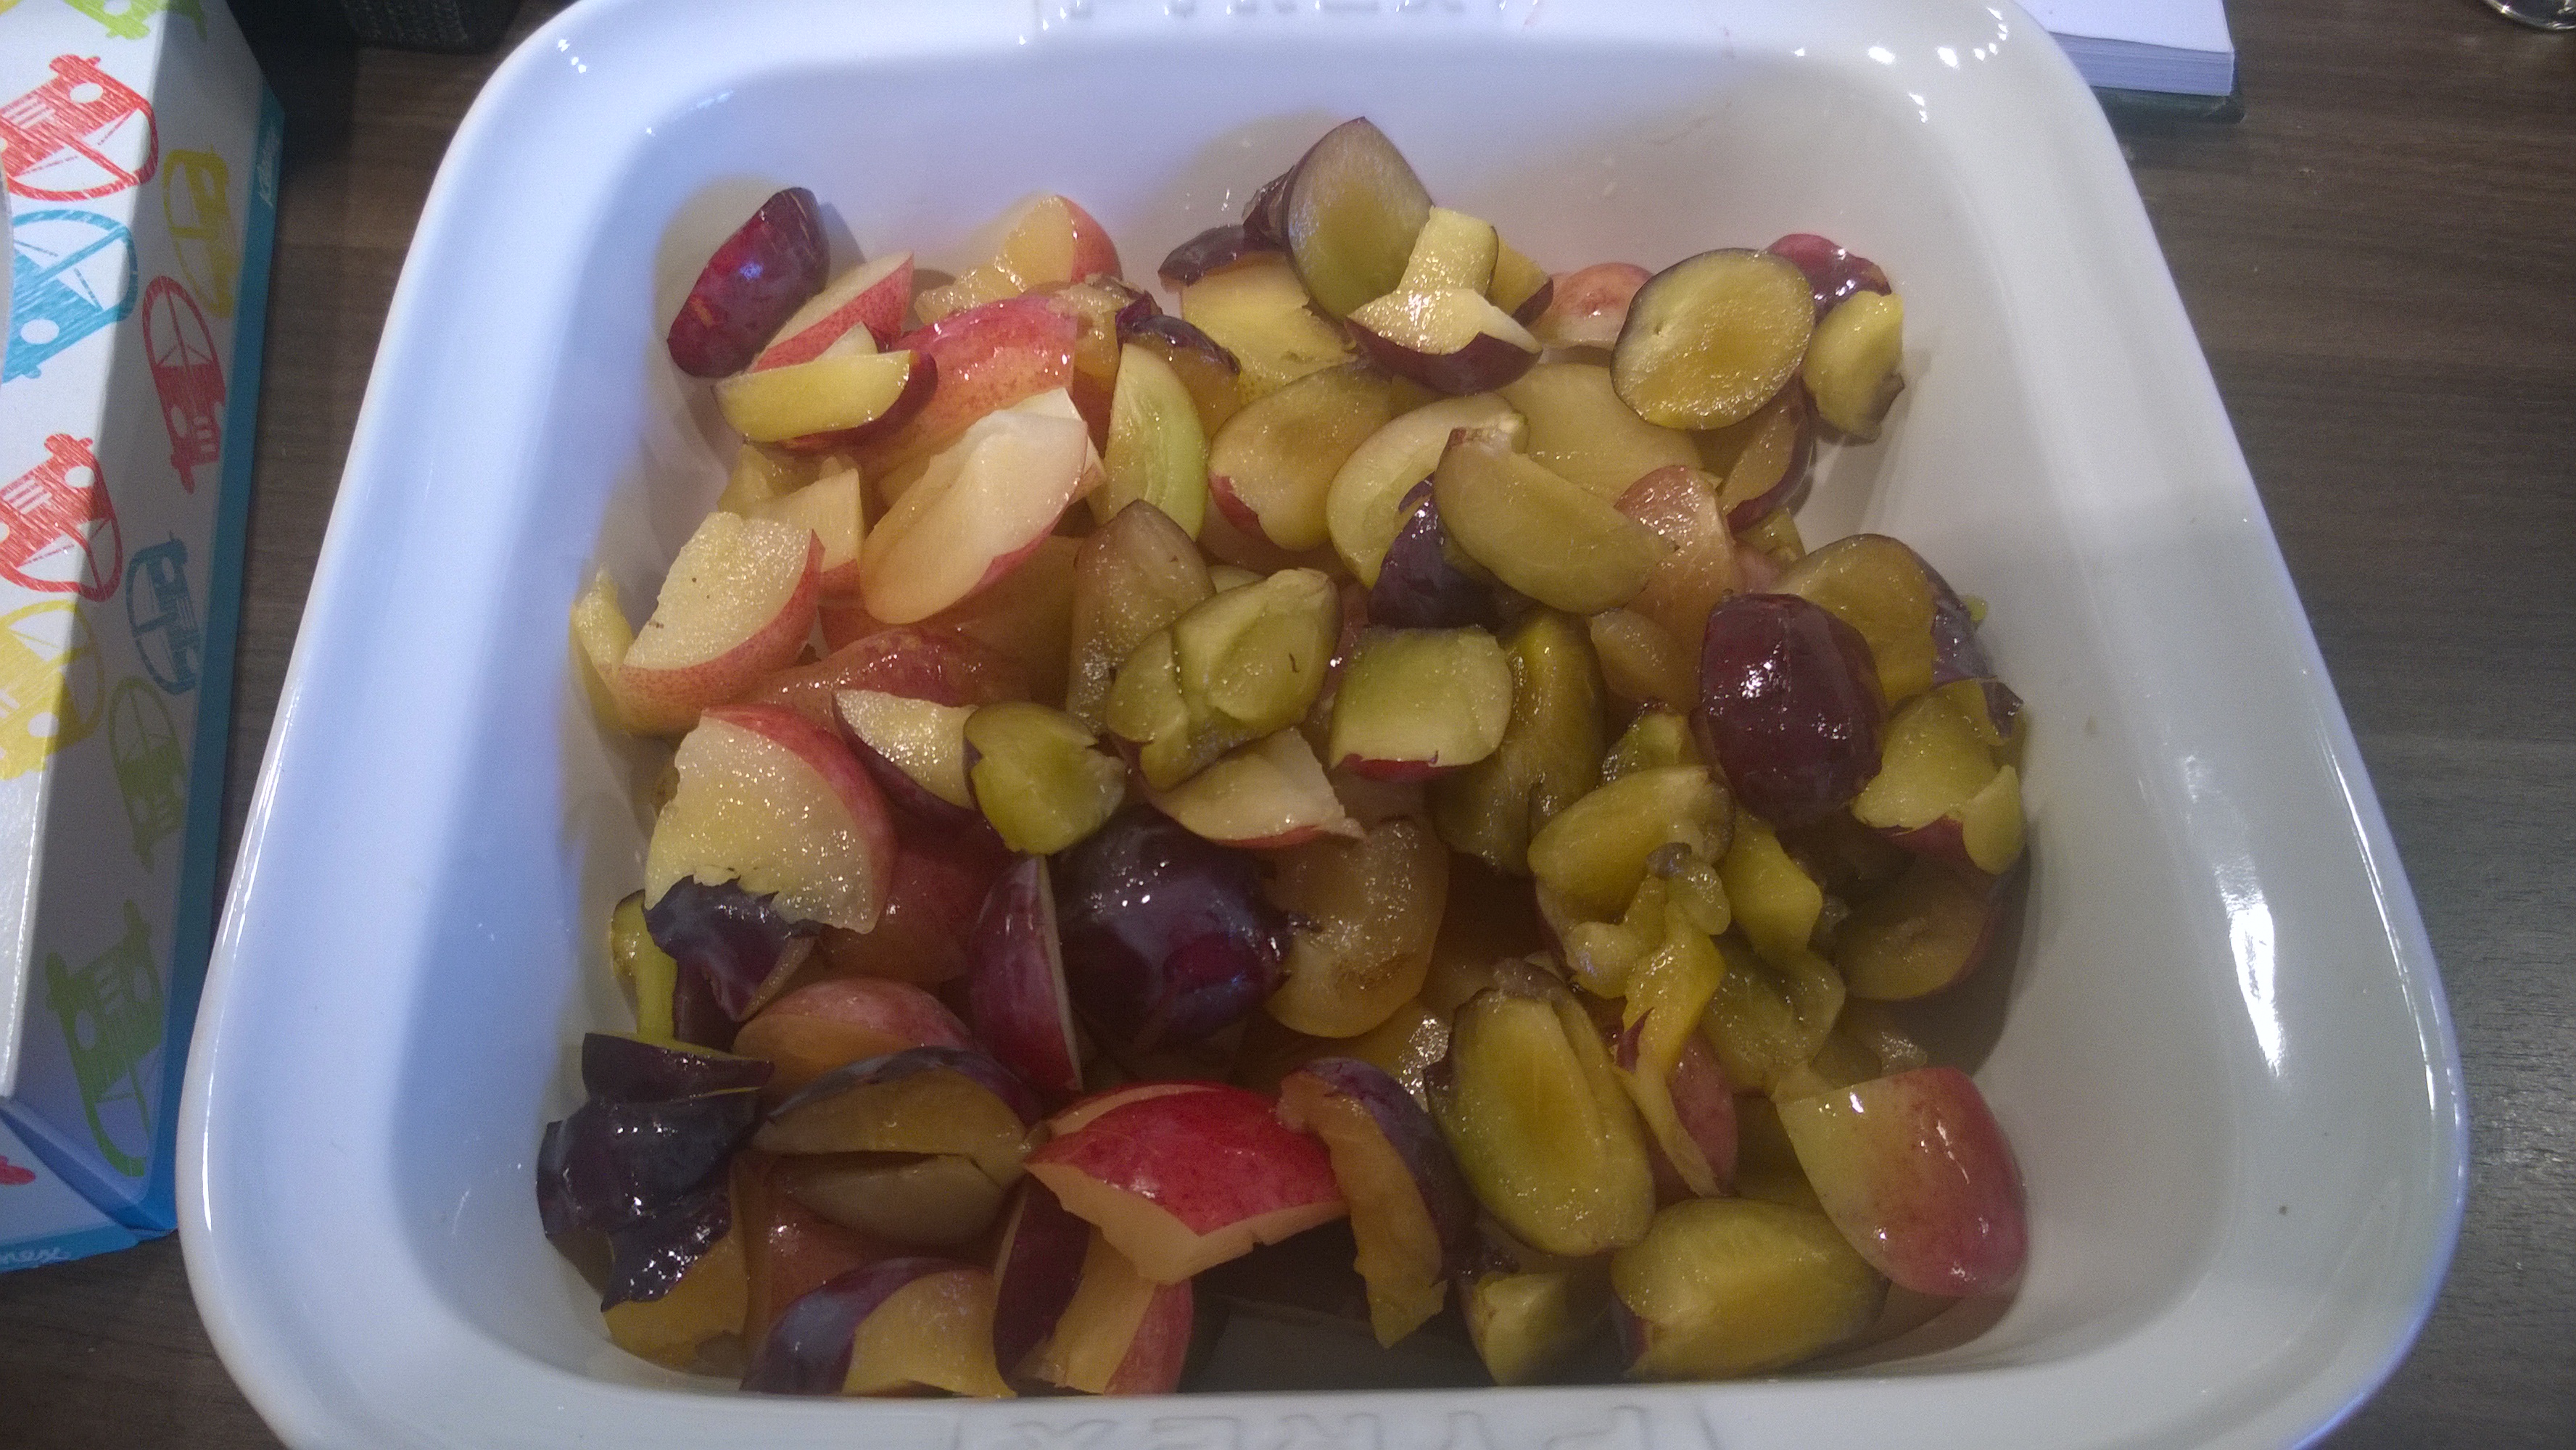
500g Fruit – in this case Plums & Blackberries – chopped/sliced thinly
100g Caster Sugar
100g Wholemeal Flour (can use plain)
100g Rolled Oats (Porridge oats)
100g Butter (we use unsalted)
125g Demerara Sugar

Plum & Blackberry Crumble Method

Preheat the oven to 180°

Place the chopped into fruit in an ovenproof dish and sprinkle with the Caster Sugar (and water if necessary i.e with rhubarb)

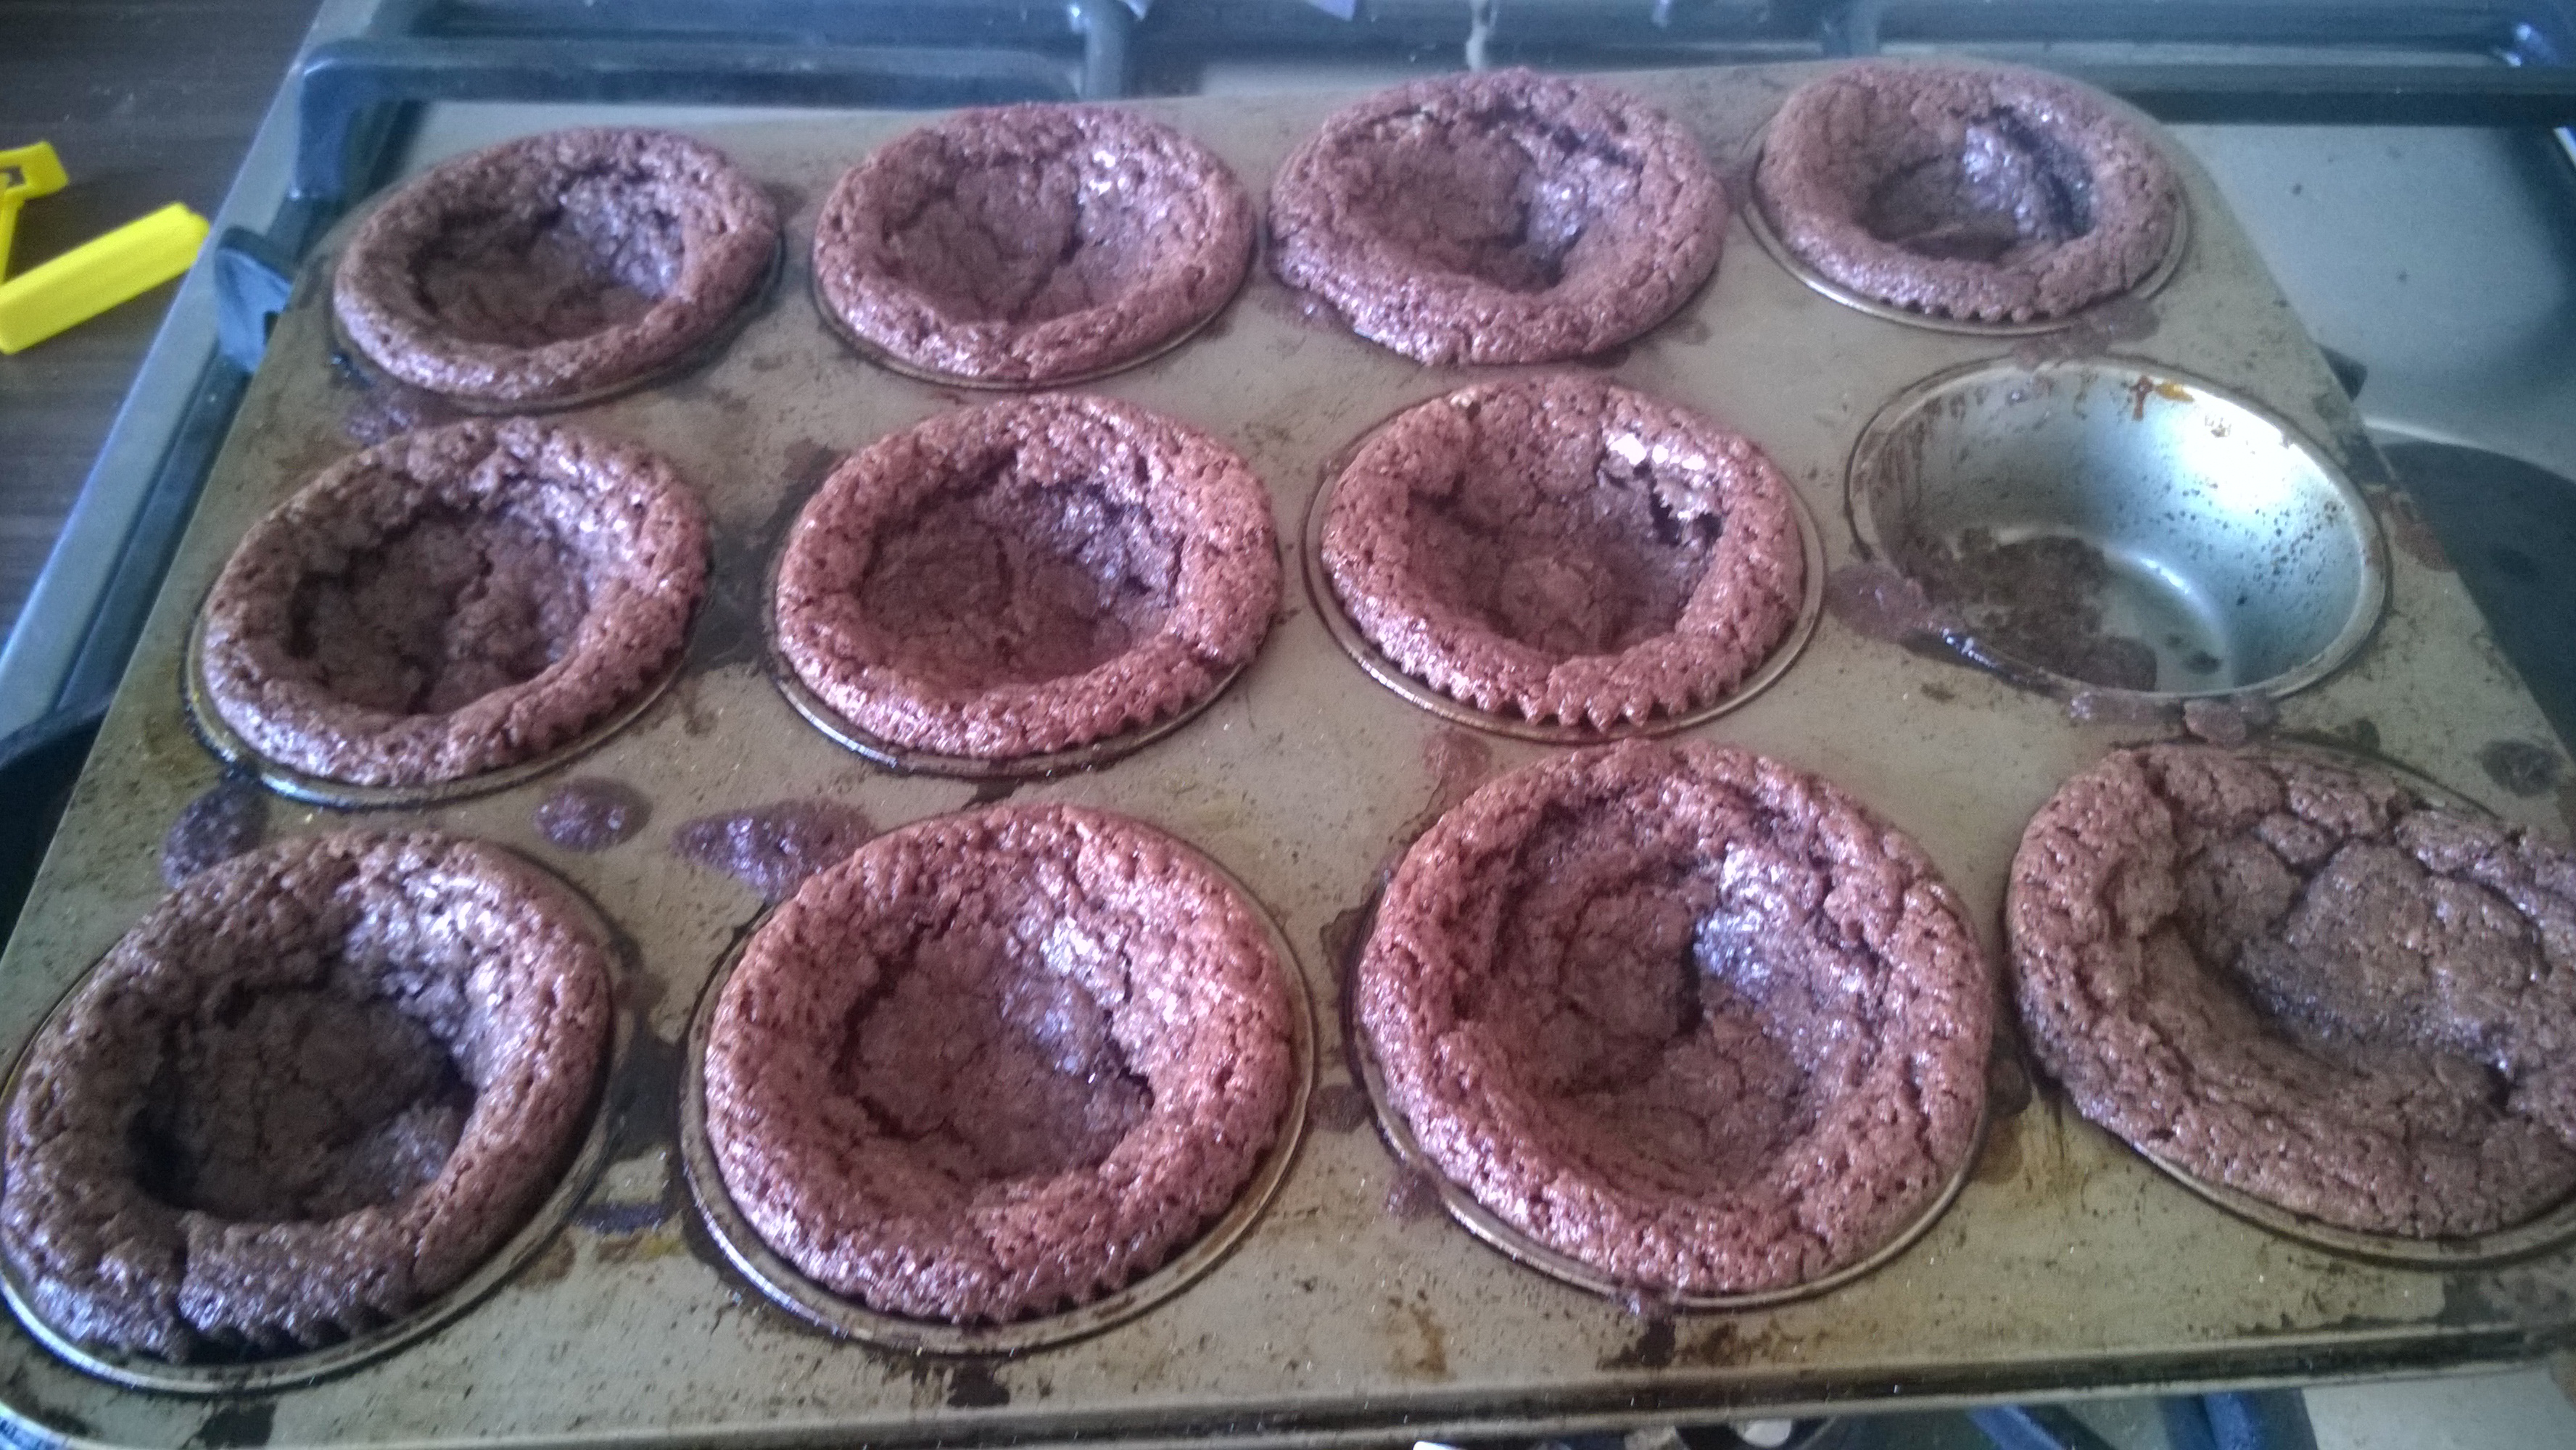
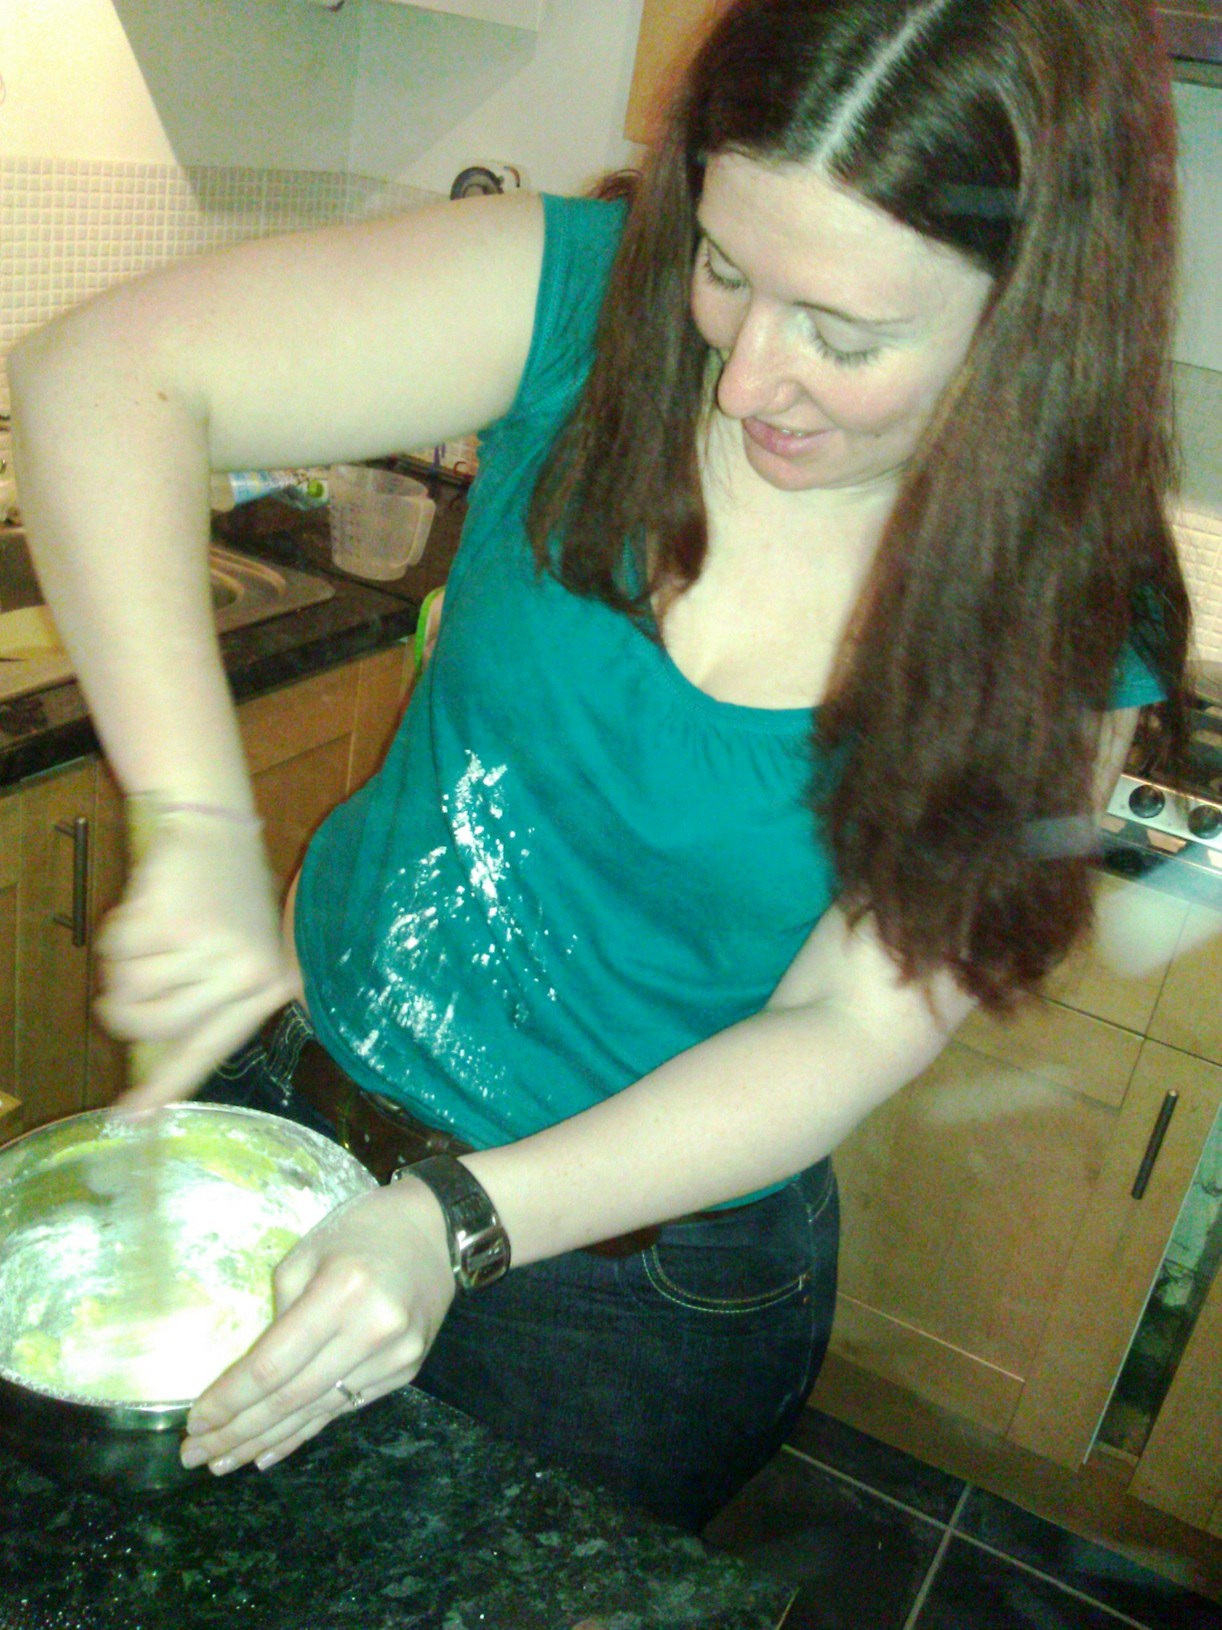
Put the Flour, Oats and Demerara Sugar in a separate bowl. Add the butter and mix in with your fingers until it resembles breadcrumbs. It is ok if there are a few lumpy bits.

Sprinkle crumble mixture over the fruit as evenly as possible, and don’t pat down too much.

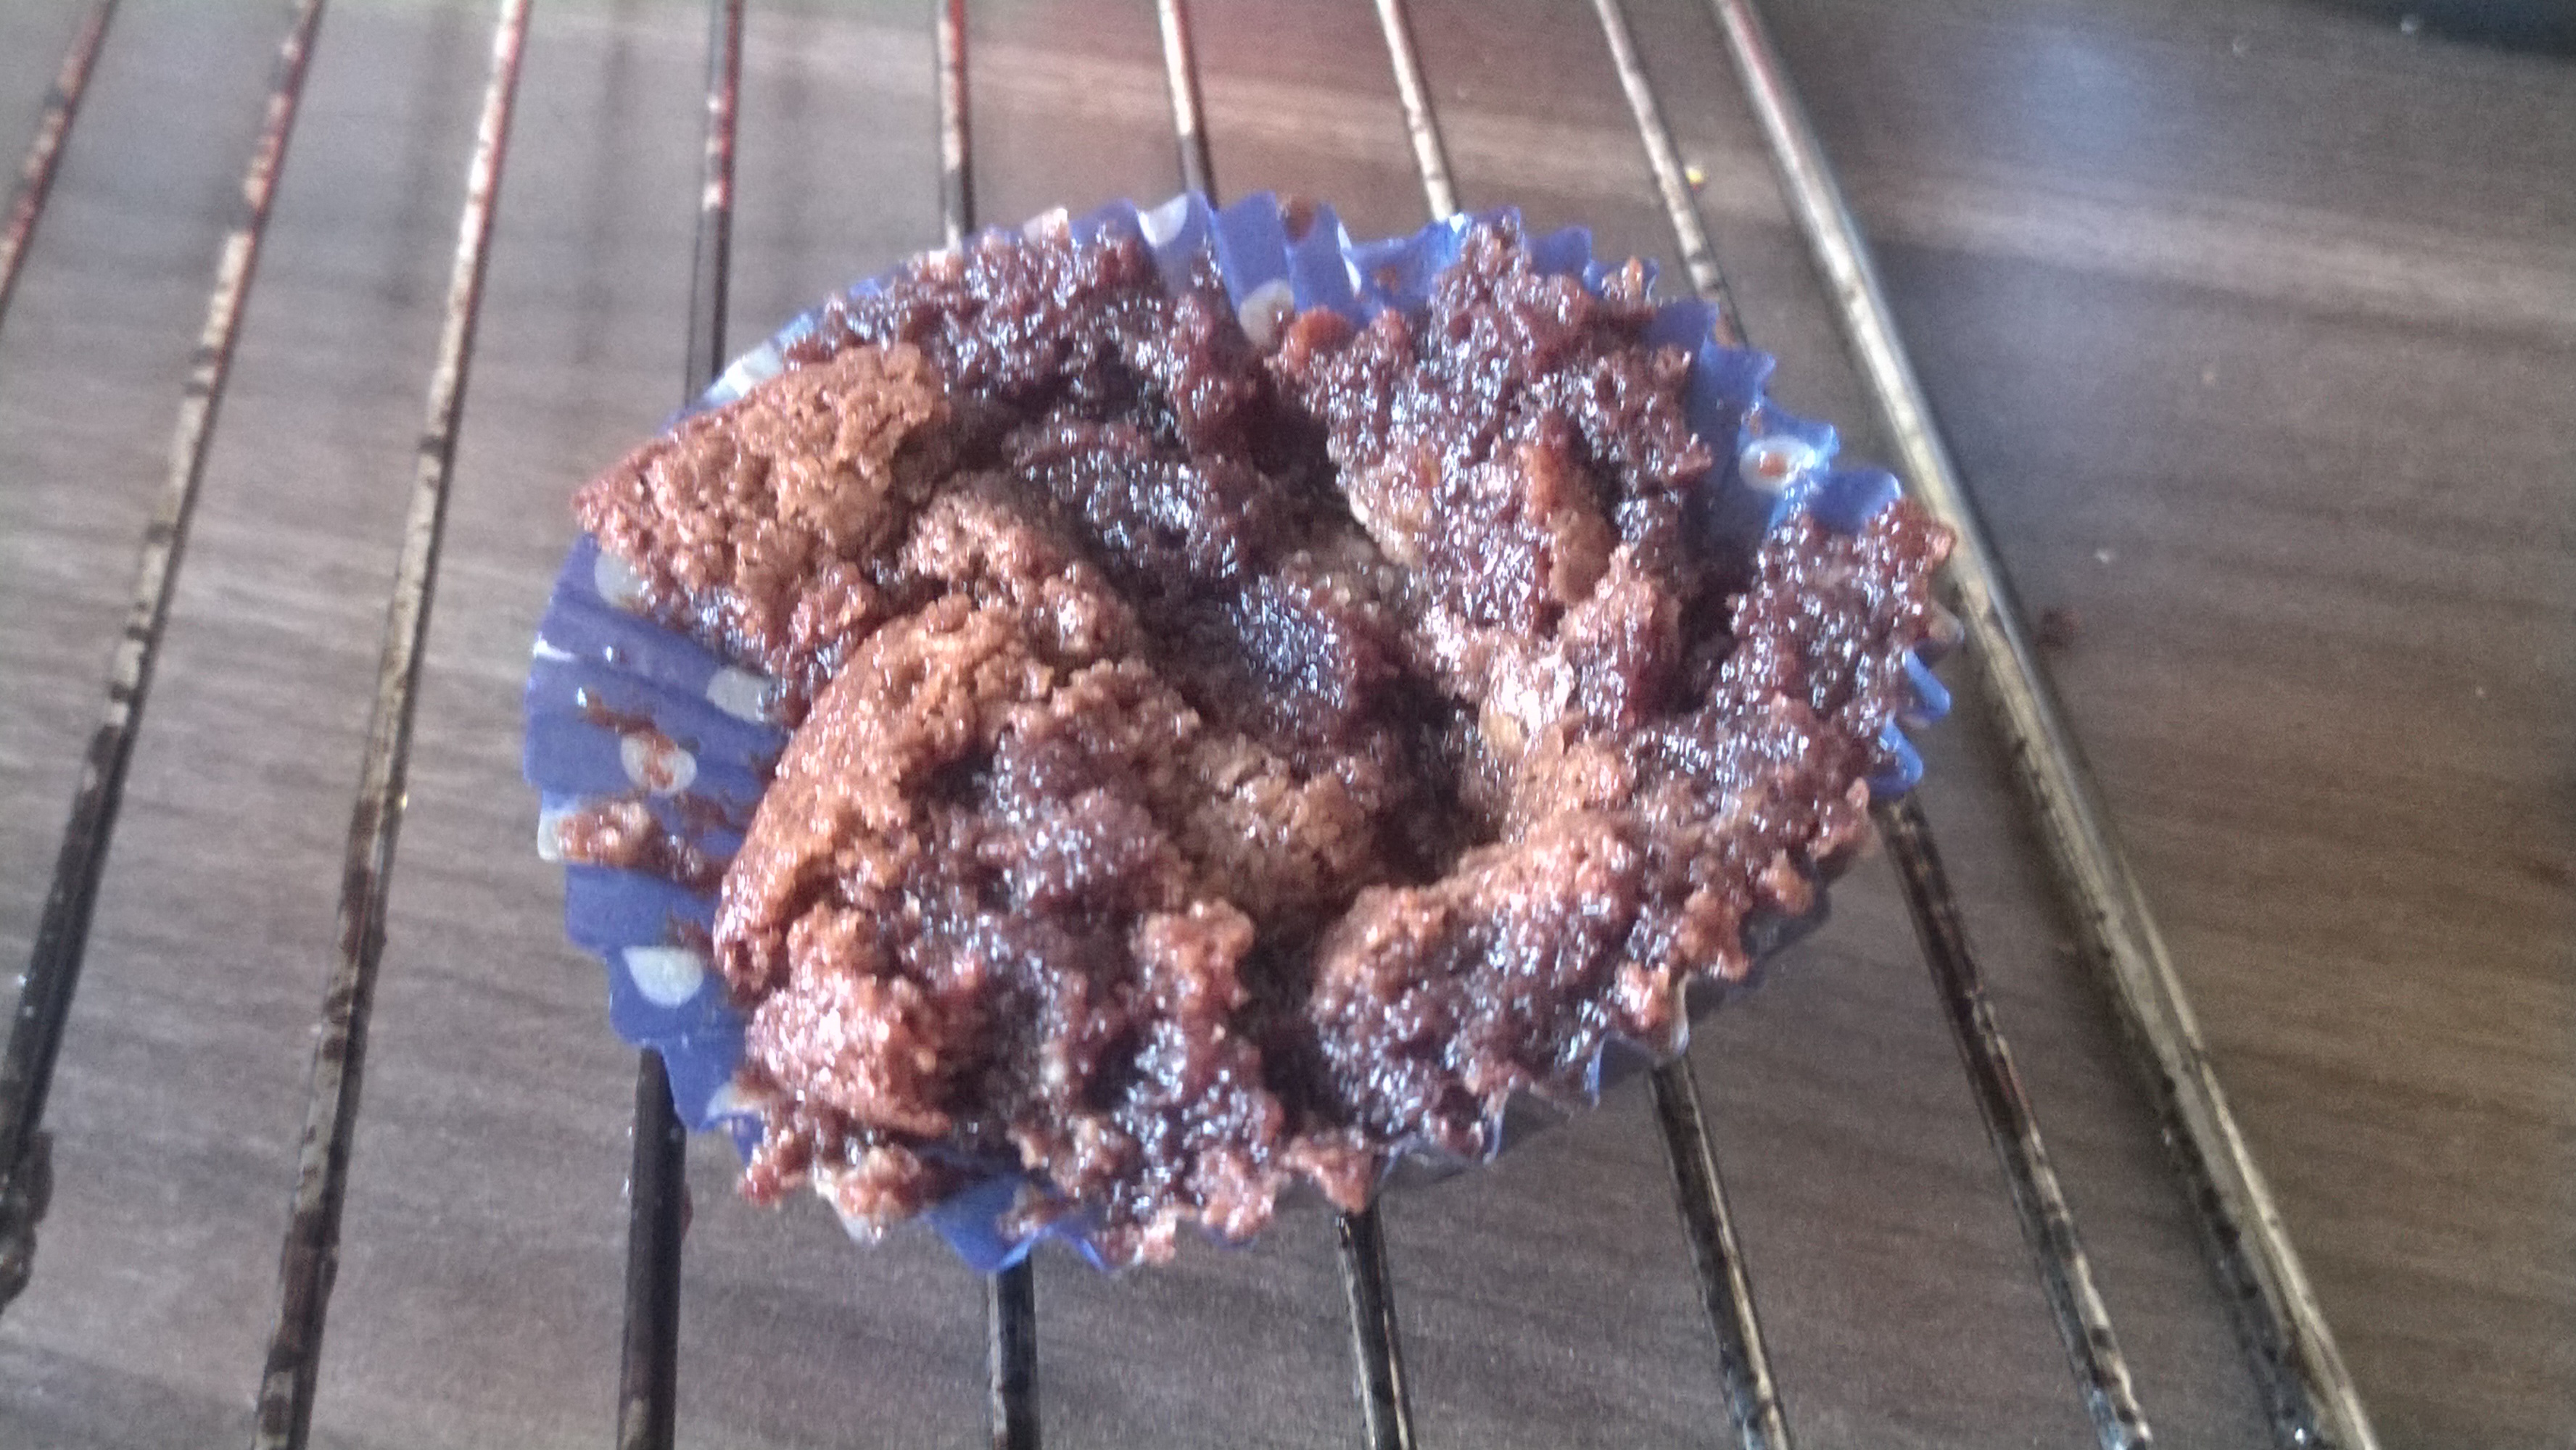
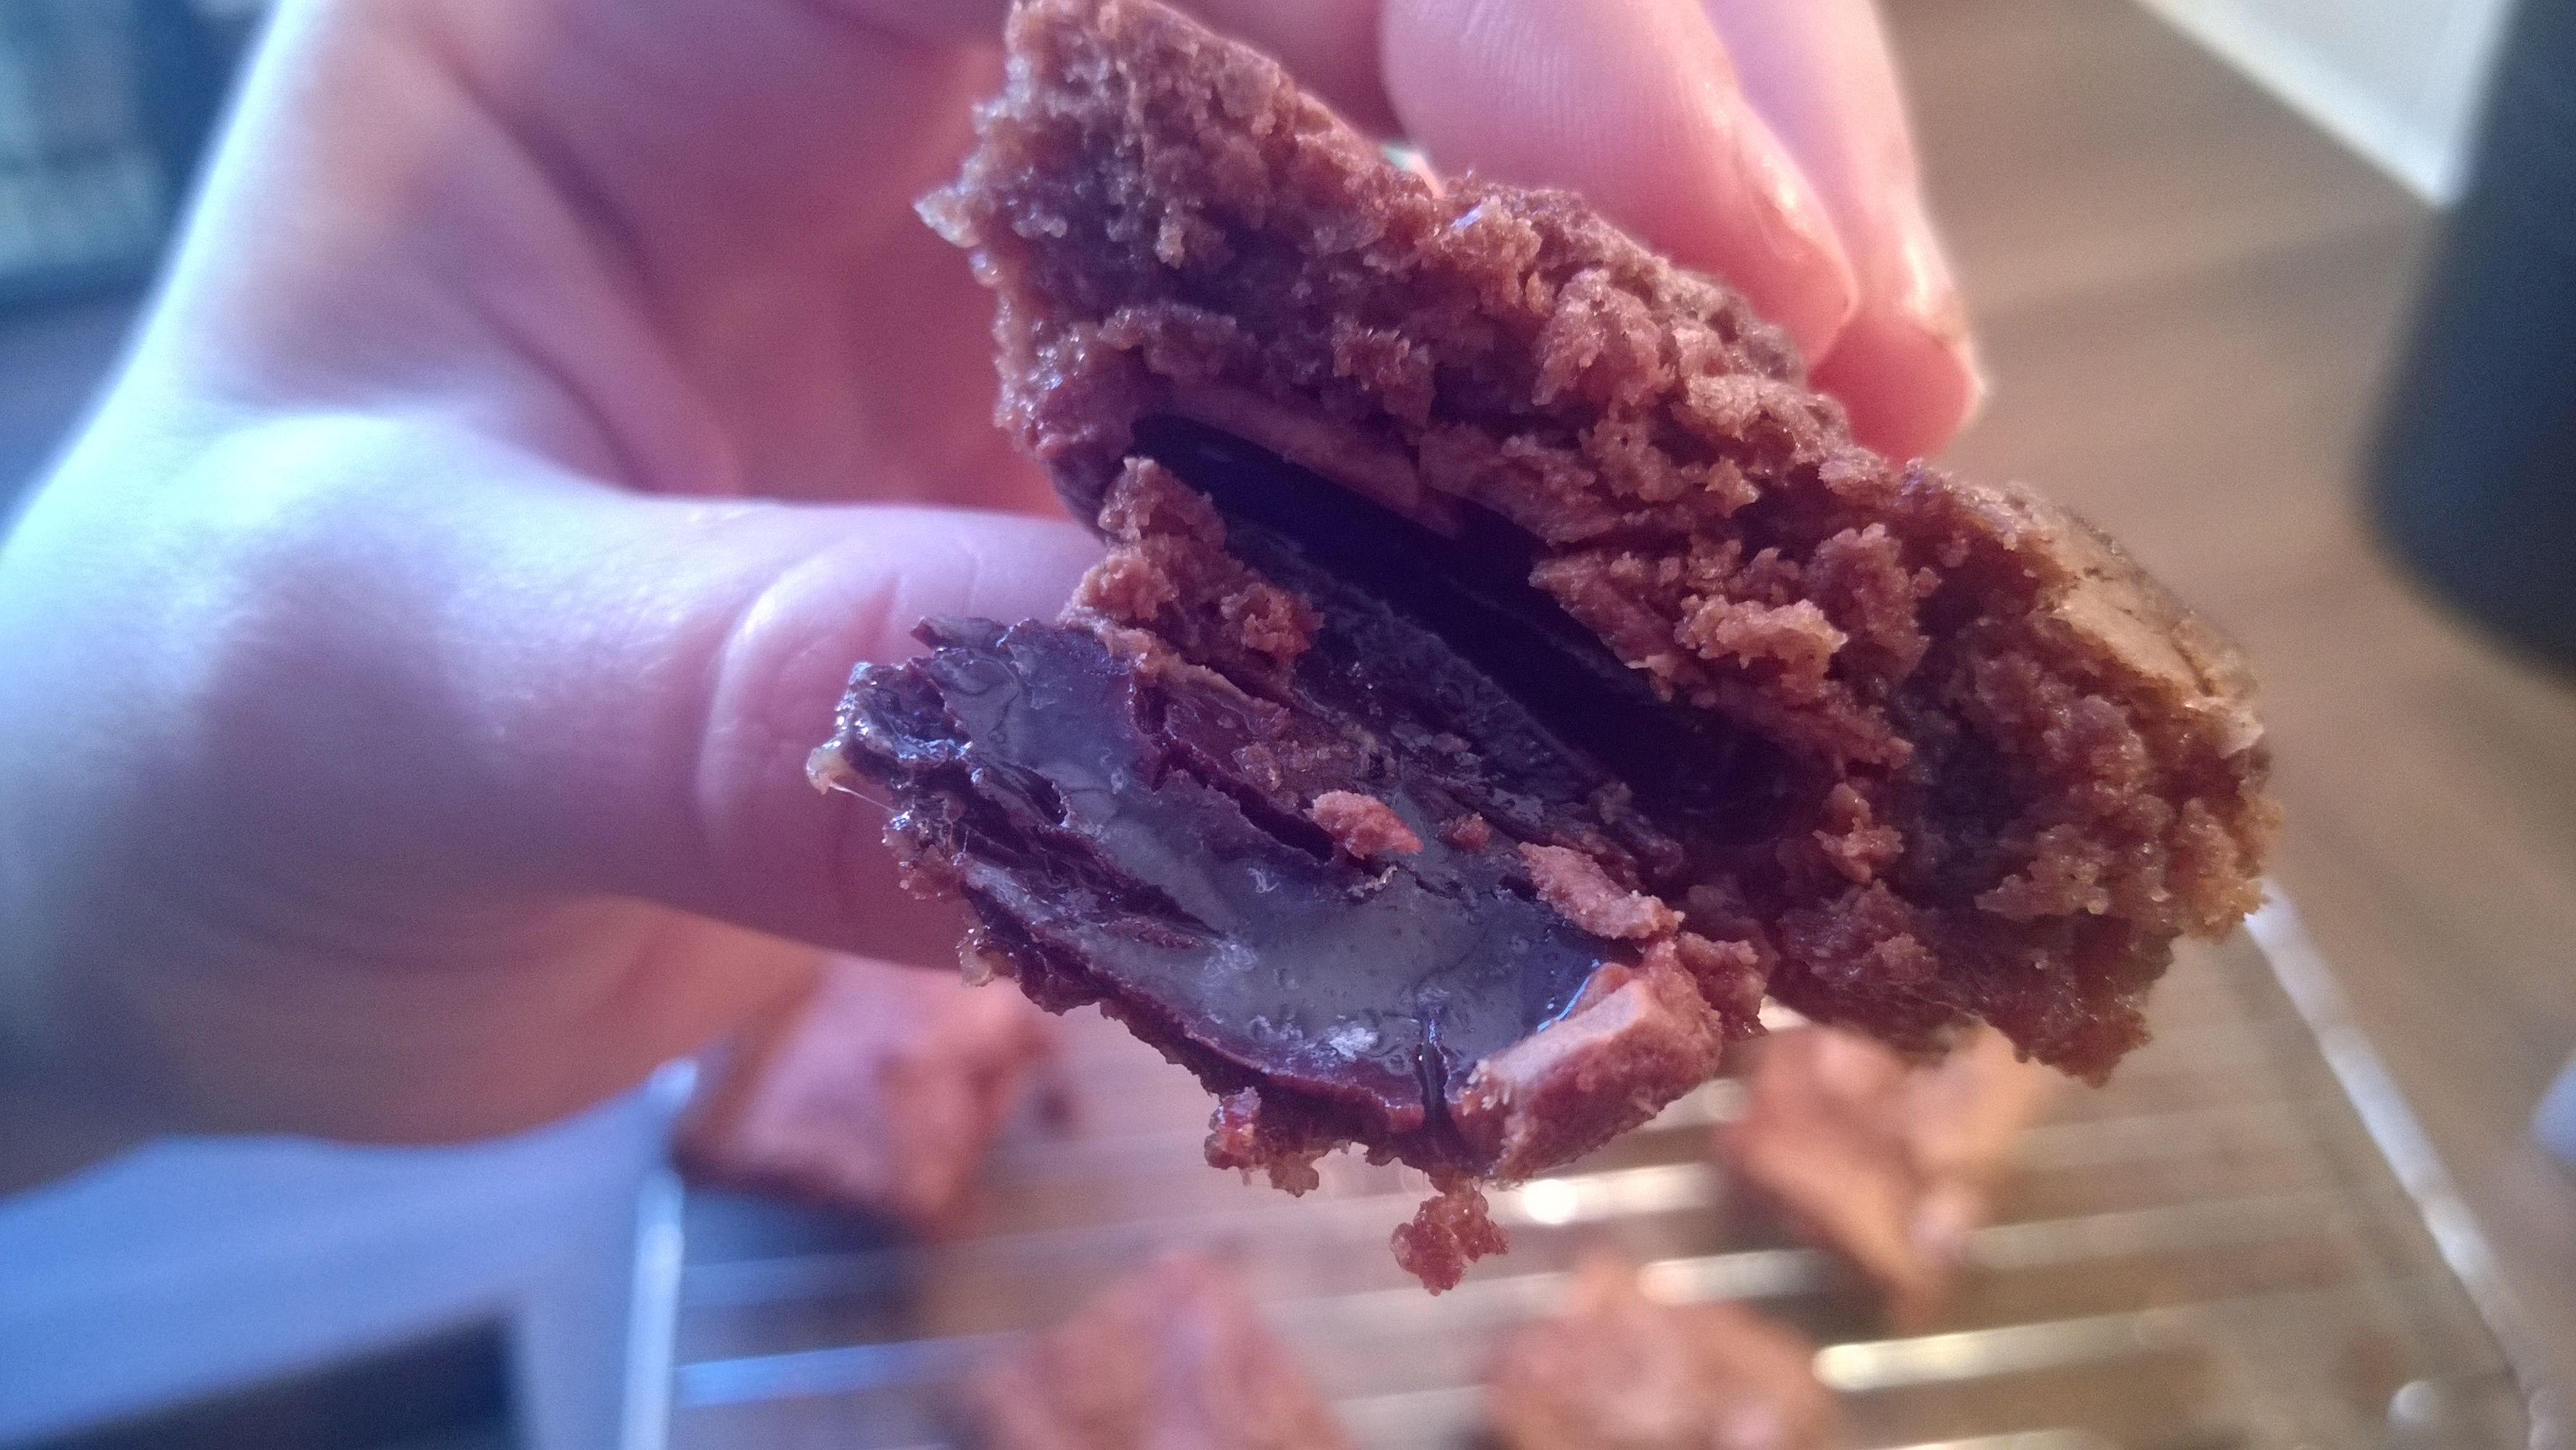
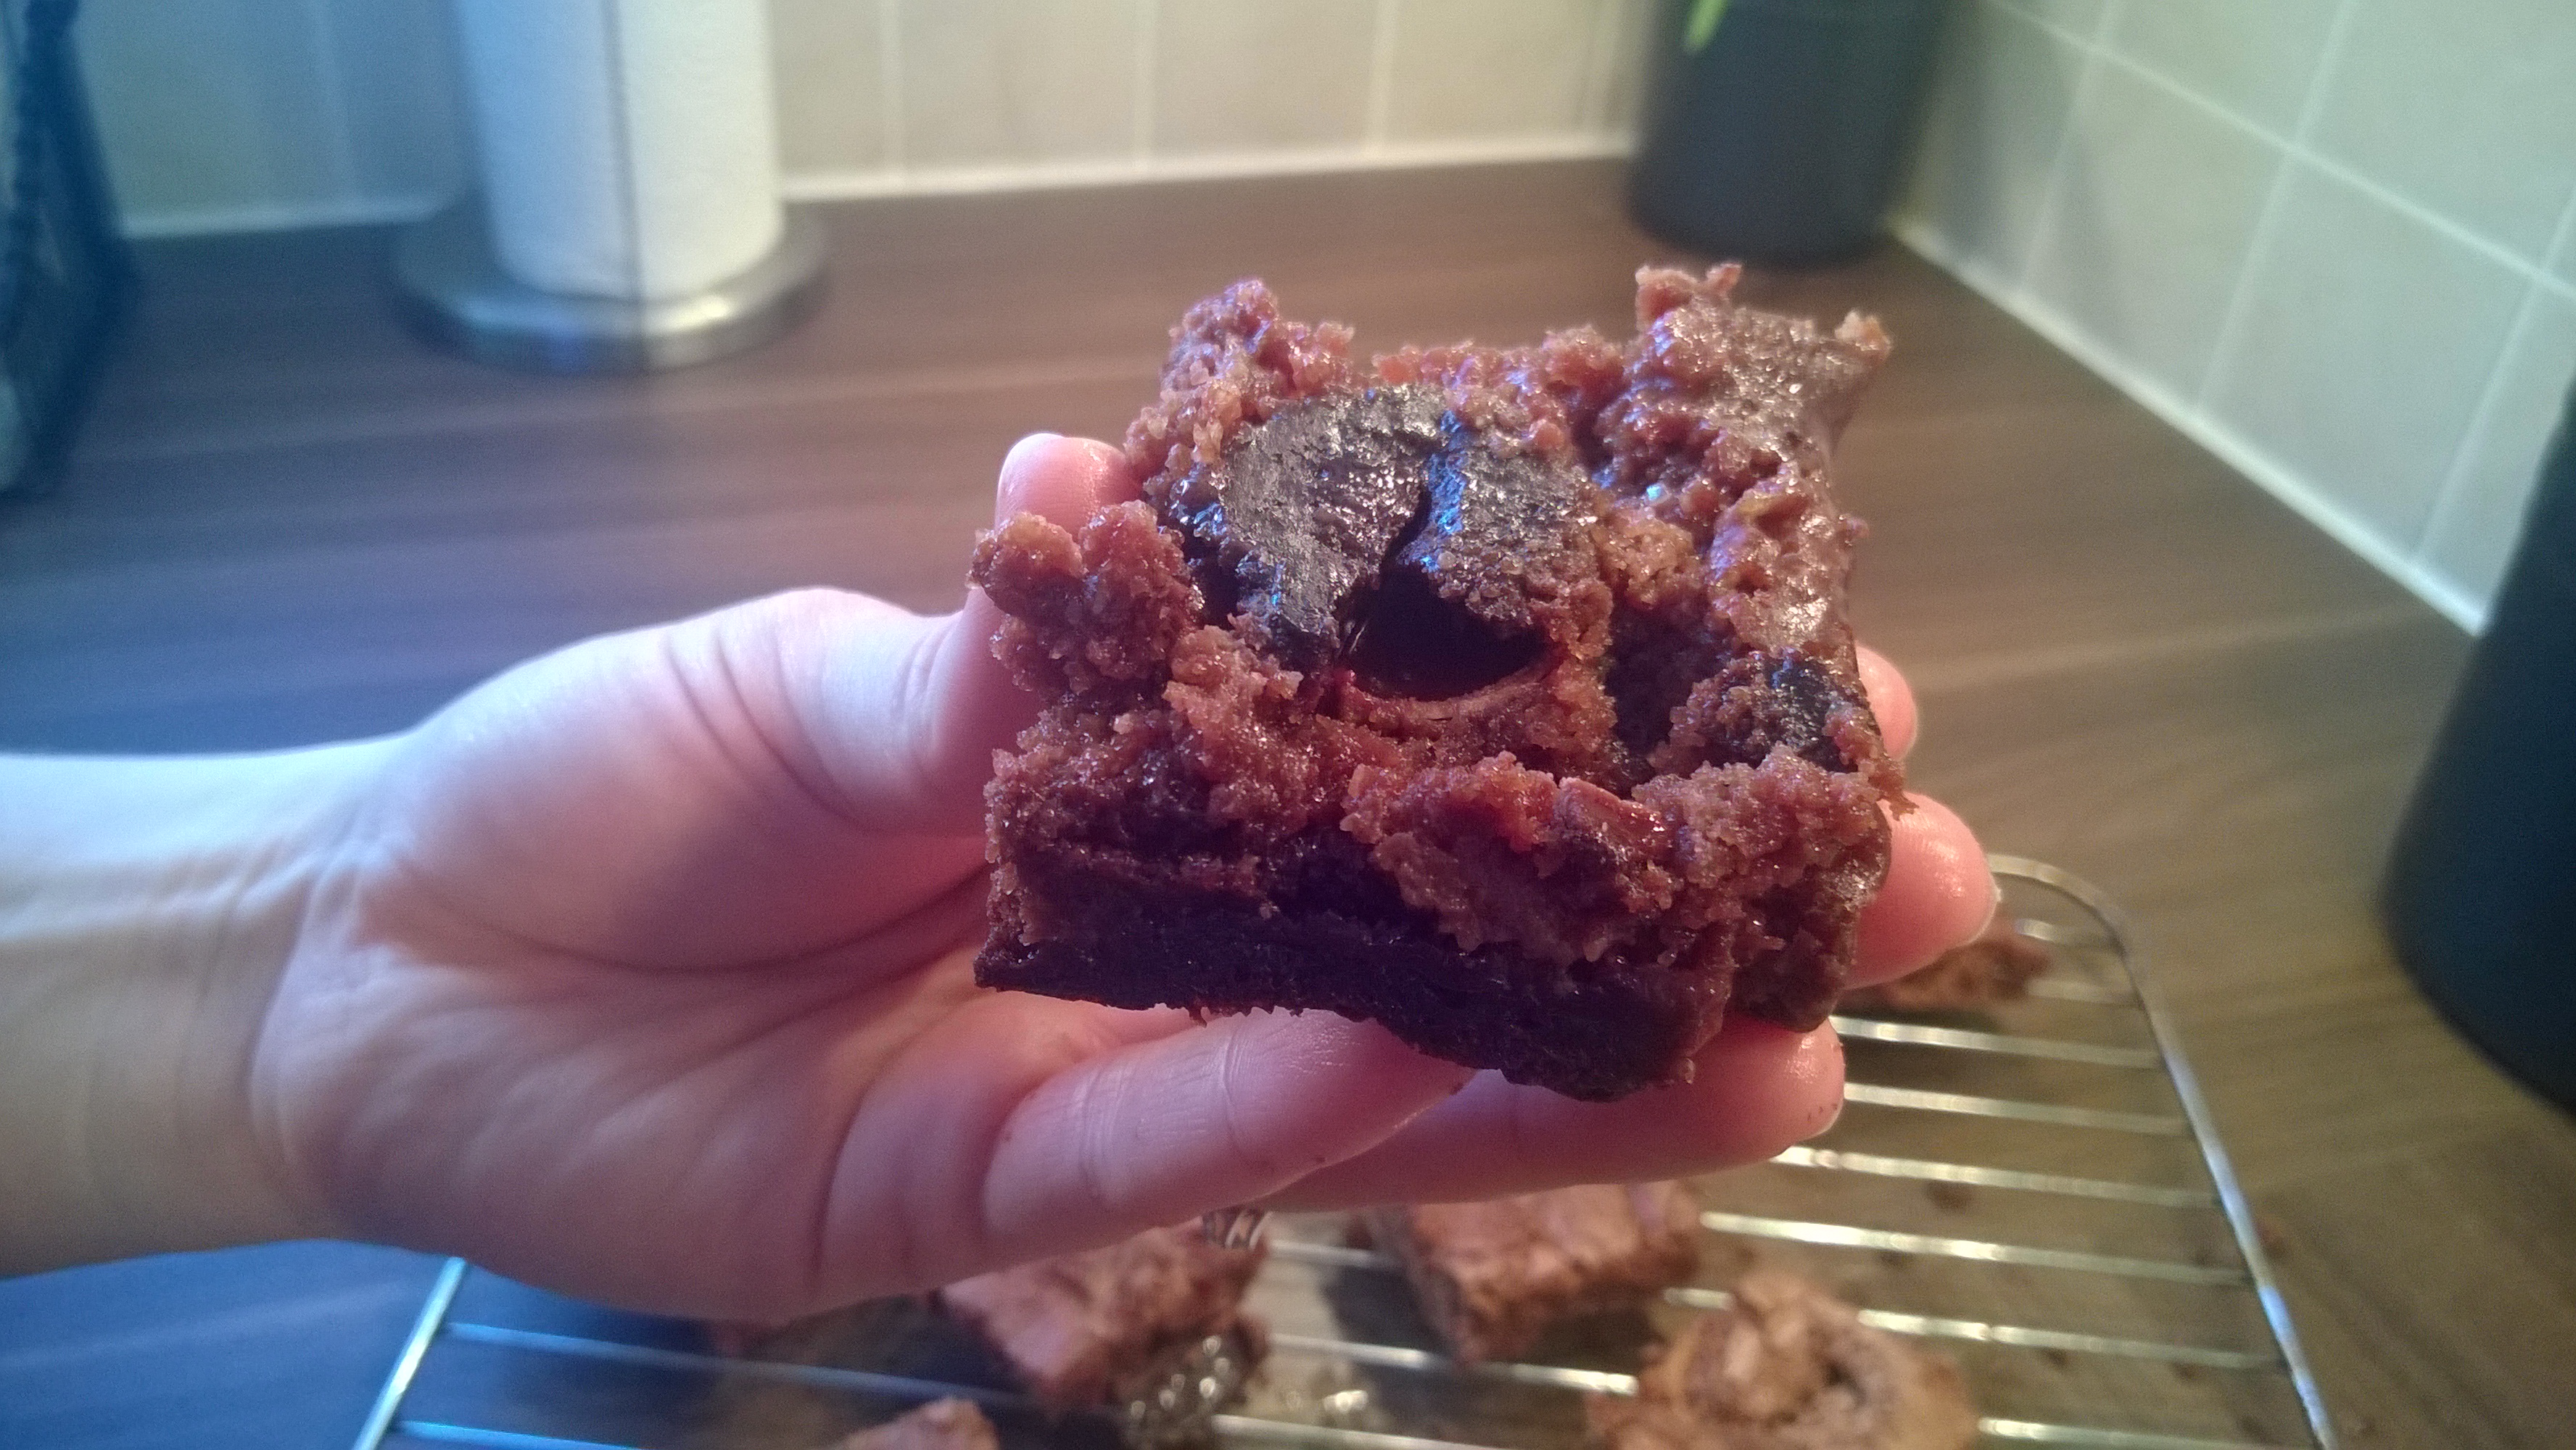
Bake for 35- 40 mins or until the topping is golden brown and the fruit is bubbling around the edges.

Plum & Blackberry Crumble

Serve with custard, or a good dollop of ice cream!

Plum & Blackberry Crumble

Family Friday

Country Kids from Coombe Mill Family Farm Holidays Cornwall

Link up your recipe of the week

Tasty Tuesdays on HonestMum.com

My Birthday Cake

Yes, I made my own birthday cake. Before I go any further I will say that my lovely hubby did offer to make it, or we could have bought one, but I said no. I wanted to make my birthday cake, and I will tell you why.

Regular readers will know that I recently went to a cake decorating masterclass with Cake Boss Buddy Valastro. At the class, I was basically just having a bit of fun and the cake I decorated was a right mess if truth be told! When we left we were given a decorating set from the Cake Boss range, and I decided that I would like to decorate my birthday cake, using the set. Partly to make use of the set, and partly to prove to myself (and the world) that I am capable of decorating a cake slightly better than the one I did at the masterclass!

We were having a birthday BBQ on the Saturday after my birthday, so on Friday, Monkey and I did a lot of baking. Or at least, I did a lot of baking while he basically ate quite a lot of butter and sugar. He was happily occupied at least!

I made a huge batch of cake mix, all following a very simple recipe. To make a fairly small batch (for 12 cupcakes or a fairly thin layer of sponge) you would follow this recipe.

4oz Self Raising Flour
1 tsp baking powder
4oz soft Marge or butter (I use Stork)
4oz Caster Sugar
2 Large eggs
2-3 drops Vanilla Extract

Preheat oven to 170°C

Put all in a bowl and whisk with electric whisk until smooth and light. (Yep it is THAT simple!)

Bake 30 mins for cake, or 25 mins for cupcakes. Should be golden and bounce back if pressed gently in the middle) 

I made 4 times that amount, made a huge cake, in two layers, and 24 cupcakes.

Then I made lots of lovely buttercream icing, using this recipe: (I made a double batch for my cake and cupcakes)

110g Unsalted Butter at room temperature
60ml Semi-skimmed milk
1 teaspoon vanilla extract
500g sifted Icing sugar

Beat the butter, milk, vanilla extract and half the icing sugar until smooth – can take several minutes with an electric hand mixer.

Gradually add the remaining icing sugar and beat until smooth and creamy.

If you want different colours – your best bet is to add gel food colouring otherwise the consistency gets a lot sloppier and harder to work with.

On Friday night I dirty iced the cake (or applied a ‘crumb coat’) ready for some fondant. Now I didn’t do quite as cake boss would recommend. I didn’t trim the cake to make it flat (I did plan to cut off the tops of the sponge, but it felt too much like a waste of cake!) and I don’t really have the smoothing tools he mentions in his book. I did pipe the icing onto the cake before spreading with a spatula though, and I have to say that was much easier. Normally i am dragging it all over the place and there is crumbs sticking to the icing everywhere, and it basically looks a bit rubbish. Piping the buttercream onto the cake, and then spreading with a spatula, worked a LOT better!

WP_20140425_17_01_12_Pro WP_20140425_17_06_24_Pro

I made some different coloured buttercream for decorating the cupcakes and used a couple of the tips we already had for piping the decorations on. It started off quite well, and I was really pleased with myself.

WP_20140425_17_29_02_Pro WP_20140425_17_30_09_Pro

Then somehow, it went wrong. I know they say a bad workman always blames his tools but honestly something went weird with the piping tips. I used exactly the same technique from moments before, but they went from looking like this…

WP_20140425_17_47_38_ProWP_20140425_17_47_48_Pro

to this…

WP_20140425_17_47_52_Pro WP_20140425_17_47_59_Pro WP_20140425_17_48_08_Pro

What? How? Oh I don’t know, but they look like I suddenly got drunk while piping, and well, as I am 3 months pregnant, I don’t think that happened. Anyway, hey ho, they will all taste the same!

I had planned on finishing the cake on the Friday night too but this had annoyed me somewhat and by now I was tired and irritable and eventually conceded the point to hubby and agreed it may be more sensible to finish icing the cake the following morning!

Feeling fresh on Saturday I set about decorating my cake. Unlike at the masterclass where I just went all guns blazing with no clear idea in my head, this time I had a vague design idea.

I started with the white fondant, which seemed to go ok, although I did make a bit of a mess on the sides of the cake.

WP_20140426_09_28_35_ProWP_20140426_09_28_25_Pro

Thankfully I planned on putting a thick band of icing round this bit, which will hide it but I managed to patch it up a little.

Then I cut some ribbons using the handy cutting tool from the set, and applied round the base of the cake (handily hiding my previous errors!).

WP_20140426_09_33_50_Pro WP_20140426_09_36_14_Pro

The set comes with lots of different shaped cutters, but I chose to just use the star shapes for my cake. So I cut out lots of stars in the different coloured fondant and applied to the cake.

WP_20140426_09_47_57_Pro WP_20140426_09_57_36_Pro

I don’t think I was very delicate with the stars as they look a little more like star fish than stars as they are all wavy, but they still look quite pretty! We’d bought some gel icing pens for writing on the cake with, so I had a little practice, and actually found them really easy to use!

WP_20140426_09_48_03_Pro

So Ouila! My Birthday Cake and cupcakes! Not perfect and my writing on the cake was a little wonky but overall I was quite pleased. I was pretty chuffed with them, and everyone said they tasted yummy, so a big success overall I think!

WP_20140426_10_00_56_Pro

WP_20140426_14_24_16_Pro

I used the Cake Boss circus kit to make my birthday cake, which retails at £25.00. I received the kit free but all words and opinions are my own.


Tasty Tuesdays on HonestMum.com

Creative Challenge
We're going on an adventure

Easter Fun 2014 – 23 Months old

Happy Easter!! Hope you have all had a lovely relaxed weekend so far and eaten lots of chocolate? No? Well there’s still time!

We’ve had lots of Easter fun so far this year!

We’ve made Easter Nests, Easter Cards and been on an Easter Hunt, and Monkey has loved every minute!

Easter Nests

There is obviously different ways of making easter nests but I like to use Shredded Wheat, as then they feel a bit more nest-y.

So we used:
1 pack of Shredded Wheat 16s
400g Belgian Milk Chocolate (we are a little in love with the Waitrose own brand Belgian Milk Chocolate at the mo – seriously, you should try it, yummy!!) We actually used a little less than this as I had scoffed some beforehand, but it would’ve been better if we had the whole bars!
Mini Eggs

Easter Nests

Basically you bash up the Shredded Wheat, Monkey helped with this, until it is really fine. I actually find using the end of a big rolling pin is the best bashing method! Lots of fun!!

Melt chocolate, we do it over the hob in a bowl over simmering water, but I hear microwaving is very easy too!

Mix, then scoop into cake cases, and add eggs.

Very simple, tasty chocolatey fun! 🙂

Easter Cards

After the success of Granny’s birthday card a couple of weeks ago, i thought we’d use a similar  method for Easter cards and involve monkey with some finger painting! The first time we tried unfortunately Monkey just mixed up the paint and we ended up with some murky brown splodges, he had fun, but not very attractive or easter themed!

We tried again at the weekend with some different colours and had much more success! Once the masterpieces had dried I cut them into egg shapes and stuck them onto some cards. Monkey finished them off with some lovely colouring! Easy peasy Easter cards!

Easter Cards

Easter Hunt

Because we would like to avoid too much of a sugar rush, we got some other bits in addition to eggs, to make this an Easter Hunt, rather than an Easter ‘Egg’ Hunt. I dotted the chicks and bunnies, signs and eggs around the front garden (the back garden still being mainly mud at the moment, with less places to hide them!) for Monkey to find. With the weather forecast for Easter Sunday a bit miserable we did the hunt on Saturday afternoon, in case it got rained off on Sunday!.

Monkey loved it, I mean it lasted about 5 minutes but he had lots of fun with all his bunnies and chicks, and putting them in his little basket. He obv loved eating the choccy eggs too!

Easter Hunt

I used to love Easter as a kid, Easter egg hunts, chocolate, but as an adult I didn’t really celebrate it much. Now we have a little man it is bringing the fun back again and I am loving all the Easter fun this year!

Have you had much fun over Easter?
Tasty Tuesdays on HonestMum.com

The Reading Residence
Mumday Monday

A Cake Decorating Masterclass with Cake Boss Buddy Valastro

Buddy Valastro, AKA Cake Boss, is an awesomely talented New Jersey Baker who has become a household name in the US, and across the world. Having watched his show a lot, I have also attempted to make his amazing Red Velvet Cake recipe in the past, and have blogged about it. This blog post led to me receiving an invite to meet the man himself! I couldn’t believe it! After much excitement I agreed and made all the arrangements to head to London for the evening.

Last Monday was The Night! I headed to L’atelier Des Chefs in London for a Masterclass in Cake Decorating and to meet the amazing Buddy. I was excited, nervous, awestruck… but you know what, I had so much fun, and he was LOVELY!

The man himself arrived!

The man himself arrived!

He was such a lovely, genuine guy and seemed genuinely happy to meet us all! There was a real mixture of people there from die-hard fans, to journalists, digital media marketing peeps and a few of us bloggers (including the lovely Lucy from Capture by Lucy, and it was great to meet her!). There may have been more variety than that even, there was quite a few people there and I didn’t get to speak to everyone!

After meeting Buddy and his UK ambassador Juliet Sear we headed in to the kitchen where Buddy gave a demonstration of some of his techniques, giving us decorating tips and showcasing his range of products which you can buy (more on that later). He was also answering a lot of questions, on a whole variety of subjects including the balance of personal/private life with filming a reality TV show – to why he does what he does. He was very lovely and genuine and took it all with real aplomb. He said that for him it is all about family – he wants people to bake as a family and show people that anyone can do it. And you know what, I believed him.

WP_20140407_18_50_52_Pro WP_20140407_18_54_45_Pro WP_20140407_19_06_23_Pro WP_20140407_19_10_33_Pro

Then it was our turn to have a go at decorating cakes. The hard bit of baking, trimming and shaping the cakes had been done in advance so all we had to do was decorate, but it was for a competition judged by Buddy! Yipes! Right off I made a mess of my fondant so he helped me sort it out and we had a lovely piccy together and a brief chat, though I was a bit awestruck to ask any serious questions not related to cake decorating – sorry everyone!

WP_20140407_19_34_15_Pro

WP_20140407_19_31_47_Pro

The lovely Lucy from Capture by Lucy

I got the fondant on the cake with the help of his handy smoother tool… (ok so it’s not THAT smooth, but better than I’ve ever managed before!)

WP_20140407_19_39_22_Pro

But then didn’t really know what to do, and instead of forming a plan, I decided to just have some fun and try out some different techniques, some of which I managed better than others!! My drop lines were not particularly effective as they kept falling off the cake. Think I need some more practice there!!

WP_20140407_19_56_40_Pro

I was having lots of fun then I looked round and realised some people were actually taking it pretty seriously…. and their cakes looked fab! Oops! So I panicked and stuck a layer of fondant over my messy creation in a last ditch attempt to make it a bit more appealing? (Not sure it worked??!)

WP_20140407_20_11_23_Pro

Then it was judging time and there was so many fab cakes to choose from (not including mine – though shhh I don’t think mine was the absolute worst – but it was down there with them!) and he chose a lovely cake with a bow decorated by Kirsten at The Little Wedding Helper.

WP_20140407_20_08_13_Pro

The evening was over and I got my pinny signed by the man himself, and a couple more snaps to remember the evening!

WP_20140407_20_07_40_Pro WP_20140407_20_19_59_Pro

As we were leaving we got an awesome goody bag with a Cake Boss DVD, Baking Tips book, a Cake decorating kit, a book by his UK ambassador Juliet Sear and some fondant icing! Great stuff!

WP_20140410_17_03_26_Pro

Some of his products were fab, I am very excited to try out the kit we got as a freebie and have popped a couple of others onto my birthday wishlist! 🙂

If you would like to buy any of the Cake Boss range I am sure there are a lot of places you can buy them but I have found them on Very.co.uk

If you would like to see Buddy in action you can catch him on TLC as follows:

The current series of Bakery Boss is on Fridays at 9pm right now

Cake Boss is on Fridays at 9pm from June

Next Great Baker is on Fridays at 9pm from September

Tasty Tuesdays on HonestMum.com

Mother.Wife.Me

I’ve been invited to meet Buddy Valastro!

If you are wondering “Who is Buddy Valastro?” He is an oh so cool New Jersey Baker who is the star of a very popular show, “Cake Boss” on TLC. He is famous for making some seriously incredible cakes. Cakes that are the size of cars. Cakes that are so intricate and detailed that they look like works of art. He is basically incredible, and very funny. He also has two other shows – “Next Great Baker” a competition show to find the next great baker,which is a lot of fun, and “Bakery Boss” which I have to admit I haven’t seen yet but looks to be a little like Ramsey’s Kitchen Nightmares…. but in Bakeries, which sounds like it would be very good fun!

And I have been invited to meet him! Moi? Little old me? I have blogged about his amazing Red Velvet Cake recipe before (which is incredible) and somehow, that blog post has led to an invite to a press event! Me and approx. 14 journalists are attending an exclusive cake decorating Masterclass in London. I can’t believe my luck! My initial response to the invite was a LOT of nervous giggling and it took me a few hours to get my head around it! Heck I’m not sure I do have my head around it! But I am definitely excited!!

My version of Buddy's Red Velvet Cake

My version of Buddy’s Red Velvet Cake

Hubby was very excited for me and is happy to look after Monkey while I trot off to London for the evening where I will be attending L’atelier des Chefs for said Masterclass and ‘chat’ with Buddy Valastro!  They are even going to pay for my train ticket to London! I’m dead excited (have I mentioned that?) but also really nervous! I love baking and I love his cakes, but he and his staff are INCREDIBLE and create some serious masterpieces. Have a look here for some of their recent cakes.

After a bit of trial and error I have managed to succeed in baking his Red Velvet Cake but this is a cake decorating masterclass, and, well, look at Monkey’s 1st Birthday Cake! Decorator Extraodinaire I most certainly am not! So the masterclass will be great and hopefully I will pick up some tips, but I also hope I don’t completely embarrass myself either!

Decorator Extraordinaire? Ummm .... No

Decorator Extraordinaire? Ummm …. No

Not to mention the fact that the other attendees are journalists, I am just a mummy blogger who likes baking, I have a feeling I will feel ever so slightly like a fish out of water! I will have to put a lot of effort into faking some confidence I think! I just can’t believe that I have been picked to attend a press event with a celebrity. Little old blogging me! Crazy, but awesome 🙂

I am hopefully going to get a chance to chat with Buddy (eek!) so I need to come up with some questions for him. Are any of you fans of Buddy or Cake Boss? Any burning questions you’d love to ask him? I can’t promise I’ll be able to get answers to any of them but I will give it a good try!

To see Buddy for yourself you catch him on TLC as follows

The current series of Bakery Boss is on every Friday at 9pm 

Cake Boss is on Fridays at 9pm from June

Next Great Baker is on Fridays at 9pm from September


Mother.Wife.Me

Tasty Tuesdays on HonestMum.com

SuperBusyMum

Mini Creme Egg Brownies – Success at Last!

I may have mentioned once or twice the challenges I have faced with making chocolate brownies with mini creme eggs. I have seen recipes for them with a big creme egg halved and sat on top of the brownie, and my friend even has a recipe for those that works. Apparently though that is too easy for me.

Is this possible??

For ages I have been seeing pictures of gorgeous brownies where they have cut through a mini creme egg and the fondant is there giving this lovely image. Here’s a picture I found on google.

NOTE: THIS IS NOT COOKED OR TAKEN BY ME 🙂

I have now tried 4 times to get  a result similar to this. I winged it first, then I followed a couple of different recipes. No matter what happened though, even when the brownie itself was sill raw, the fondant melted and all we were left with was empty shells! I was starting to think that it is actually impossible and that the images were somehow faked (I’m sure they aren’t, this was just the depth of my despair with my baking).

And then, finally, we have something resembling success.

It’s still a bit hit and miss, there are some empty shells, some nearly empty shells, but (hooray) there are some with fondant in! Wahooo!!

WP_20140309_12_25_35_Pro WP_20140309_12_28_57_Pro WP_20140309_12_27_04_Pro

So here is my recipe for some, not so perfect, but ever so tasty Mini Creme Egg Brownies. Before I go any further, step 1 – the trick, it would seem, is to put your mini creme eggs IN THE FREEZER. Ours have been in the freezer for a couple of days. I have tried them in the fridge and at room temperature, and personally, only way I have got them to remotely work, was by freezing them first!

WP_20140309_10_55_09_Pro

I’m melting…

Ingredients
2oz Plain Chocolate (I use Bournville)
4oz Milk Chocolate
2 x 89g Bags Mini Creme Eggs – FROZEN
8oz Caster Sugar
2 large eggs
4oz Butter
2oz Plain Flour
1 tsp Baking Powder
1/4 tsp Salt

Preheat the oven to 180°C

Line the base of a well greased oblong tin  with greaseproof paper, allowing the paper to come up 2 inches above the rim of the tin.

Melt the butter and chocolate together in a heatproof bowl over simmering water on a low heat.

Meanwhile, whisk the eggs and sugar together until light and fluffy.

WP_20140309_10_57_59_Pro

Once the chocolate and butter have melted, add to the egg/sugar and mix.

Add the flour, salt and baking powder, and mix gently but thoroughly.

Spread the mixture evenly in the tin. Bake for 15 minutes.

WP_20140309_11_04_26_Pro

While the brownie is in the oven, take the mini creme eggs out of the freezer and unwrap (they are actually easier to unwrap when cold I find). Monkey had been ‘helping’ me bake and at this point I realised, he was COVERED in chocolate!

WP_20140309_11_12_50_Pro WP_20140309_11_17_27_Pro

After 15 minutes is up, take the brownie out of the oven and quickly place the eggs into the brownie, evenly, or hodge podge, depending on what you prefer!

Bake for a further 13 minutes. Check the brownie is cooked by inserting a sharp knife or cocktail stick into the brownie, if it comes out clear then it is cooked! Times can vary according to ovens so it is worth checking!!

WP_20140309_11_32_31_Pro

Leave in the tin for 10 minutes to cool, then I left it to cool on a cooling tray for a little longer and then popped the whole thing in the fridge for a bit. Not sure if that helped set the fondant again but who knows!

When it has thoroughly cooled cut and see whether the fondant has evaporated! Hopefully yours will be better than mine. One of the problems with the whole slicing into the egg is that actually the top of the egg caves in when you slice through it as it is quite brittle once it has been melted. So I really don’t know how the other recipes I have seen have managed to have these whole eggs sliced perfectly with the fondant in the exact condition as it would have been….. but then, I am no master baker!!

Give these a try though, they are very very yummy even if they aren’t 100% how I wanted them to turn out!!

WP_20140309_12_30_49_Pro

I’m always on the lookout for improvements, so may try and do them in a slightly smaller tin next time, so they are deeper… and may change the timings slightly so the creme eggs are literally int here for 10 mins. I am happy with these taste wise though and I’m not really sure I have the energy to try them again for a while, so I thought I would share the recipe with you now 🙂

Have you tried Creme Egg Brownies yet?

Link up your recipe of the week

Tasty Tuesdays on HonestMum.com

Yummy Turkey Bolognese Recipe

This is one of our favourite family meals, as it is delicious and so simple. It started at life as one of Annabel Karmel’s recipes (as regular readers will know, I love her) which we have adapted to make enough for the whole family, and we use Turkey whereas she uses chicken in her version. It’s great to get a bit of hidden veggie goodness into picky eaters too

WP_20140227_18_04_35_Pro

Ingredients
1 tbsp Olive Oil
1 Onion, peeled and finely chopped
2 Carrots, peeled and grated
1 large Garlic Clove, peeled and crushed
500g Turkey Mince (we use thigh mince)
1/2 tsp dried thyme
600ml Passata (sieved tomatoes)
300ml Pure Apple Juice
2 tbsp Tomato Puree
Lots of Worcester Sauce (I think about 3 tbsps but I don’t really measure it!)
1 tbsp Italian mixed herbs
2 tsps sugar

To Serve
Pasta. We use wholewheat as it goes nicely but normal pasta is lovely too. We tend to use weight watchers portion sizes so have about 50g of dried pasta per person, it’s not a lot though so make as much as you would normally use for your family. There is plenty of mince in the recipe, we tend to get 4 adult portions plus two kiddy portions from the bolognese, and they’re quite generous.

Method
1 – Heat the oil in a fairly large saucepan and gently fry the onion and carrot over a low-medium heat, stirring often, for 3 minutes or until soft.

2 – Add the garlic and fry for another 30 seconds

3 – Add the turkey and fry, stirring frequently until cooked.

Boil and reduce the sauce

Boil and reduce the sauce

4 – Add the thyme, passata and apple juice, bring to the boil.

5 – Stir in the tomato puree, worcestershire sauce, sugar and italian mixed herbs.

6. Bring to the boil, reduce slightly but then leave to boil and reduce for 15 minutes (stirring occasionally).

7. Meanwhile cook the pasta according to packet instructions.

8. Taste test the sauce, adding more worcestershire sauce if needed.

Serve/ You can either mix the sauce and pasta together, or serve separate, whatever your preference.

Including the prep time I find it takes 40-45 mins to make but a big chunk of that time is just on the hob.

So simple and tasty, and being Turkey it is a really healthy, low calorie meal too, packed full of flavour. Why not give it a go?

Link up your recipe of the week

Tasty Tuesdays on HonestMum.com

Word of the Week? Trying

The word that best sums up this week is


trying

I think this word is perfect for this week as there is more than one meaning.

Starting with the positives, I have been trying out new things this week, starting with my website redesign and then my new linky the Creative Challenge which went live on Wednesday (and is still open if anyone has been creative this week and fancies joining in?)

Monkey has also been trying more with his speech, yep at 21 months we have no words, I know it’s within the normal range but I really want him to talk. And he’s getting closer, I really believe it. I say something and sometimes he tries to say it back. Onion = Oeeeaaa, Garlic = Garya, Zip =Zzzzz. Just a few examples and I know he’s not there yet, but he is trying, which means the world to me.

On to the not so positive side…

I’ve also been trying to find the perfect recipe to make creme egg brownies. This has been a very trying experience as I keep failing! Seriously, how hard can it be? First off I tried to wing it, big mistake, you can read more about that here if you like. The next time though, I followed a recipe and if anything, they turned out worse and we actually threw most of them away!

WP_20140225_13_48_14_Pro WP_20140225_13_49_13_Pro

Not only did they look appalling but they didn’t taste good either, really greasy, there was just way too much butter in them. Such a  waste of good chocolate, butter, sugar etc.  The worst of it was that I attempted to bake these as a way of cheering me and Monkey up on a very trying day where we were both grumpy. Eating all the chocolate and butter and sugar definitely cheered him up, but it certainly did not improve my mood that day!!

WP_20140225_13_18_21_Pro

It’s my own fault as I wanted to be clever and have mini creme eggs that were within the brownie mixture, rather than full size creme eggs that are kind of sat on top of the brownie. I don’t like to be beaten though so I will be trying again soon. Hopefully I will get it right one day!!

Another trying experience this week was our attempt to cut Monkey’s hair. This is not a fun experience, in fact it is downright stressful. He hates it and cries and squirms and shakes his head about so it’s basically impossible for it to end up looking ok. I know we could take him to the hairdressers, but honestly if we can’t get him to sit still long enough (even with the help of daddy, his fave tv shows, scrummy treats to eat) how the heck would we do it at the hairdressers?

Anyway, this is as good as we could get it.

WP_20140222_17_50_34_Pro

It looks ridiculous! And I managed to scrape the side of his face with the scissors 🙁 scare me so much!

So yes this week has been partly about trying new things, but it has also been very trying!

What word sums up your week?

The Reading Residence

Follow my blog with Bloglovin

All about Cake – from a Novice Baker! #TheThemeGame

The Theme for The Theme Game this week is Cake! This has got to be my favourite theme so far, by miles!

Photo_E9938D0D-F5AC-397A-AE44-D77A1C27FF7E

Early days of baking

As you may have seen on my blog before I do enjoy a bit of baking since I have become a SAHM, but this wasn’t always the case, and I rarely get it right first time! I had never even baked a cake before I met my hubby 31/2 years ago! I love cooking and am quite slapdash whereas there is a science to baking which scared me, and I still don’t understand. You can’t just throw in a bit of this or that like you do with cooking as it can make it go horribly wrong!

I am definitely a recipe follower rather than  a recipe writer but even then I can get it massively wrong!  Hubby is a much better baker than I am and he taught me the basics.The first time we baked together, it didn’t go very well as what I thought was a tub of sugar turned out to be salt, so we had a very salty cake batter! Thankfully we tasted it before we cooked it so we could start again and we ended up with quite a nice cake in the end.

Caroline and Nic-16 July 2011-Colour-63

I got bitten by the baking bug after that and have spent the last couple of years trying things out. We spent a lot of time baking in the run up to our wedding as we didn’t have a traditional cake. We asked our mums to bake our favourite cakes and then we made (with the help of one of our lovely friends) lots of cupcakes and the top tier. It was all very bright coloured and imperfect but we loved it. There was so much cake!

I’ve enjoyed expanding my repertoire and trying out new things and I’ve definitely learnt that if it goes wrong the first time, learn from it and try try again! As you can see with our fave Chocolate Cake recipe and the Red Velvet cake, it’s taken more than one go to perfect the method. Other times, like with the Angel Food Cake, I fluke it and it goes well first time!

WP_20140216_09_07_11_Pro

Doing it wrong! D’oh!

Today is a great example of where I was over-confident and then messed it up royally! I decided to make some Cadburys Creme Egg Brownies. I’ve found some great recipes online – but I decided, in all my wisdom, that instead of following one of these tried and tested recipes, I would wing it a bit and use our existing fudge brownie recipe and then just chuck in some creme eggs. It didn’t get off to the best start when I didn’t even follow that recipe correctly! I was supposed to melt the butter and chocolate together, but I just melted the choc and then had to fish the butter out of all the flour etc and then melt it. Definitely an oops moment!

Then, well it just didn’t work! The creme eggs melted completely so that the gooey centre just infused the whole brownie. It was still very tasty but pretty chewy and you got these lovely egg shells randomly throughout. Not what I intended but hey ho, I’ll know better next time. Note that I am all mellow and calm about this – well I’m sure hubby would testify to my stomping around the kitchen grumbling and berating myself for being so stupid. I can be quite hard on myself sometimes in the moment but usually get more rational when I’ve calmed down a bit!

WP_20140216_10_04_32_Pro WP_20140216_10_05_09_Pro

So, if you think that you can’t bake as you’re hopeless in the kitchen, you really should give it a go because if I can do it then anyone can!

Here’s a very simple recipe to get you started, but even if it doesn’t g0 too well, never mind, try, try again and think about all the cake you get to eat while you try and perfect it. (I actually have to limit my baking these days or I will put all the weight I have lost back on!)

4oz Self Raising Flour
1 tsp Baking Powder
4oz Soft Margarine (we use Stork)
4oz Caster Sugar
2 Large Eggs
2-3 drops Vanilla Essence

Preheat the oven to Gas 3 or 170C

Put all the ingredients in a bowl and whisk with an electric whisk until light and creamy.

You can either use this to make fairy cakes or a sponge cake. Bake for 25-30 minutes (depending on your oven). It should be golden and if you press gently in the middle of the cake it should bounce back.

Oila!

Do you bake? Or do you prefer eating cakes? Have you had as many baking fails as me?

Tasty Tuesdays on HonestMum.com

The Reading Residence

Monkey Ate Pasta!!!! (and how we made mealtimes happier)

I’m sure the title of this blog left a few puzzled looks in it’s wake. It sounds daft right? Why on earth is this loony excited that her son ate pasta? If you have read about any of our, erm, challenges with Monkey’s Fussy Eating over the past 7 months then you may have an idea why this statement makes me so ridiculously happy that I ran around upstairs waving my arms in the air with glee after dinner. If not then I will explain.

At 13 months old Monkey went from a Pasta-lover to a Pasta-phobe. It wasn’t just pasta – almost overnight loads of his favourite meals slipped out of favour. When you served them up, the look on his face was like you had scraped s**t of your shoe and put it in front of him. I actually think he would have been more interested in that than some of his previously favourite meals. It made me so miserable when I would try and make something he would like and he would just pick at it or put it in his mouth then spit it out, or just sit there screaming and wailing and refusing to eat.

WP_20130924_10_07_18_ev2_Pro

Cue months of googling and desperation. Months of mealtime battles verging on force feeding. Months of misery. How did my baby who ate a more varied diet than me, who ate nearly everything put in front of him, suddenly stop liking so much food? We’ve had ups and downs, it hasn’t all been quite that hideous but you get the idea. I know that I am not the only parent faced with this nightmare at mealtimes and thankfully I found lots of support on-line and with friends and family.

WP_20130317_029 WP_001227

Before the days of fussy eating – eating everything!!  

We tried lots of things but we weren’t always 100% committed to it if I’m honest. We were subconsciously pandering to him by giving him food that he likes rather than face a battle, but that backfired as he soon stopped eating some of the meals that we were previously so sure he would. I was giving him too much at snack time because I didn’t think he would eat dinner anyway – can we say self-fulfilling prophecy? So hubby and I had a serious chat about it and decided enough was enough and have gone down a hard line and followed the following advice.

How we made mealtimes happier with our fussy eater:

Cook one meal for all the family. It feels cruel (and depressing) making a meal that you’re pretty sure they won’t eat – but you have to give them a chance and as I said giving him foods I thought he would eat didn’t always work either. Do not offer an alternative if they won’t eat it and do not give any pudding. This terrified me at first but honestly he has gone to bed without any tea a number of times and  slept through the night absolutely fine.

No food until the next meal/snack time. I guess older kids it may be mealtime but because of his age we felt too cruel saying nothing til 6pm if he doesn’t eat lunch at 12 (cruel for me having to cope with the misery that would entail anyway). A couple of times we have re-offered the missed meal again within say 1/2 hour of the meal but that’s it, and snack time is a good few hours after lunch anyway as it’s after his nap.

We have cut down his snack sizes, we made sure that there was always a big enough gap between a snack and a meal – to make sure he is hungry enough at mealtimes. He never drinks sugary drinks anyway and we have cut down the milk he was drinking before mealtimes, and increased dairy at other times.

No reaction whatsoever whether he eats or not. We initially were praising him when he ate well but then I read that that can put pressure on them so we stopped and it has made a HUGE difference. We praise him for using his fork and spoon well and we just keep saying how yummy our food is, and we talk about a lot of other things, but NOT about whether he is eating his food or not. If he doesn’t want to eat it he gets down but we stay to eat and he gets nothing else and no reaction. 

When he is finished he is finished. He doesn’t have to clear his plate. All part of ‘no pressure’. If he has tried everything and eaten pretty well then we offer him pudding – some fruit or something usually but occasionally a treat if we have one.

Get him involved with food preparation. You can read a bit more about this here – initially it terrified me, and still does in some ways – but all the time spent in the kitchen definitely makes him more interested in food and more likely to try it. In fact he would like to be in the kitchen all the time now because he associates it with yummy food!

The main rule -DON’T GET STRESSED! Nope, don’t.  Just don’t! Even when he is crying, or playing with his food or picking at it and pulling a disgusted face. No stress. Deep breaths. Actually we found playing with food is a good sign – touching it at all is a step in the right direction and one step closer to the food going in his mouth. Some things even go in and out of his mouth a few times before he finally goes mmmm, yum, yum and scoffs the rest. Sometimes he gets down and then comes back again. We just leave him to it and I figure we will worry more about manners once the good eating has solidified!

It hasn’t been plain sailing by any means – there have been very difficult days and even whole difficult weeks where he has been surviving on 2 meals a day (breakfast + either lunch or dinner) every day, resulting in a grumpy little monkey. BUT – the light at the end of the tunnel is that his eating has improved SO MUCH!

He eats baked beans again – which he had started to refuse. He eats tomato sauces again which he had refused for months. He eats sweet potato which he had gone off recently. He LOVES soups – all flavours and colours. He loves his Veggie Burgers again. He loves having a fruit pot for pudding. And the biggy – he ate a whole meal of pasta and he LOVED it!

I’ve been thinking about a post like this for a while but there was one thing holding me back. Pasta. We have played with it, cooked and dried. We have served up a variety of shapes and colours of pasta, different flavour sauces, plain, cheesy, nothing. No can do. I was trying to reconcile myself to the fact that maybe he just doesn’t like pasta? It’s possible right? But urgh, all of the meals that we have with pasta, will he not eat any of them?

Then, tonight, we tried this amazing recipe for Roasted Garlic One Pan Mac and Cheese from Taming Twins. He was in the kitchen while I prepared and actually enjoyed eating a lump of cheese for the first time I think ever while I was grating some. He then tried some out of the pan and loved it. We sat at the table and he LOVED it. Scoffed the lot. Couldn’t get it in his mouth quick enough.

My tummy was doing somersaults and I was grinning from ear to ear. Daddy and I were shooting happy, mushy looks at each other, holding hands across the table and feeling so darn proud of our little boy who was eating pasta. Trying so hard not to break the rules and gush our happiness to Monkey, no pressure, no pressure, no pressure. It’s making me well up as I type this, how ridiculous right?

WP_20140206_18_00_29_Pro WP_20140207_12_15_43_Pro WP_20140202_11_53_27_Pro

Mealtimes now are the complete opposite of what they were, they are a happy place and one of my favourite times of day. When up until recently they have been the time of day I have dreaded more than any other. Previously the site of tantrums and tears – mainly from me – now they are a place of smiles and giggles and cleared plates and puddings.

Created with Nokia Camera Created with Nokia Camera

I’m not saying that now he will eat absolutely anything that we put in front of him – but it is a HUGE step in the right direction. He may still go hungry some nights but that’s ok because he is getting such a good varied diet all the rest of the time. Yay!! 🙂

Brilliant blog posts on HonestMum.com

Redpeffer The Theme Game

theordinarymomentsbadge

Post Comment Love
Ethans Escapades

SuperBusyMum

And then the fun began...