Monkey has always loved his arts and craft activities, and now he is that little bit older, his abilities and what he can achieve (with some help) have come on leaps and bounds. There are so many activities I want to try with him and so many things I want to make with him, but with a newborn who has colic, reflux and a possible allergy, my hands are sadly tied a bit more than I would like them to be and I am struggling to balance both of their needs. Thankfully Daddy loves doing things with Monkey and this weekend he stepped in to have a go at some Monkey & Daddy crafting :).
Crafty
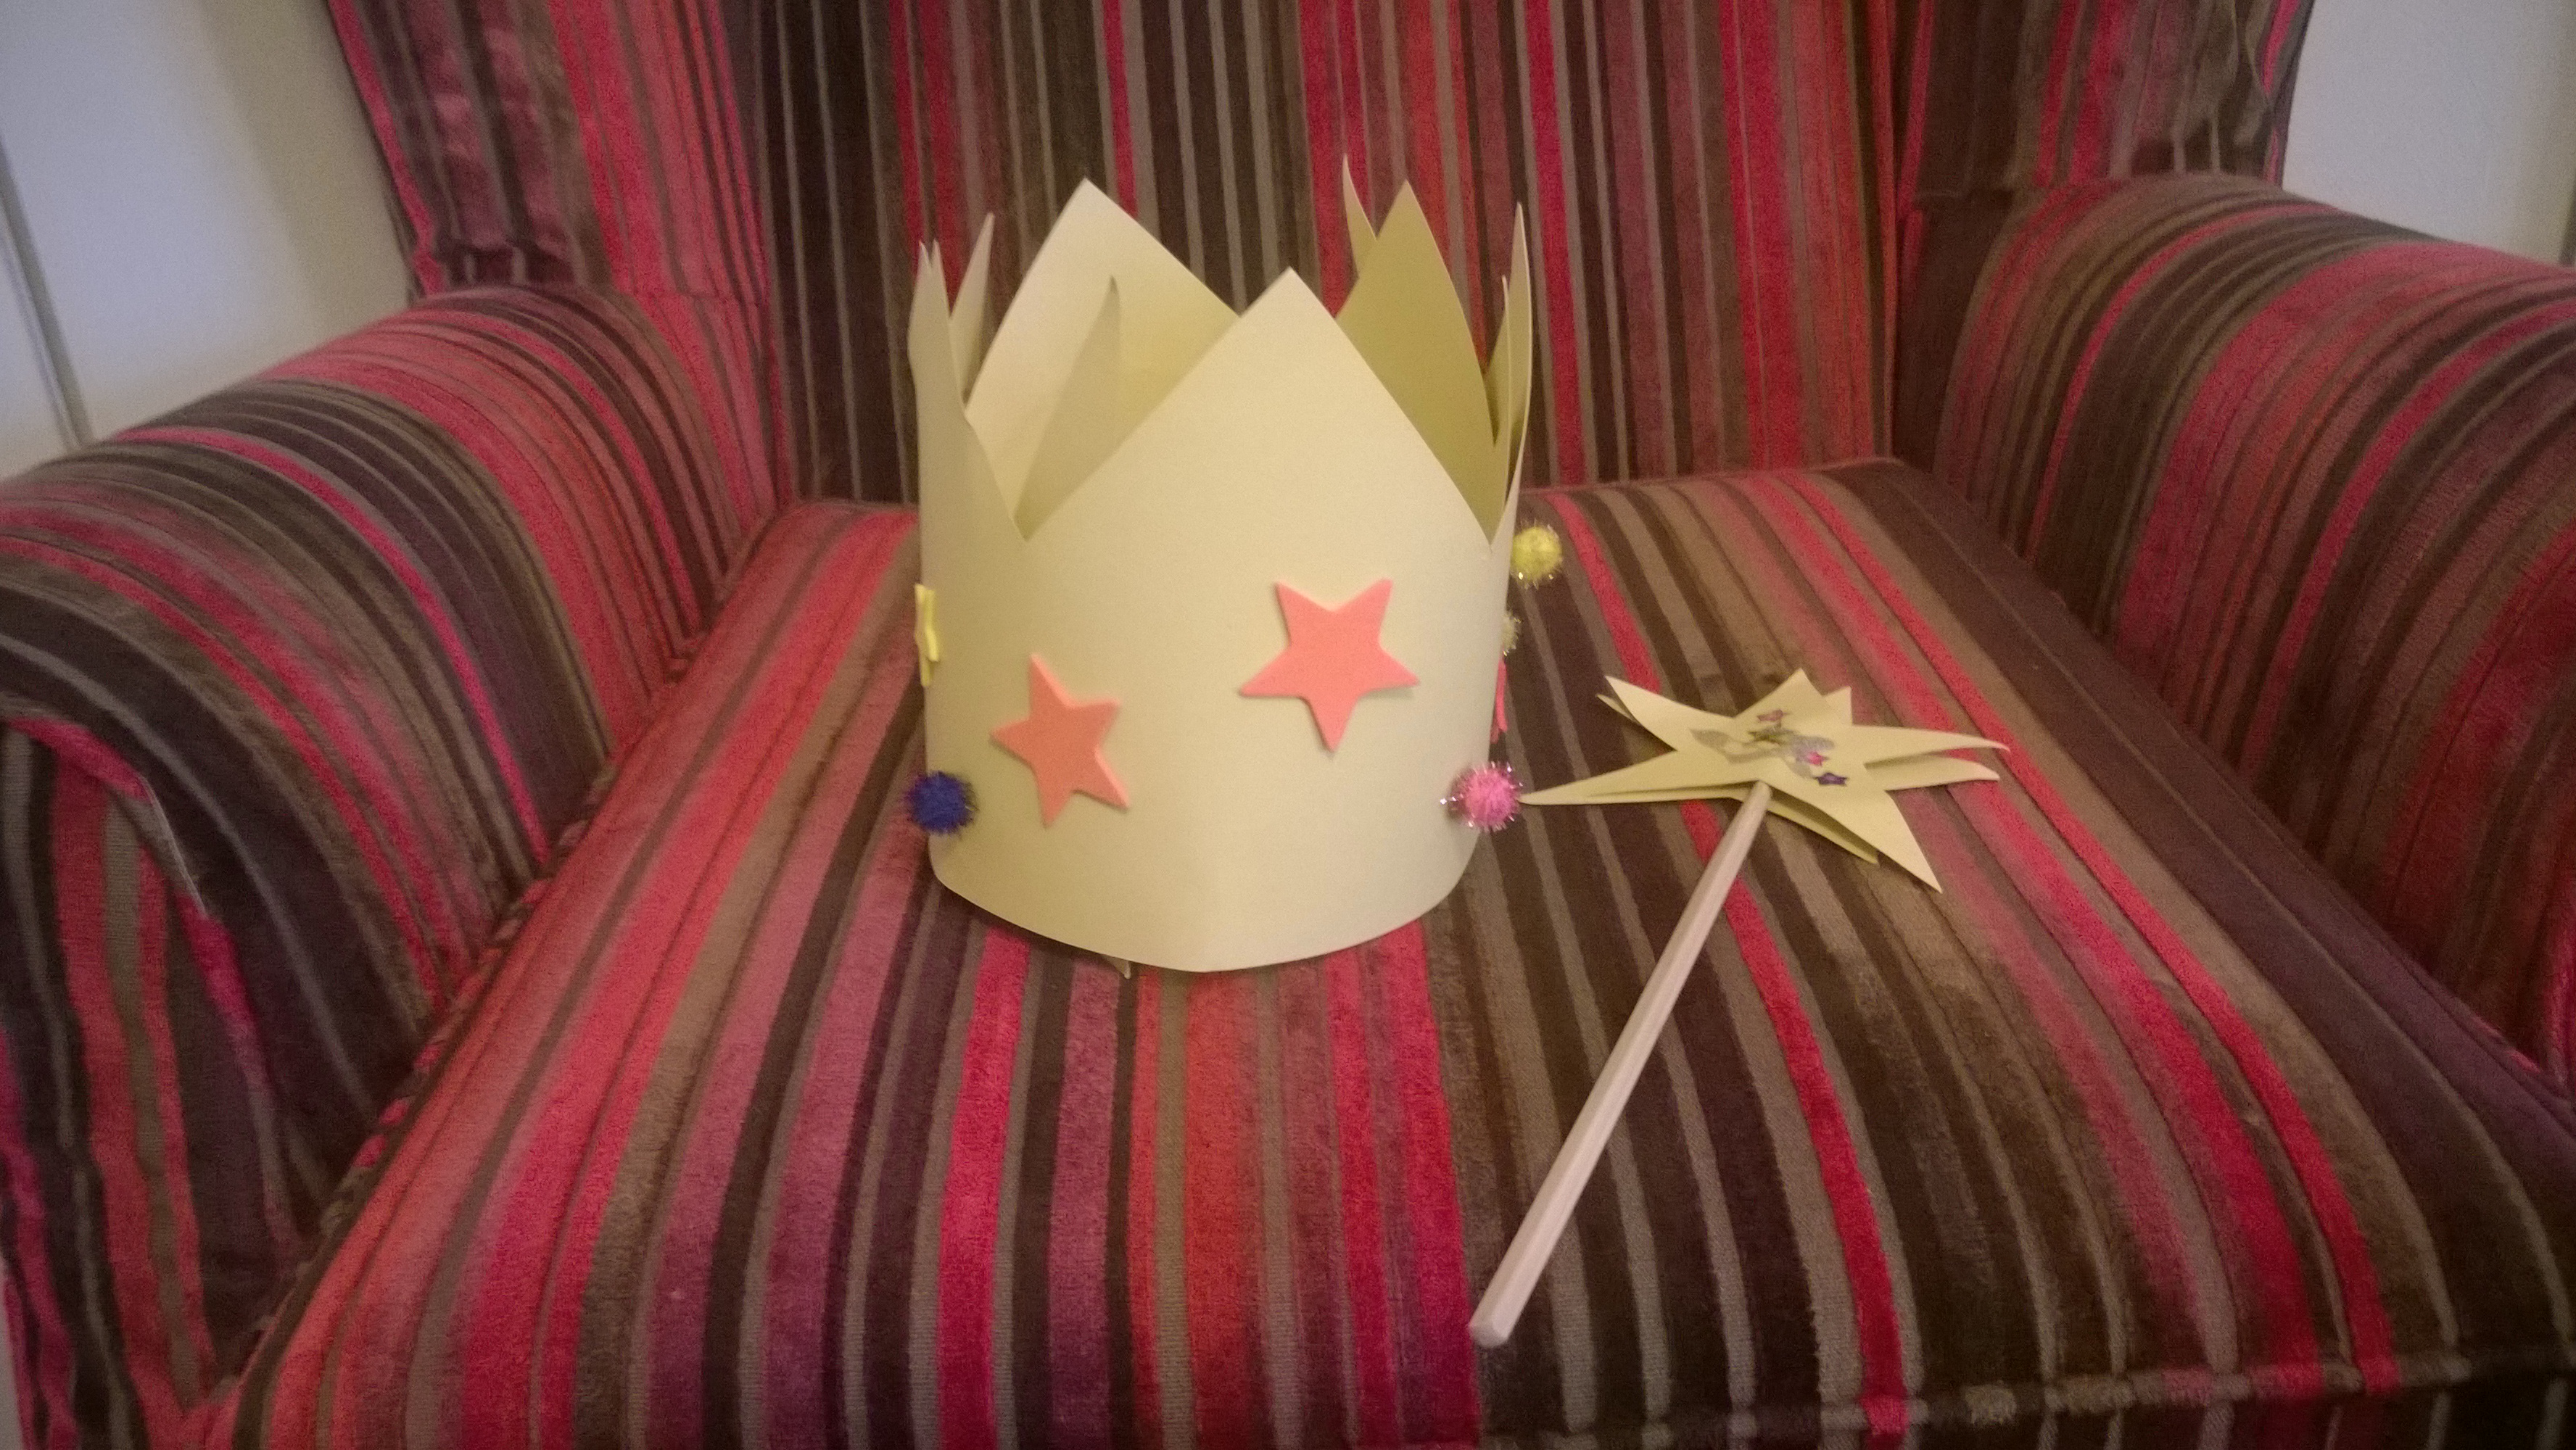
Making a Crown & Magic Wand
Friends and family have been very generous since Little Miss’s arrival and she has been given some very lovely presents. One of which was this cute little fairy princess Peppa Pig toy. Monkey helped me open the parcel and he took quite a shine to it himself and particularly liked her crown and magic wand, so I decided maybe we could make a crown and magic wand for Monkey to wear!
Masking Tape Picture
It was Daddy’s birthday last week and for a while I had it in my head that it would be nice for Monkey to make him a special picture that he can take into his office. Monkey loves painting and there are lots of pictures around but I wanted to make one a bit special for his Daddy.
Then I saw a post from Iona at Redpeffer who used masking tape to make a masterpiece with paint, and an idea was struck.
I bought some masking tape and then set about taping a message onto a piece of paper with the idea that I could remove the tape after Monkey had had his fun with the paint. ( We tried something similar with wax crayons and watercolour paints a while back which wasn’t particularly successful!)
Simple Colour Matching Game – 25 months old
I’ve been noticing recently that Monkey is doing a bit better with his colours.
He has a set of eggs that he has had since he was tiny and loved. They are great because they are good at various stages. We did have to take them out of use at one point as they just frustrated him, but they are very much back in use lately. They are all different colours with lids that match and I have noticed that lately he has been matching the right lid with the right coloured egg.
Easy peasy Homemade Thank You Cards – 2 yr old
I think Thank you cards are so important, especially when kids are little. Friends and relatives can be so generous with their gifts but very often don’t really get to see how much the little ones enjoy them. So a few little words to express how much they like the toy or present are often gratefully received. Obviously Monkey can’t yet write the words, or even tell me what he would say as a thank you, but by making the cards together I hope we can build a good habit together of thanking people for their kindness and generosity.
Monkey’s crafting abilities are still quite limited though. We have made some lovely birthday cards using his finger paints, but I honestly think I have done that one to death now! We have tried glueing and sticking things but the glue gets everywhere and honestly, I find it all a bit stressful!
Daddy’s Creative Challenge
Hi everybody, Daddy here, aka Hubby.
It’s Mummy’s birthday today, and because I’ve been off with the Monkey and Mummy over Easter, and have a couple of extra days off as well, I thought it was time I put my creative juices to the test, and make Mummy a birthday card, with Monkey’s help of course.
Now, my day job is very much office-based. There’s more management in my day than there used to be, but essentially I am a keyboard warrior, and pretty much always have been.
I do love doing crafty things, and love gardening and making things, and cooking, but I really have never been that creative, so the Creative Challenge really is for me!
I always have an idea in my head of what I want things to look like, but it’s normally quite vague at the same time, and translating it into something actually in front of me is where I really struggle.
I can look at something and say whether its good or bad, the problem is that I rarely look at anything I have made and think it looks good!
So, onto the card making. Mummy and Monkey have been doing a lot of card making recently, and I decided to go with the “Monkey Random Painting Generator” technique.
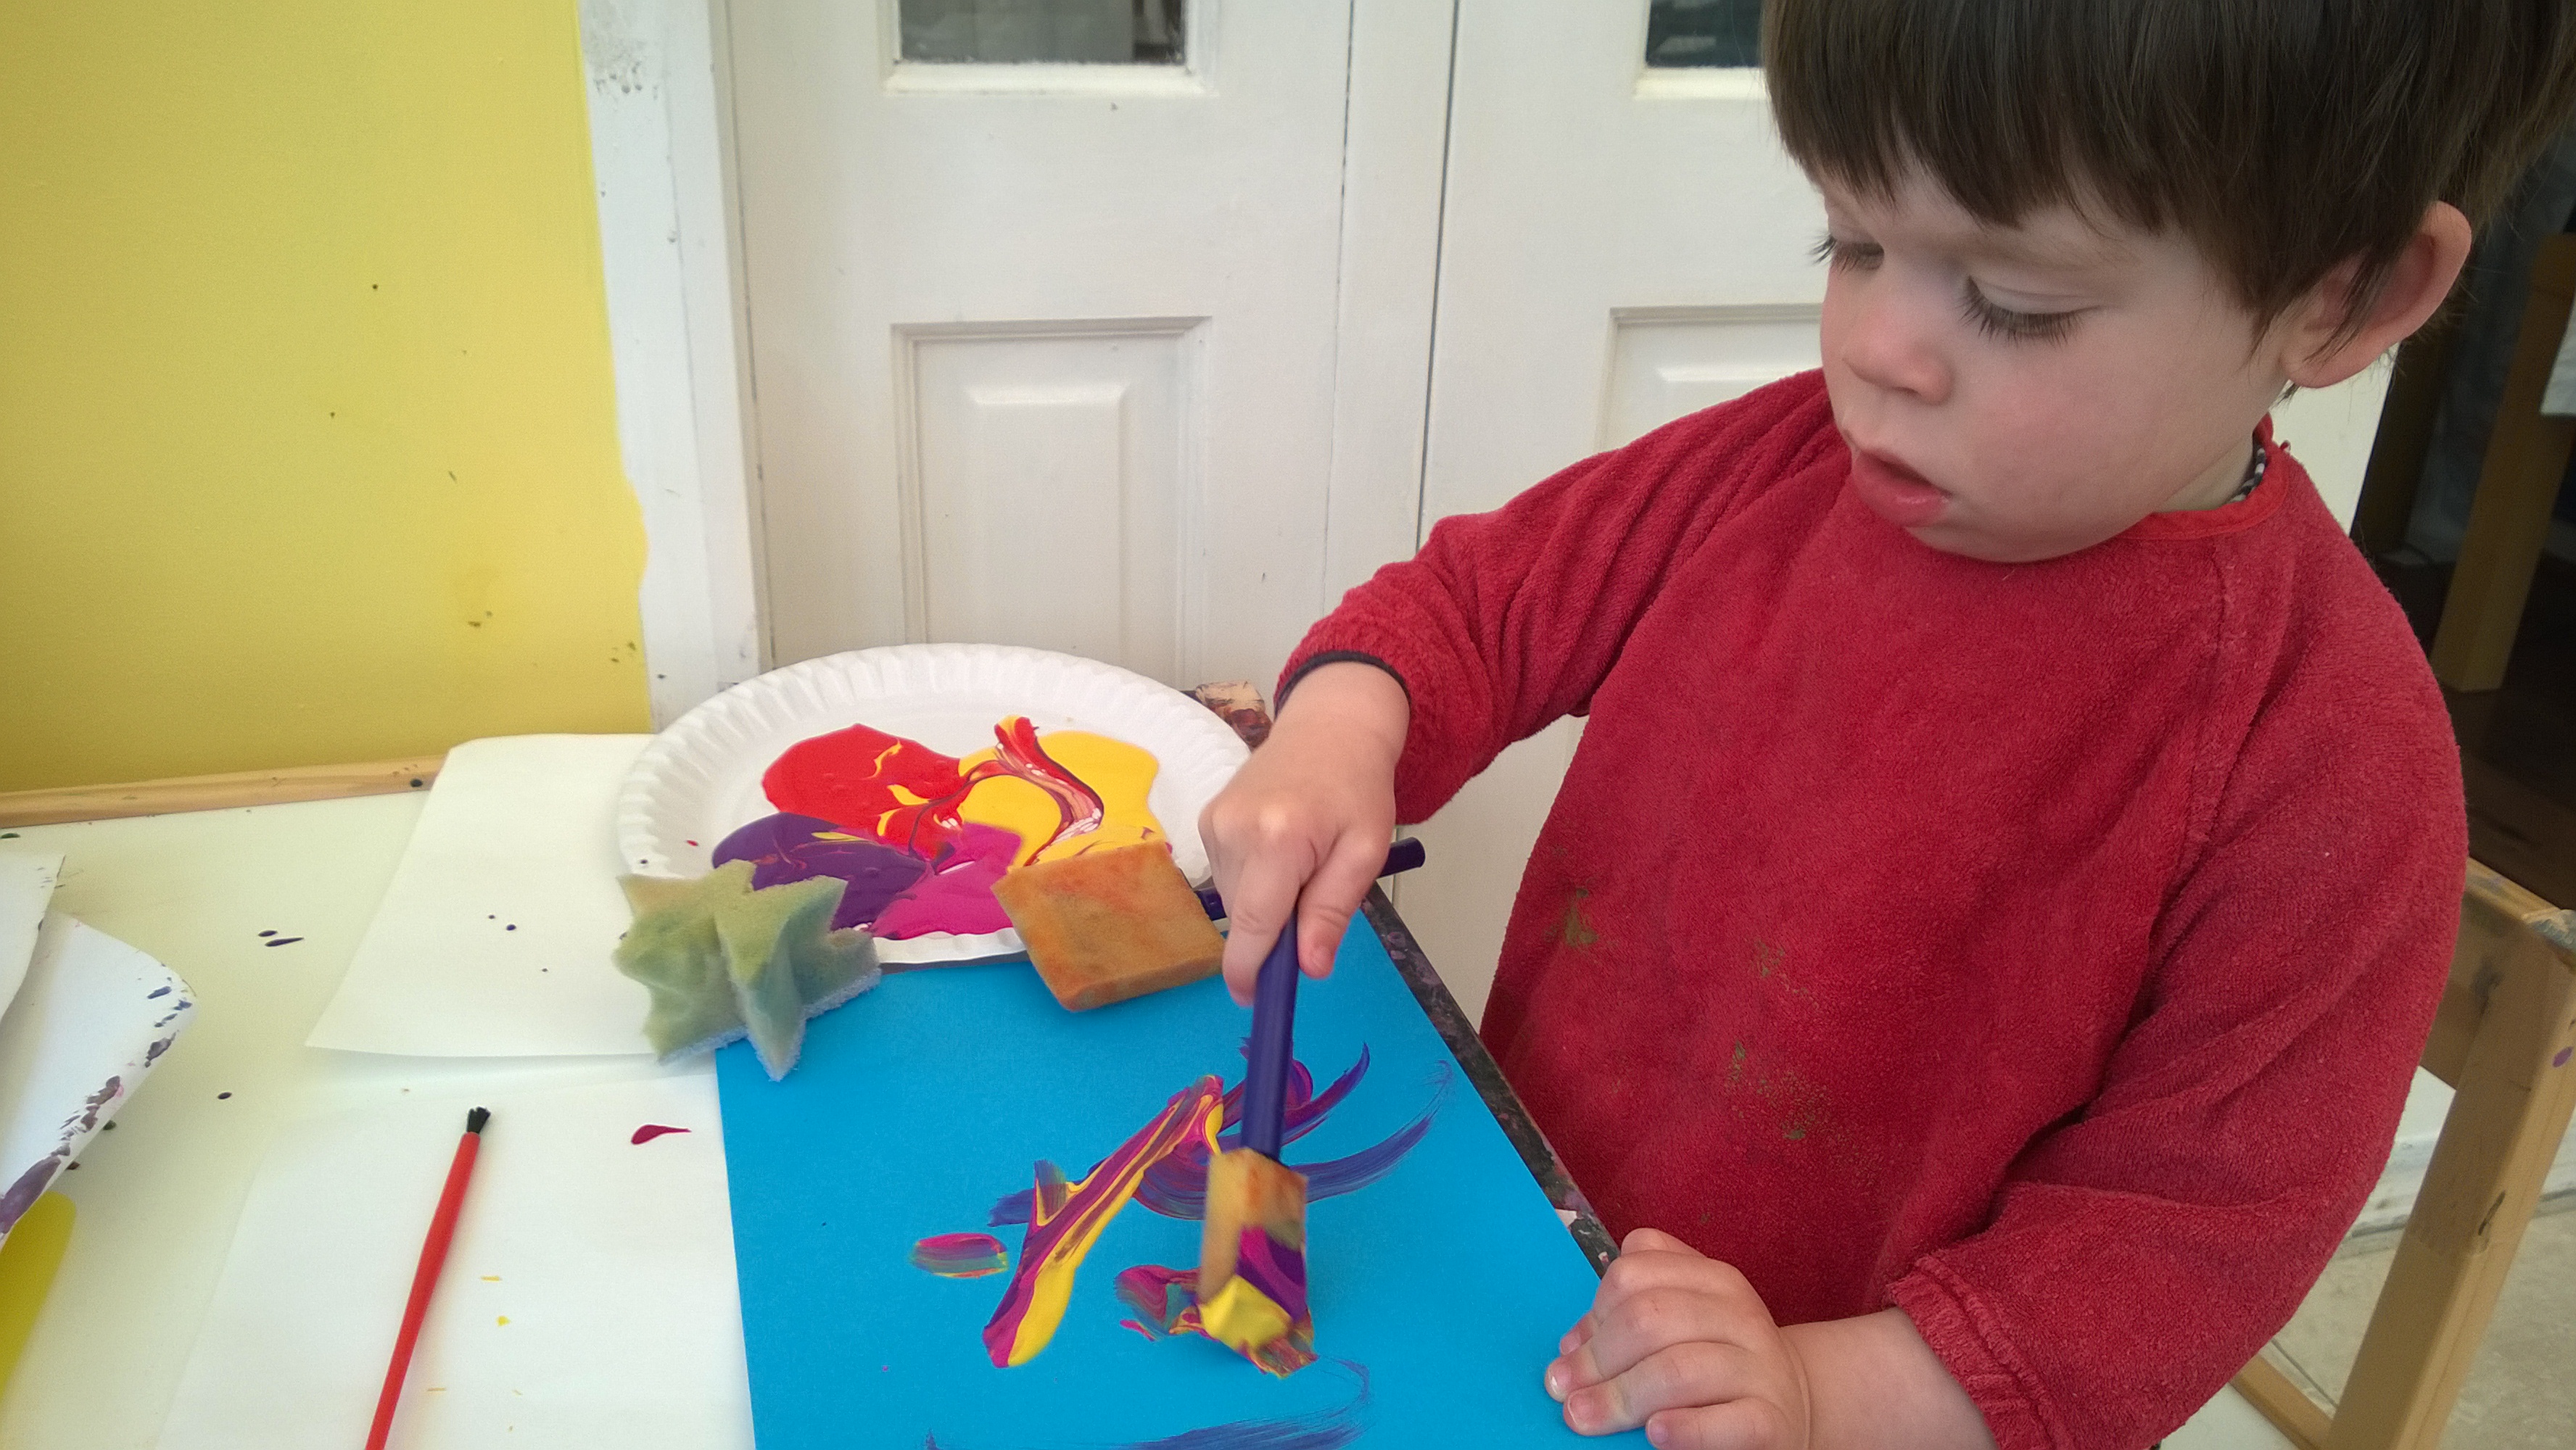 As you bloggers and blog-readers have probably already seen, Monkey loves to paint, and he loves to mix the colours – a LOT.
 He just can’t let those paints sit all nice and neat together.

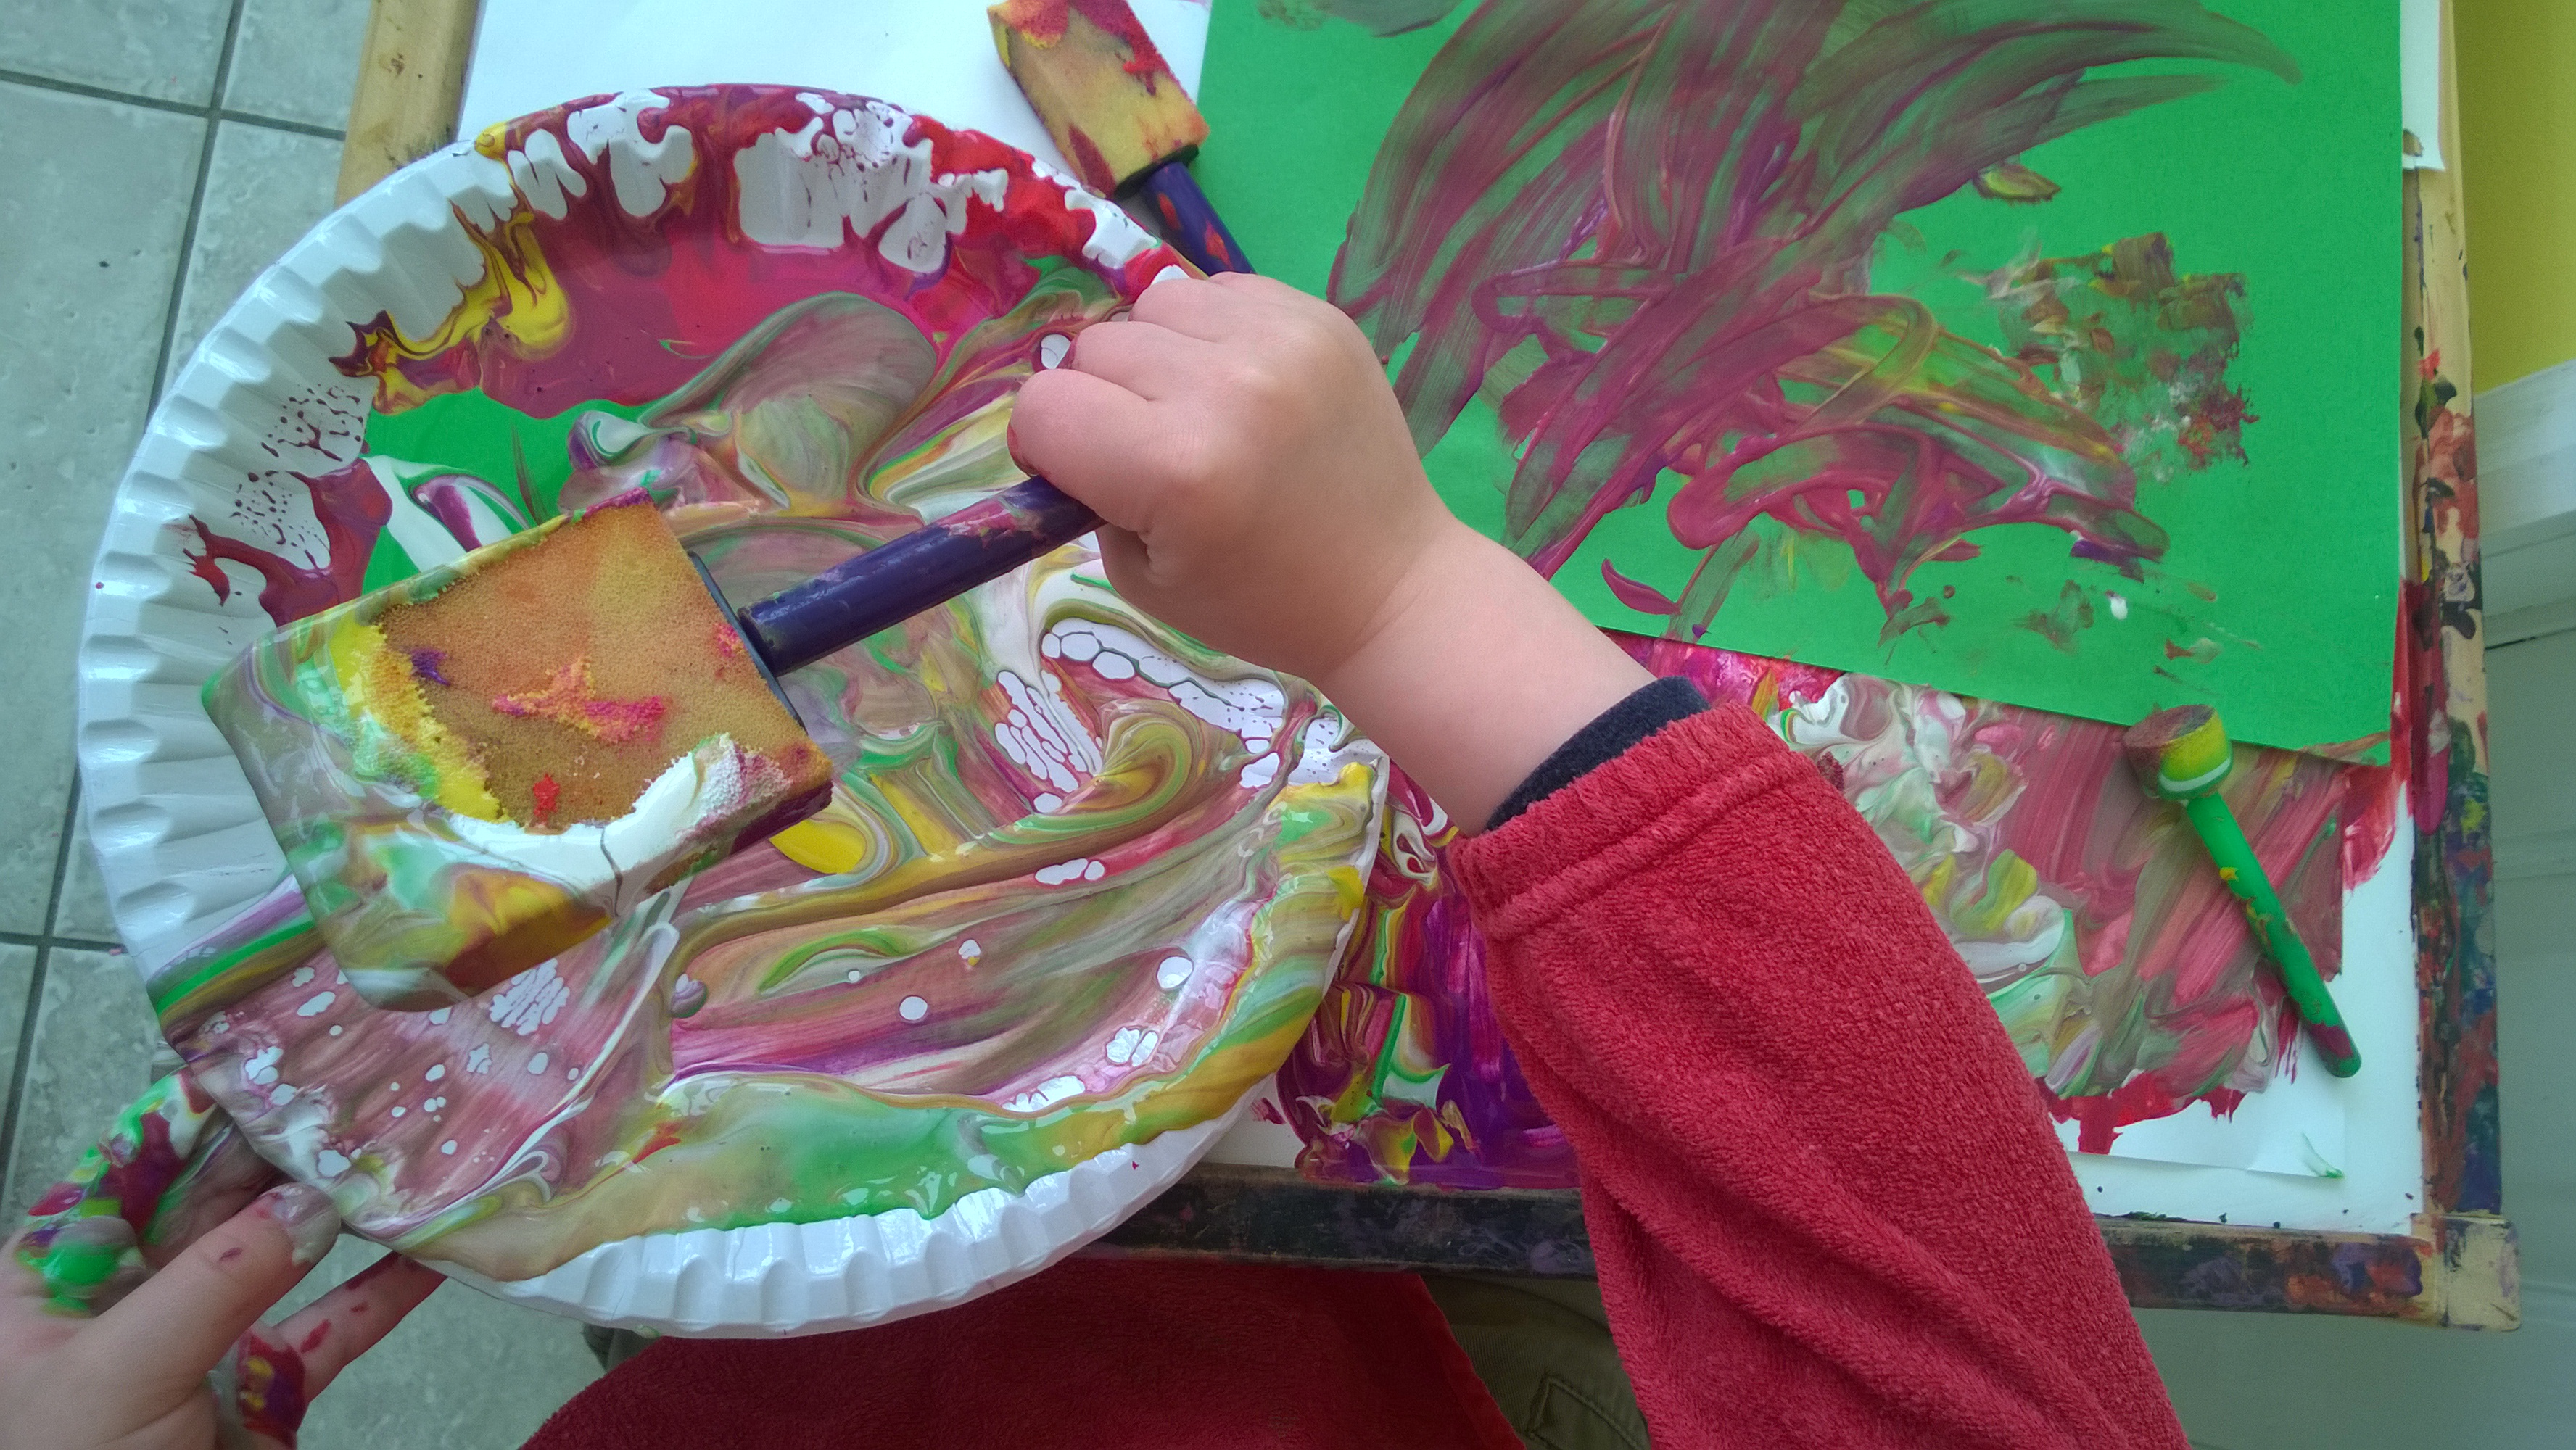
It starts like above, and then very quickly gets to this (check out the Monkey-Eye-View below).
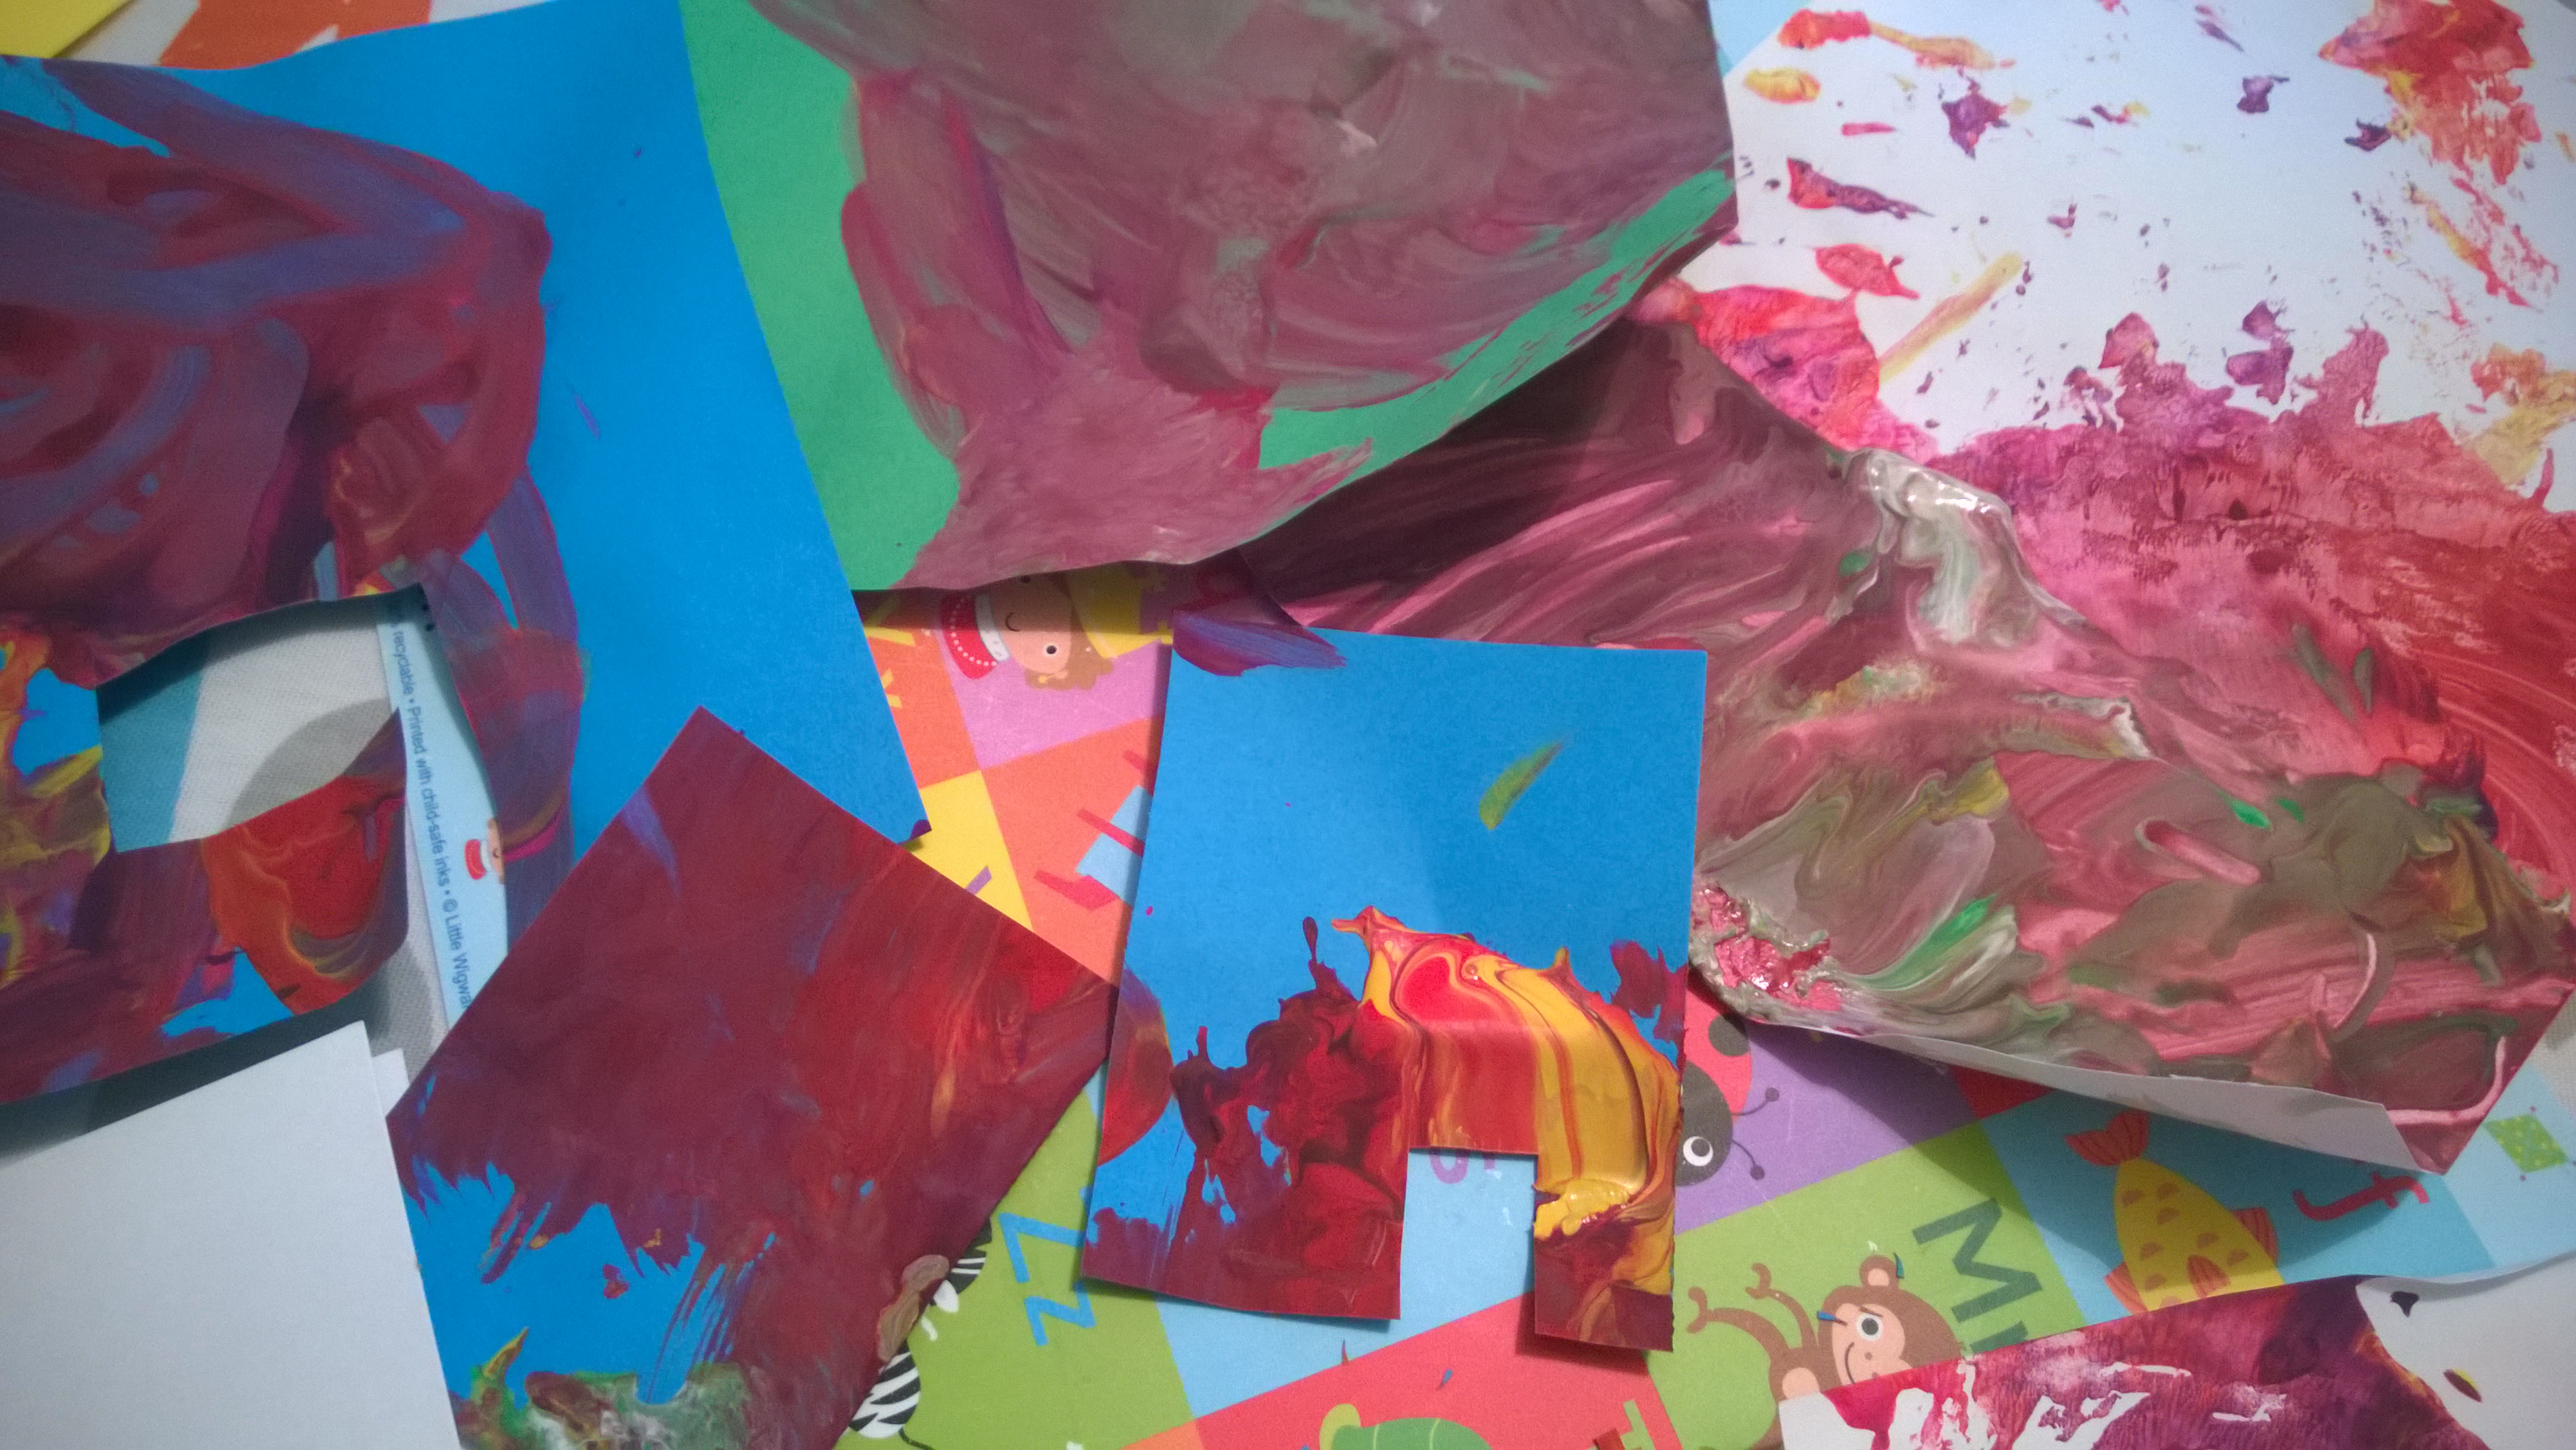
But it does make for some really interesting patterns which can be great for card making.

Check out those colour combos!
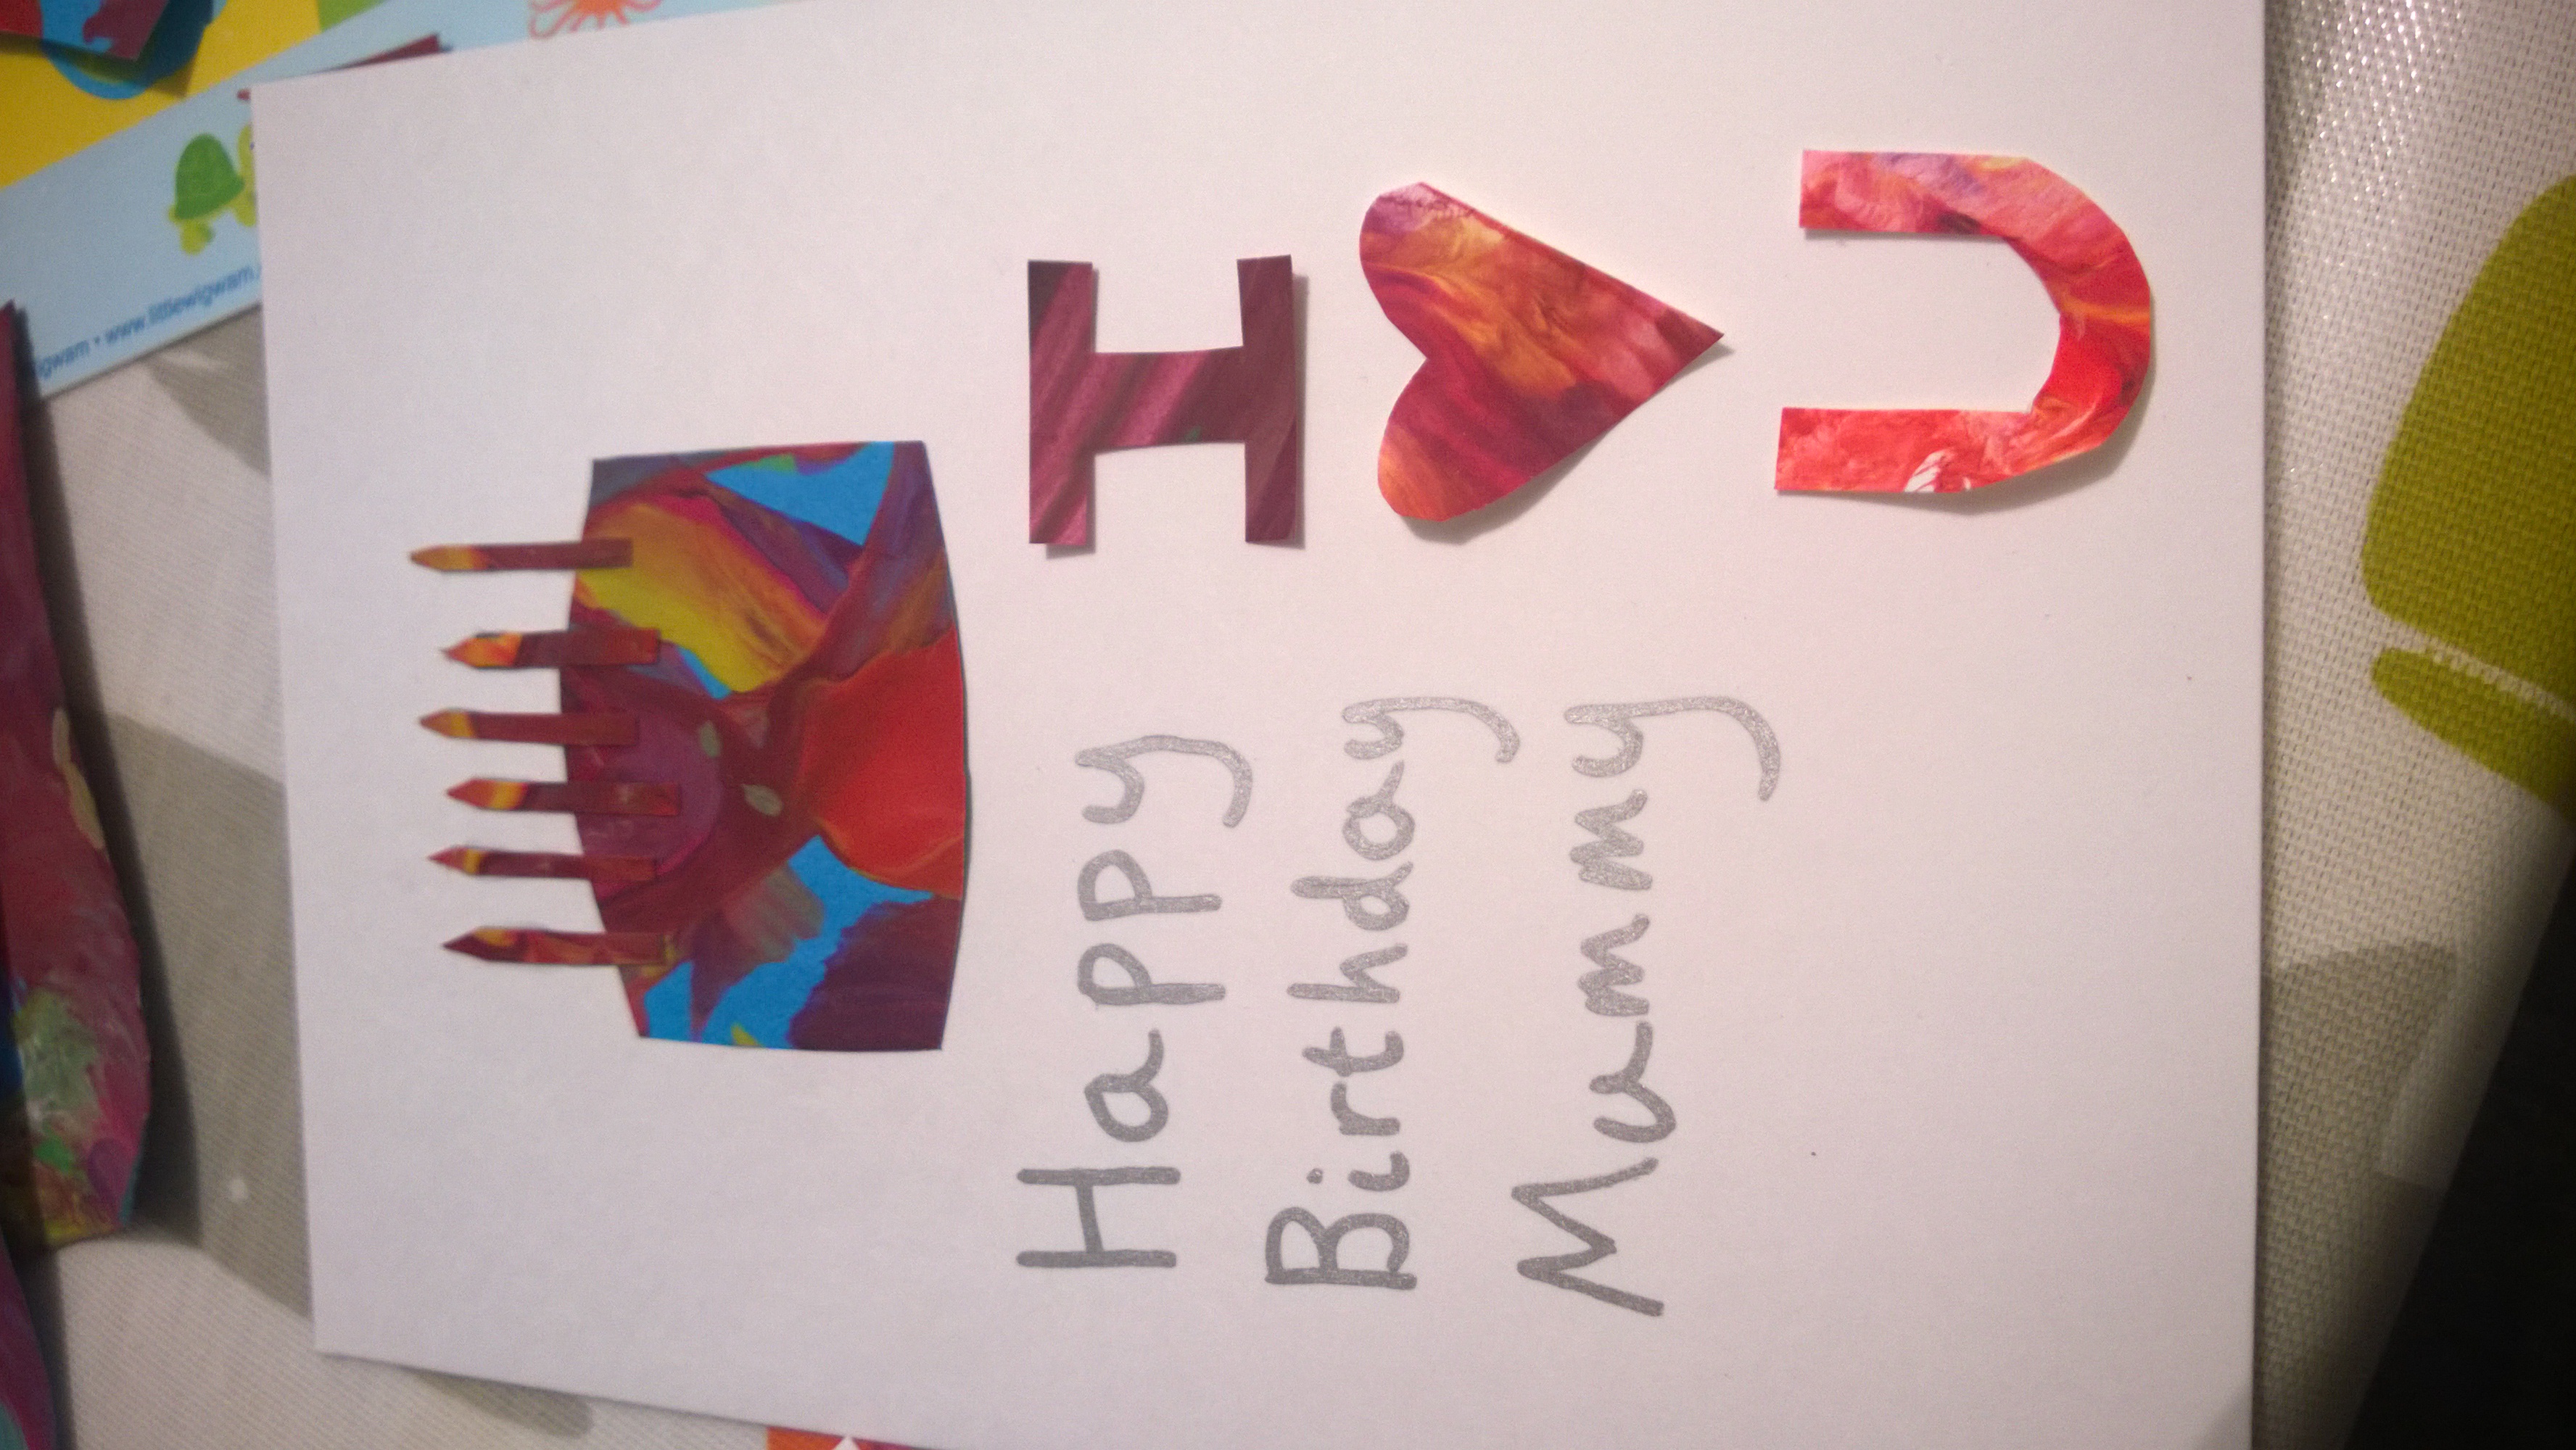
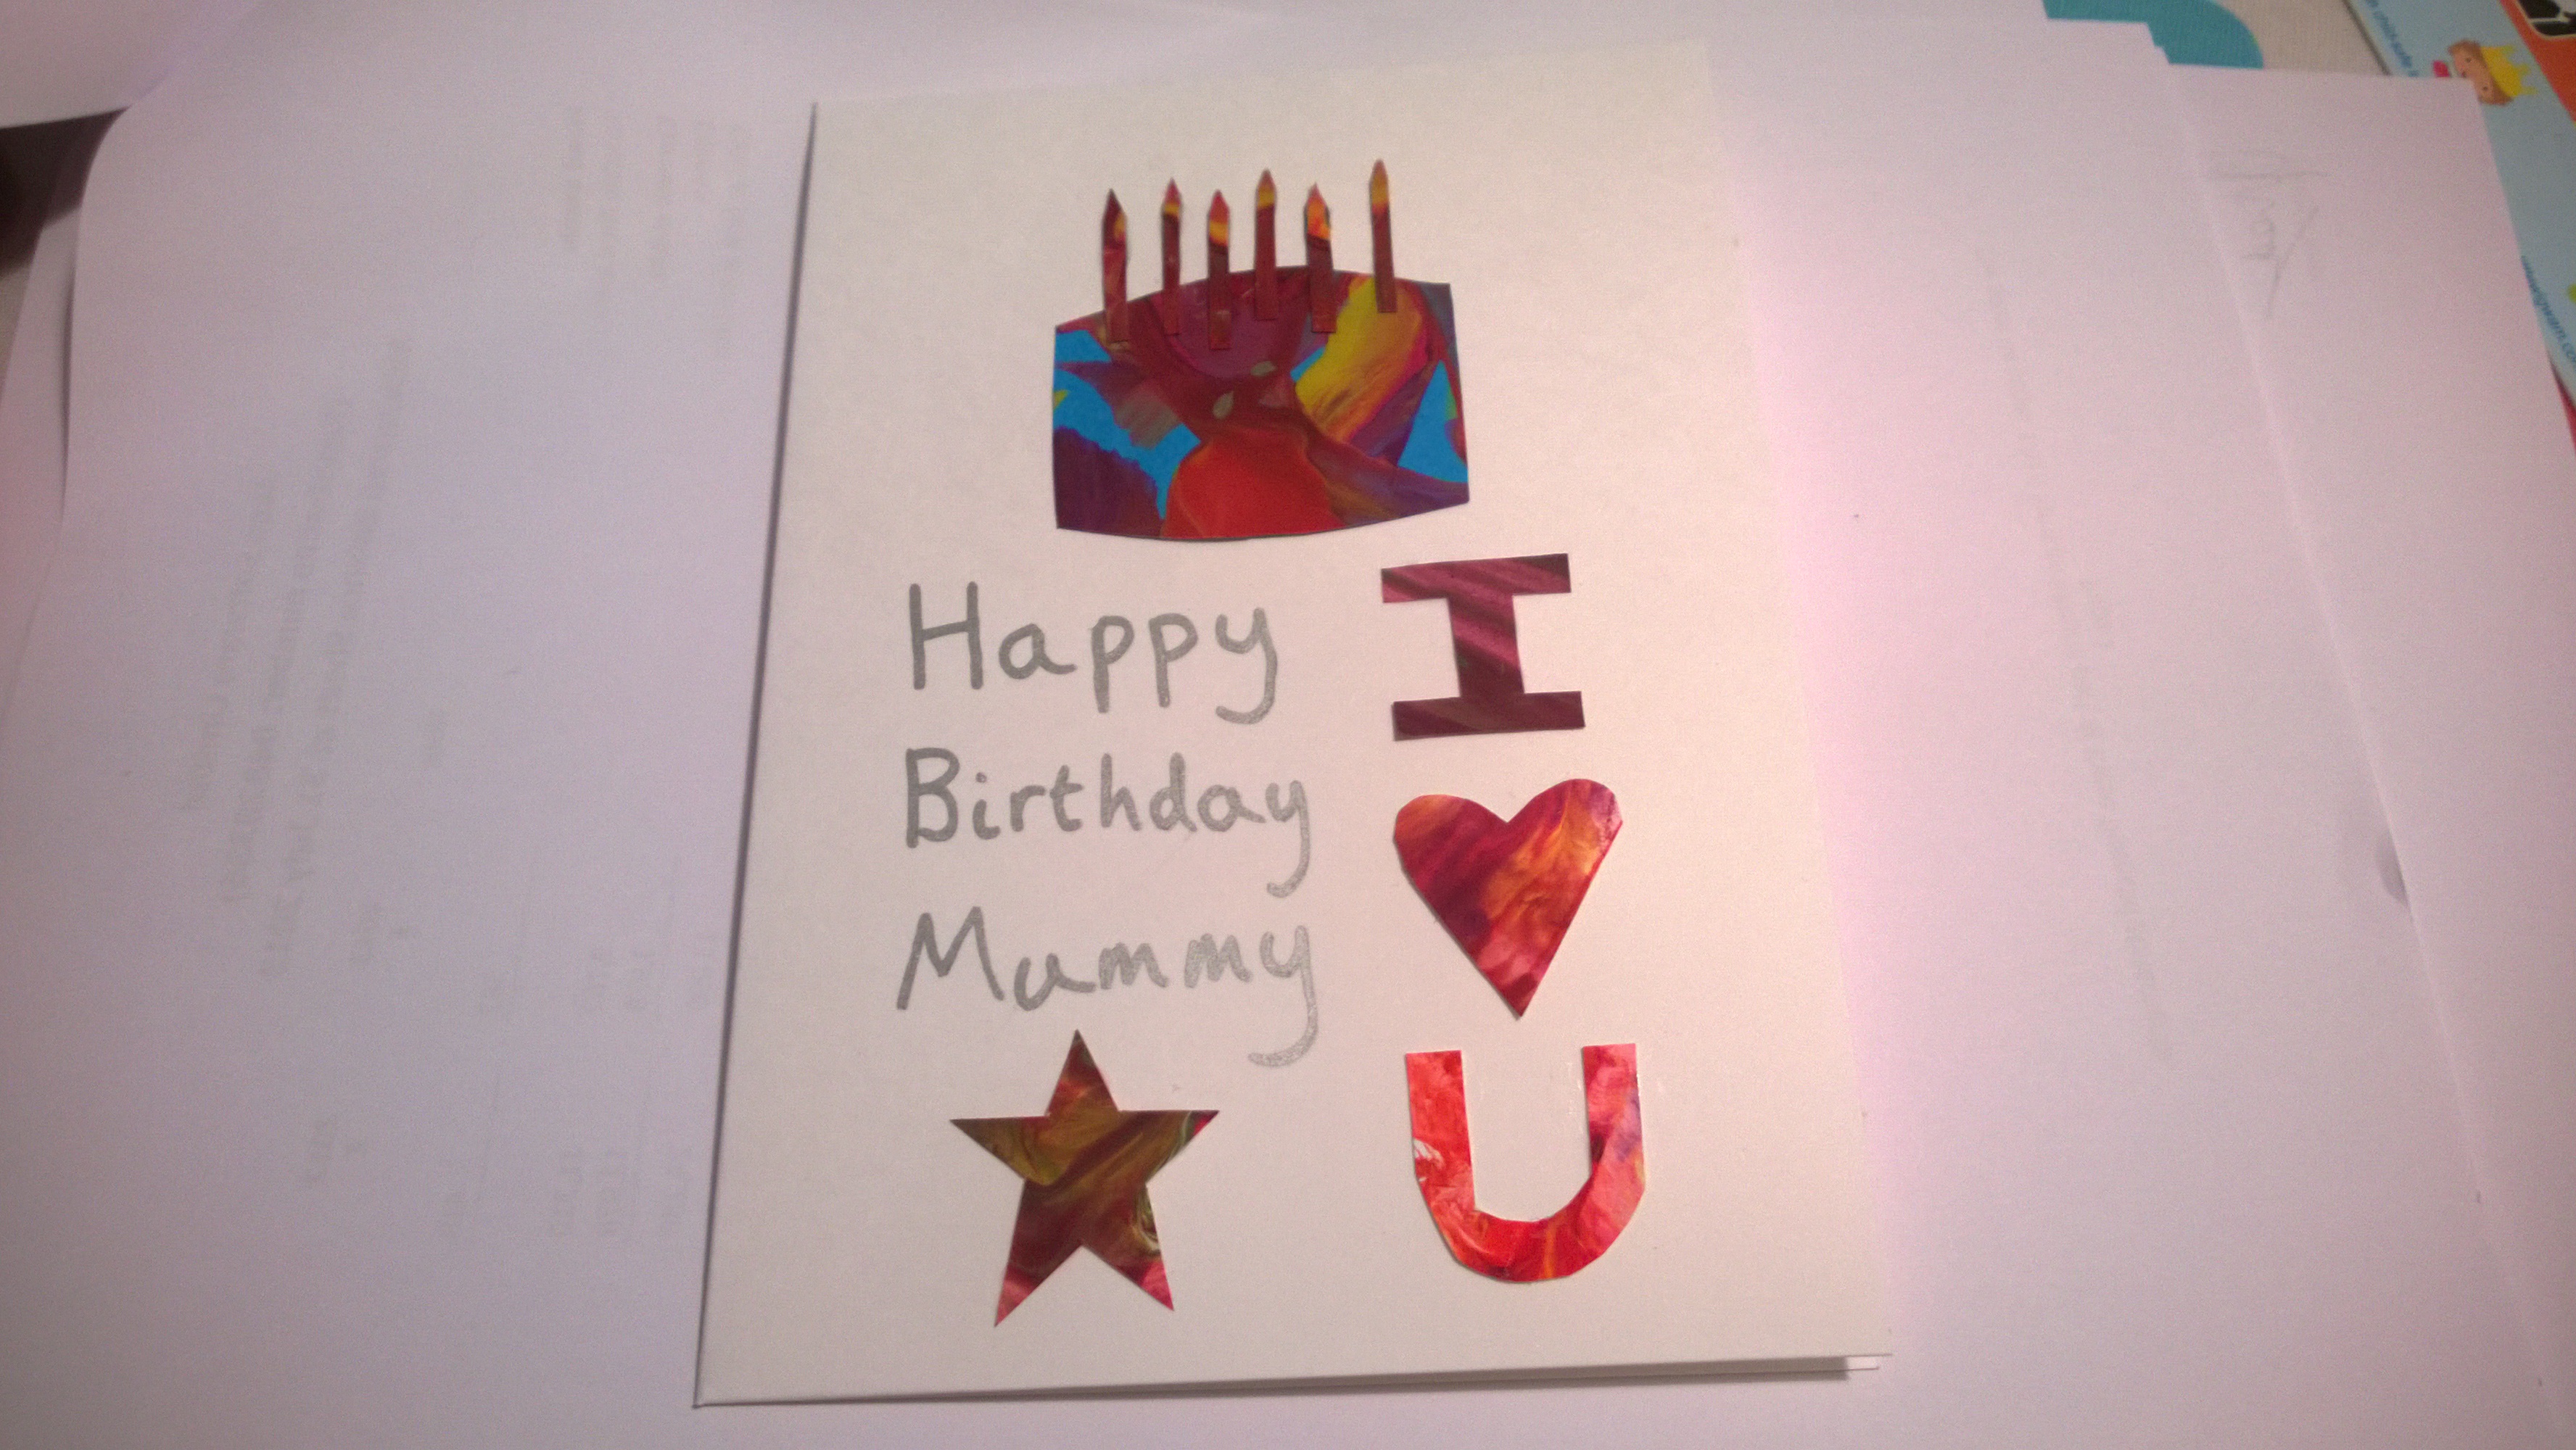
So Monkey has made all the ingredients for the card, it’s now up to me to make it. I’ve decided to make this a card from Monkey to Mummy, and the only thing I have had in my head is to try and make something with a birthday cake on it.
Throughout the day, as I have been waiting for the paintings to dry, I wondered if I could make a shape that looked enough like a cake, and tried to think about how to do some candles for it.
Note that at this point I have no idea what else is going to go on the card – I think I’ll wing it! For such a serious planner, there are times where I just “do it on the night”. Looks like this is one of those times.
Ok here’s what I have to work with.
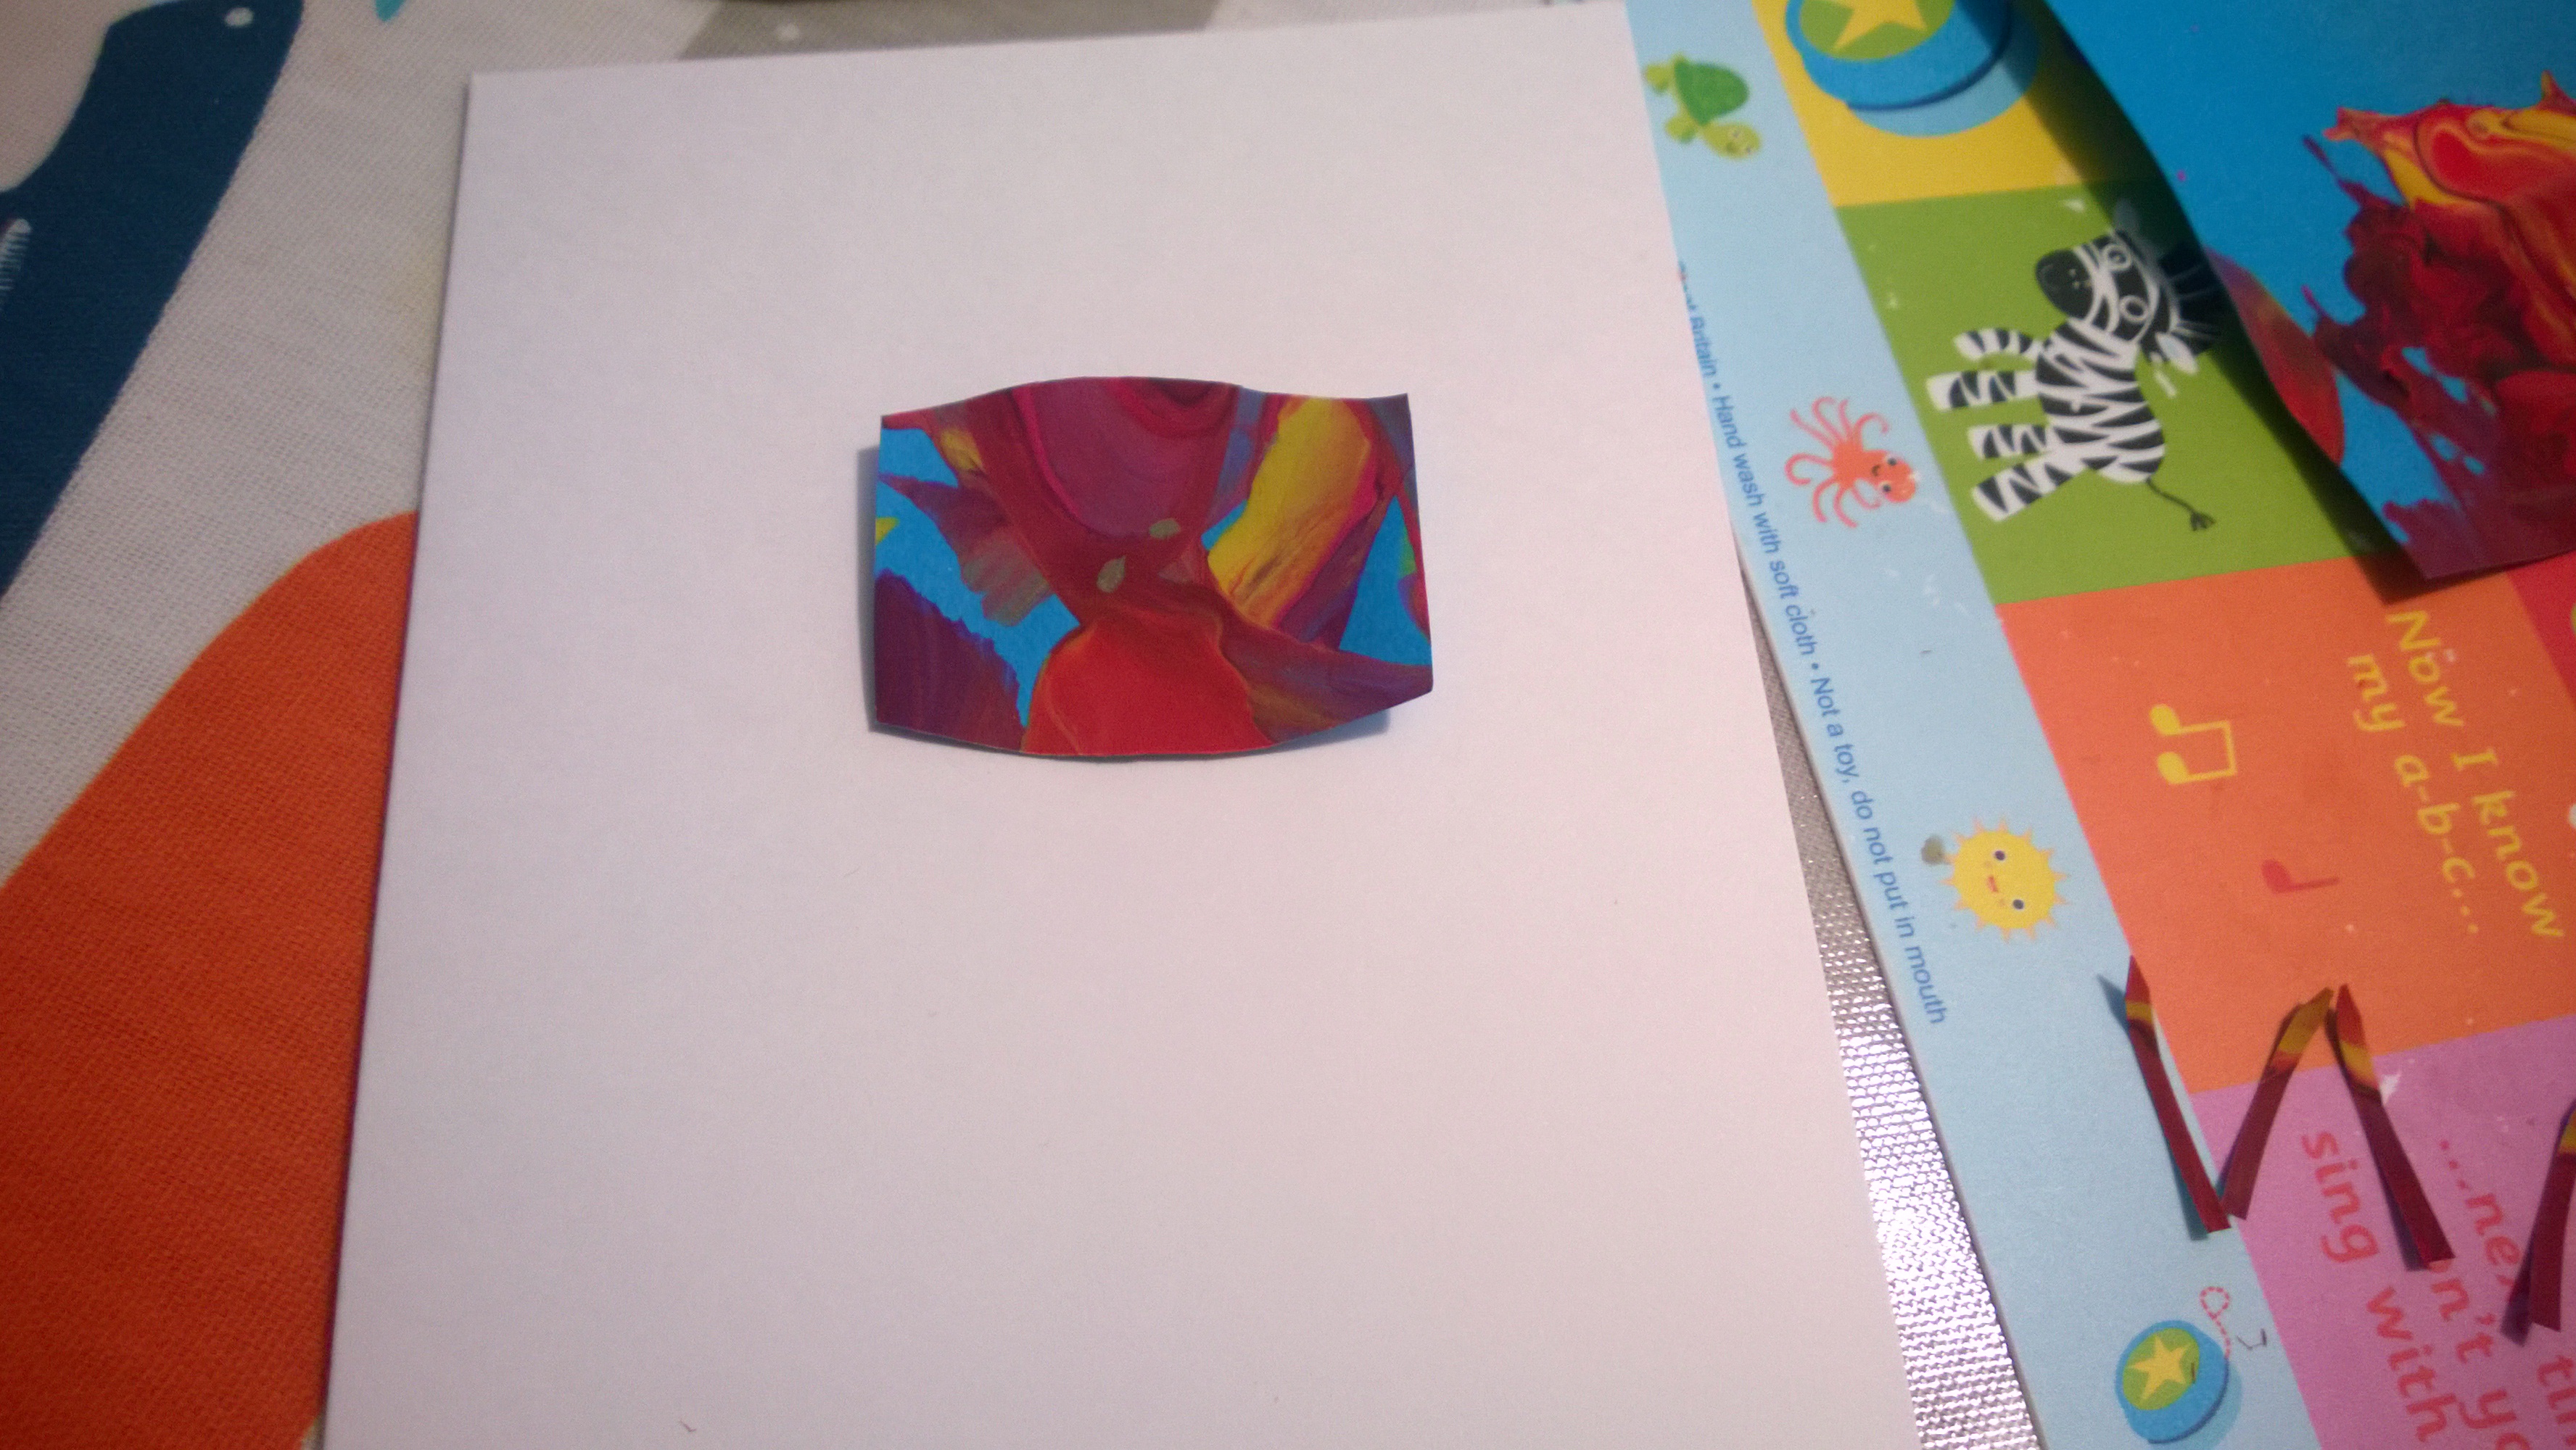
Lots to choose from so as you can see I have cut out the shape for the cake, and also had what I hope will be a great idea for the candles, by taking that fiery looking bit to use the yellow for the the flames.
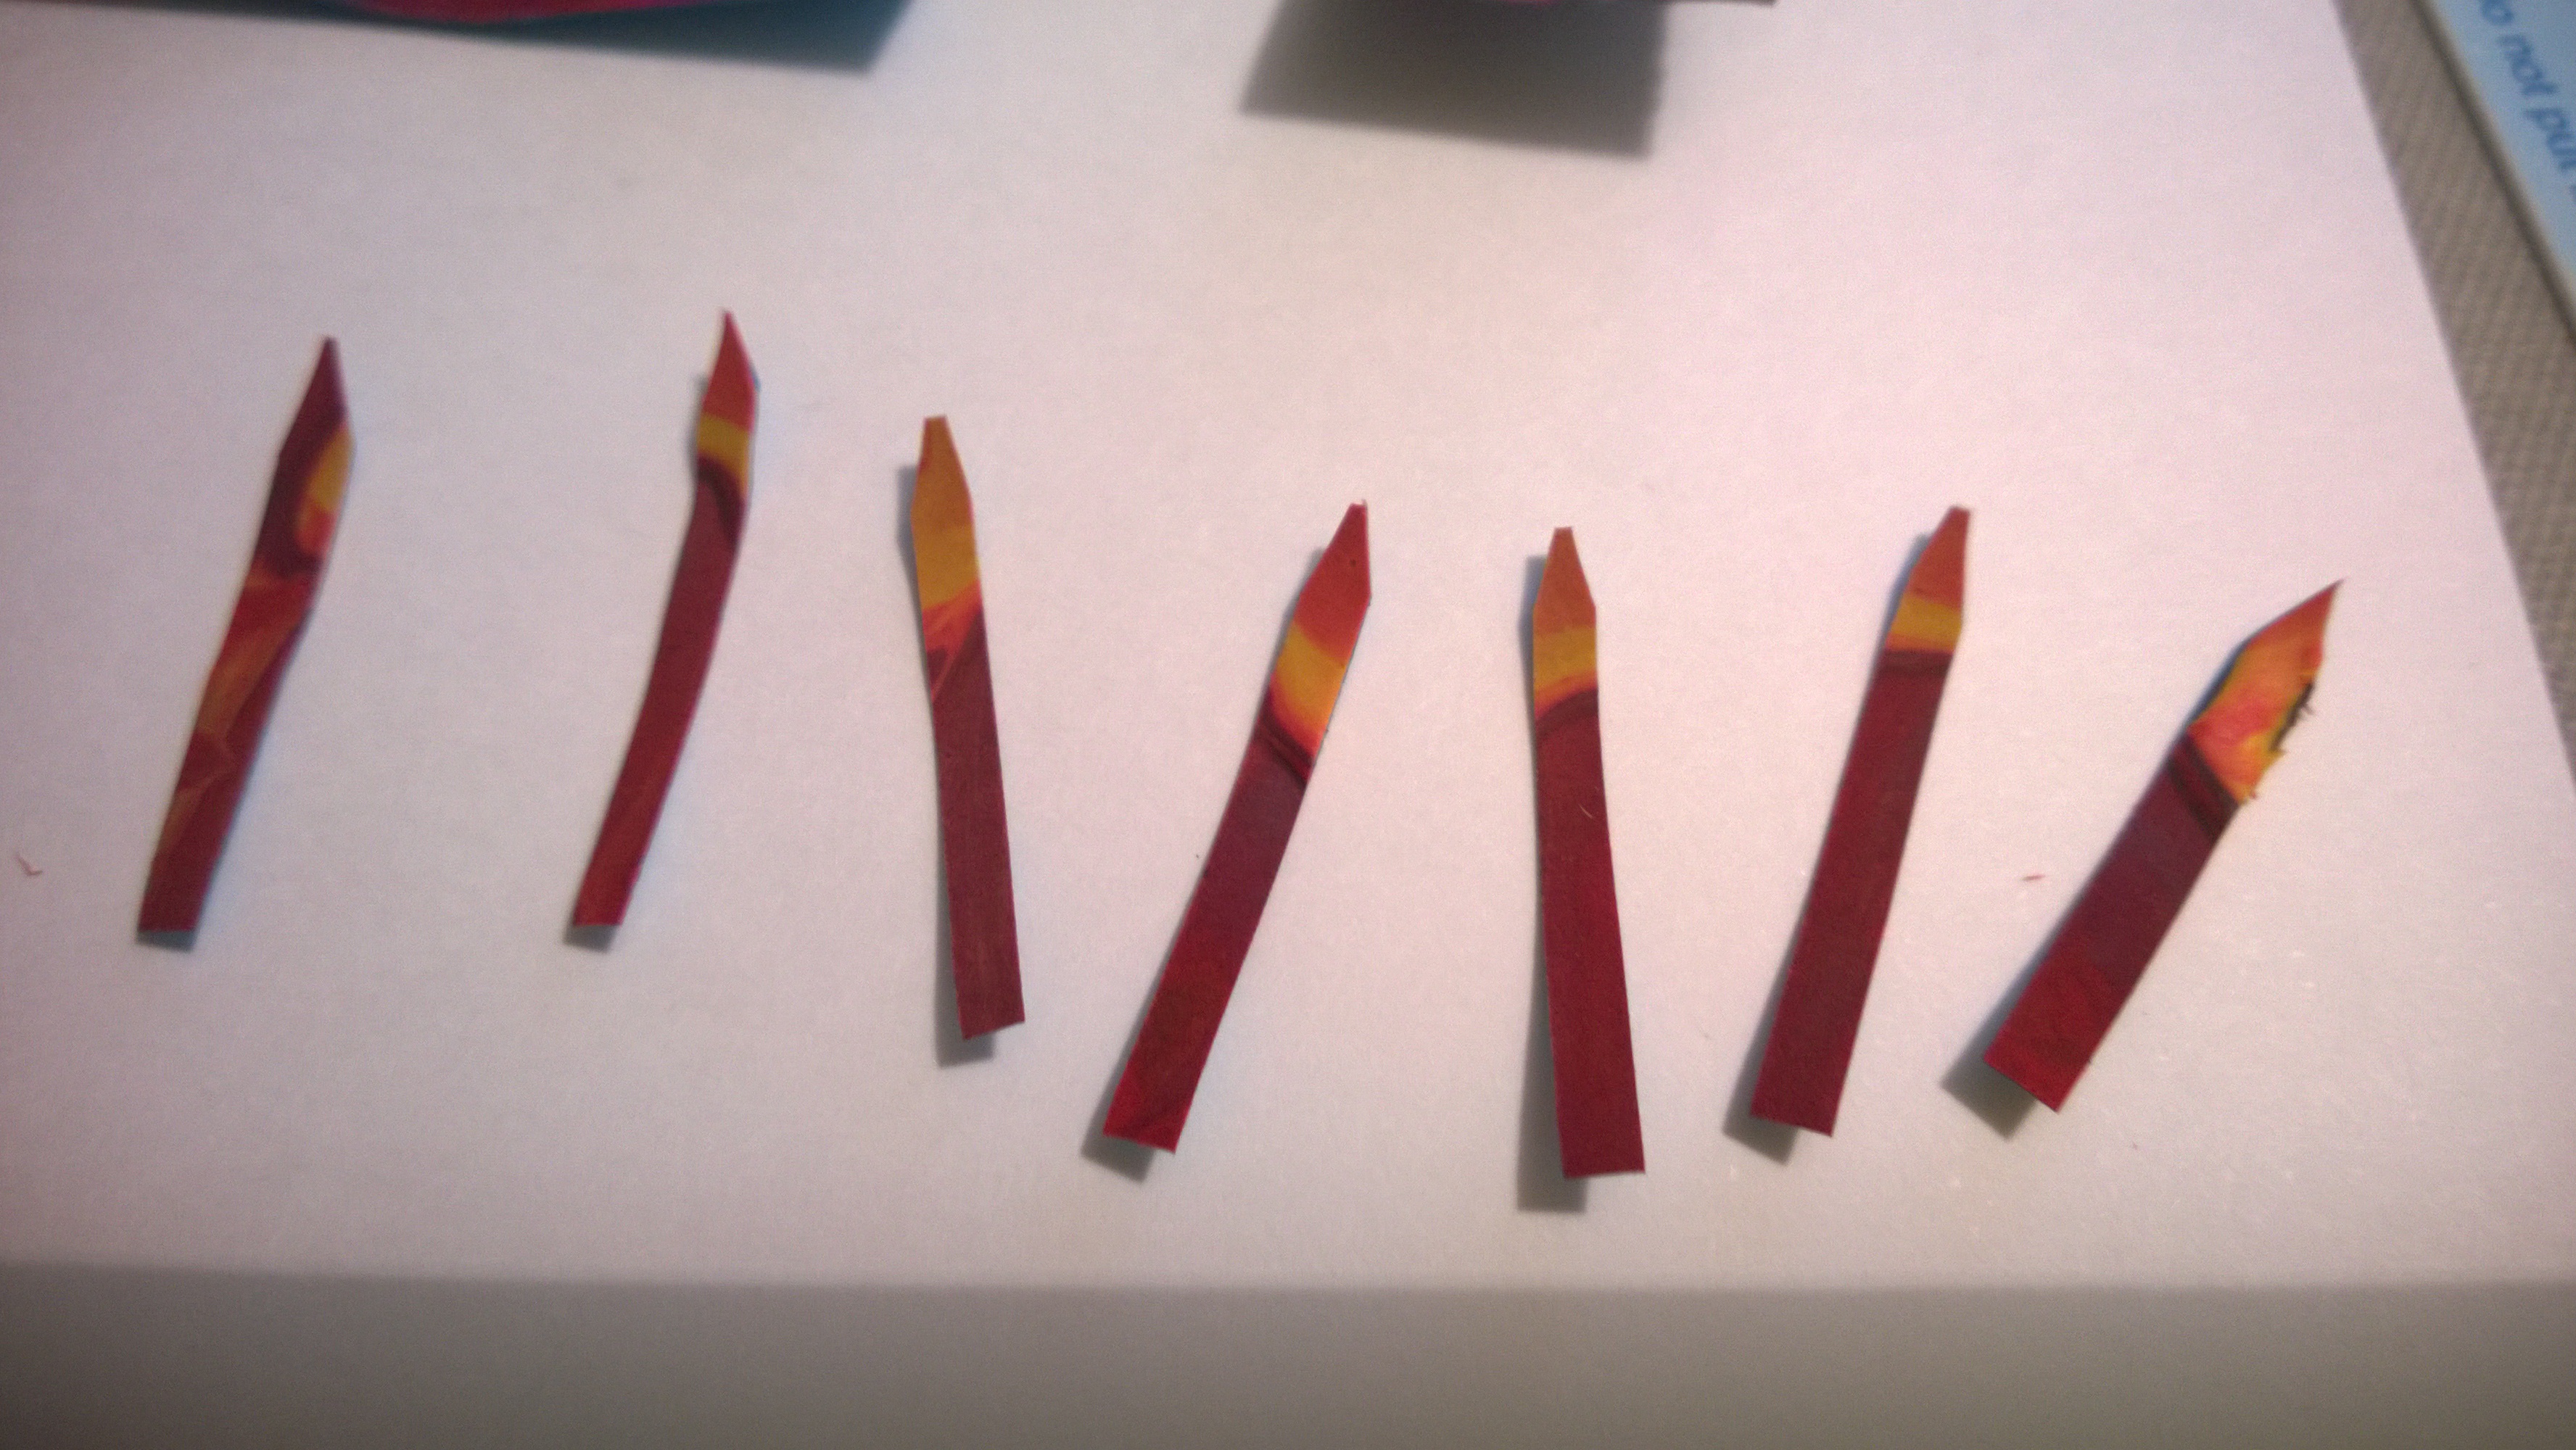 They don’t look bad!
Here’s the cake all stuck down.
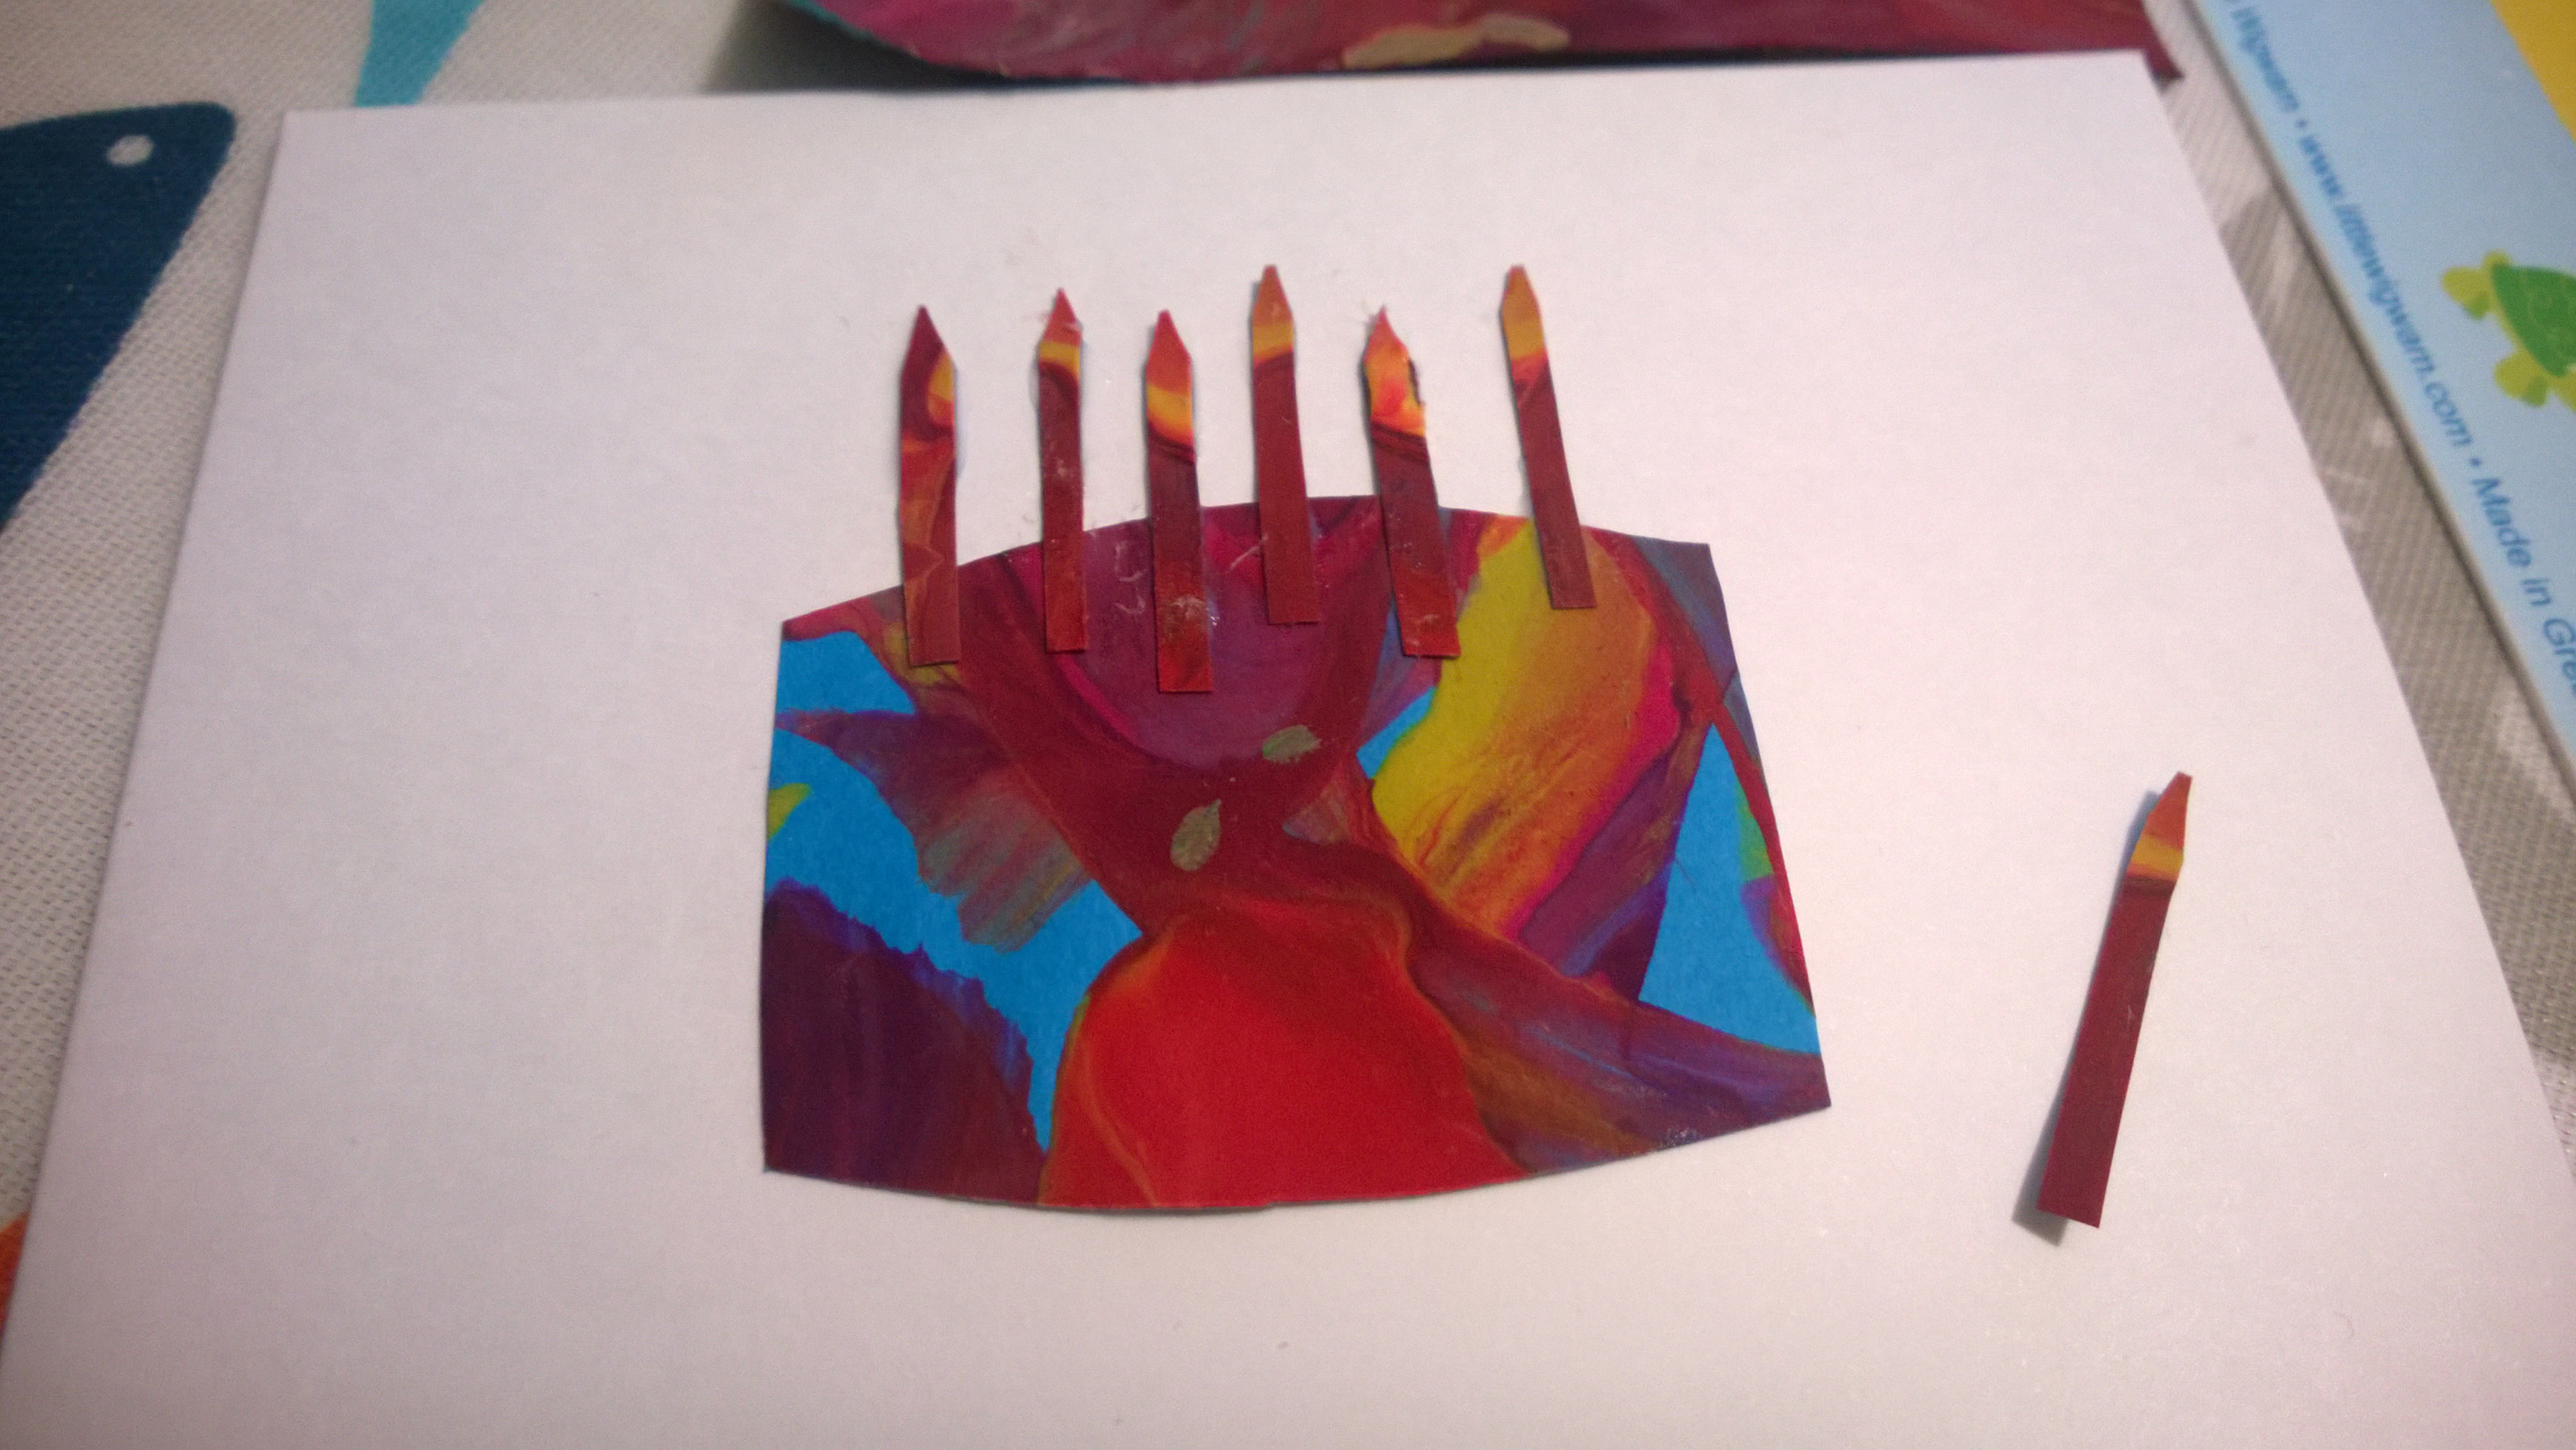 One candle left, oh well.
Here’s where the wheels fall off the wagon.
Mummy likes hearts and stars, so I try to cut some out, and, well, they are rubbish.
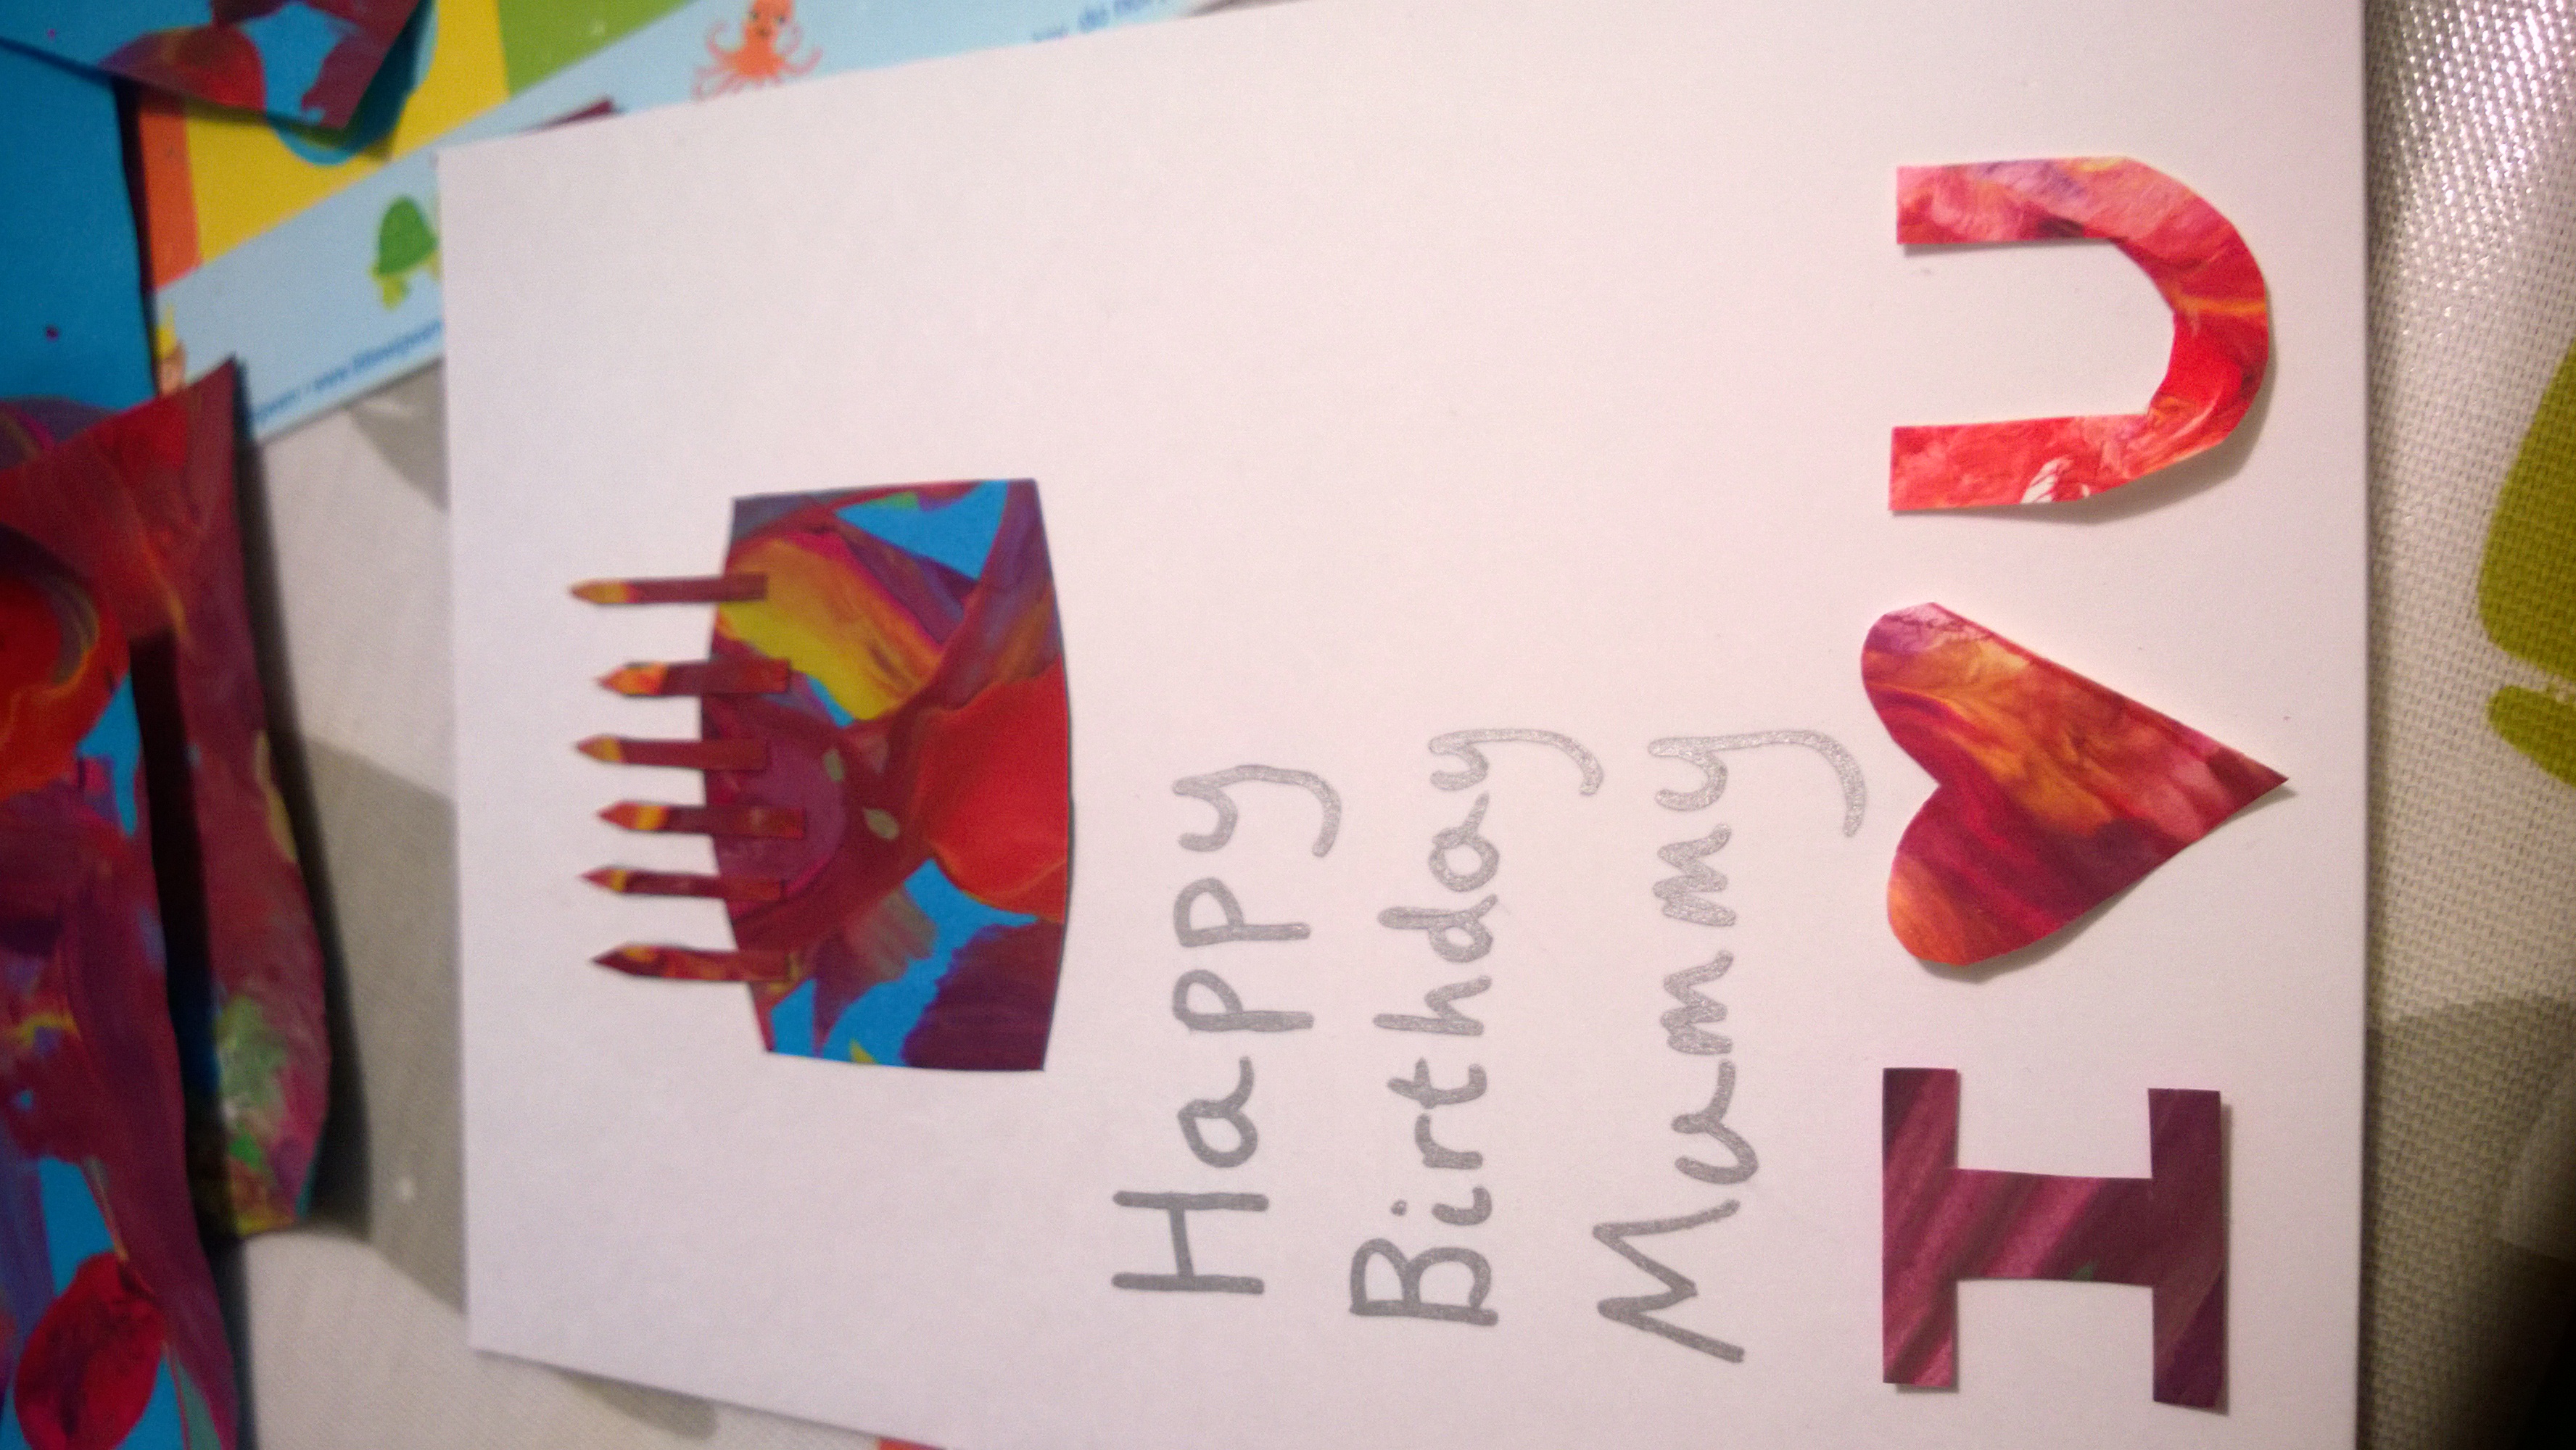
After several attempts at hearts, I finally get something that does look half decent, and decide to cut out an “I heart U” style motif. Stupidly though, I write the message on the front of the card without thinking about where everything is going to go, so I have a choice of where to put the other bits.
So I haven’t cut out the star yet, and still aren’t sure which of the above designs to go with, but I’m pretty happy with both really. It will all come down to the star I cut out.
I thought the heart was difficult…
I started by reminding myself of the classic freehand, single-stroke star.
 I then started cutting with scissors, and kept looking back at this star for guidance, thinking I should surely be able to do something that looks a bit like it (not that my drawing is very good).
But then, I have no idea how, but as soon as I have finished cutting it out, I realise that despite spending ages cutting carefully and looking back at the star above, I have randomly cut out a Star of David instead! WTF?
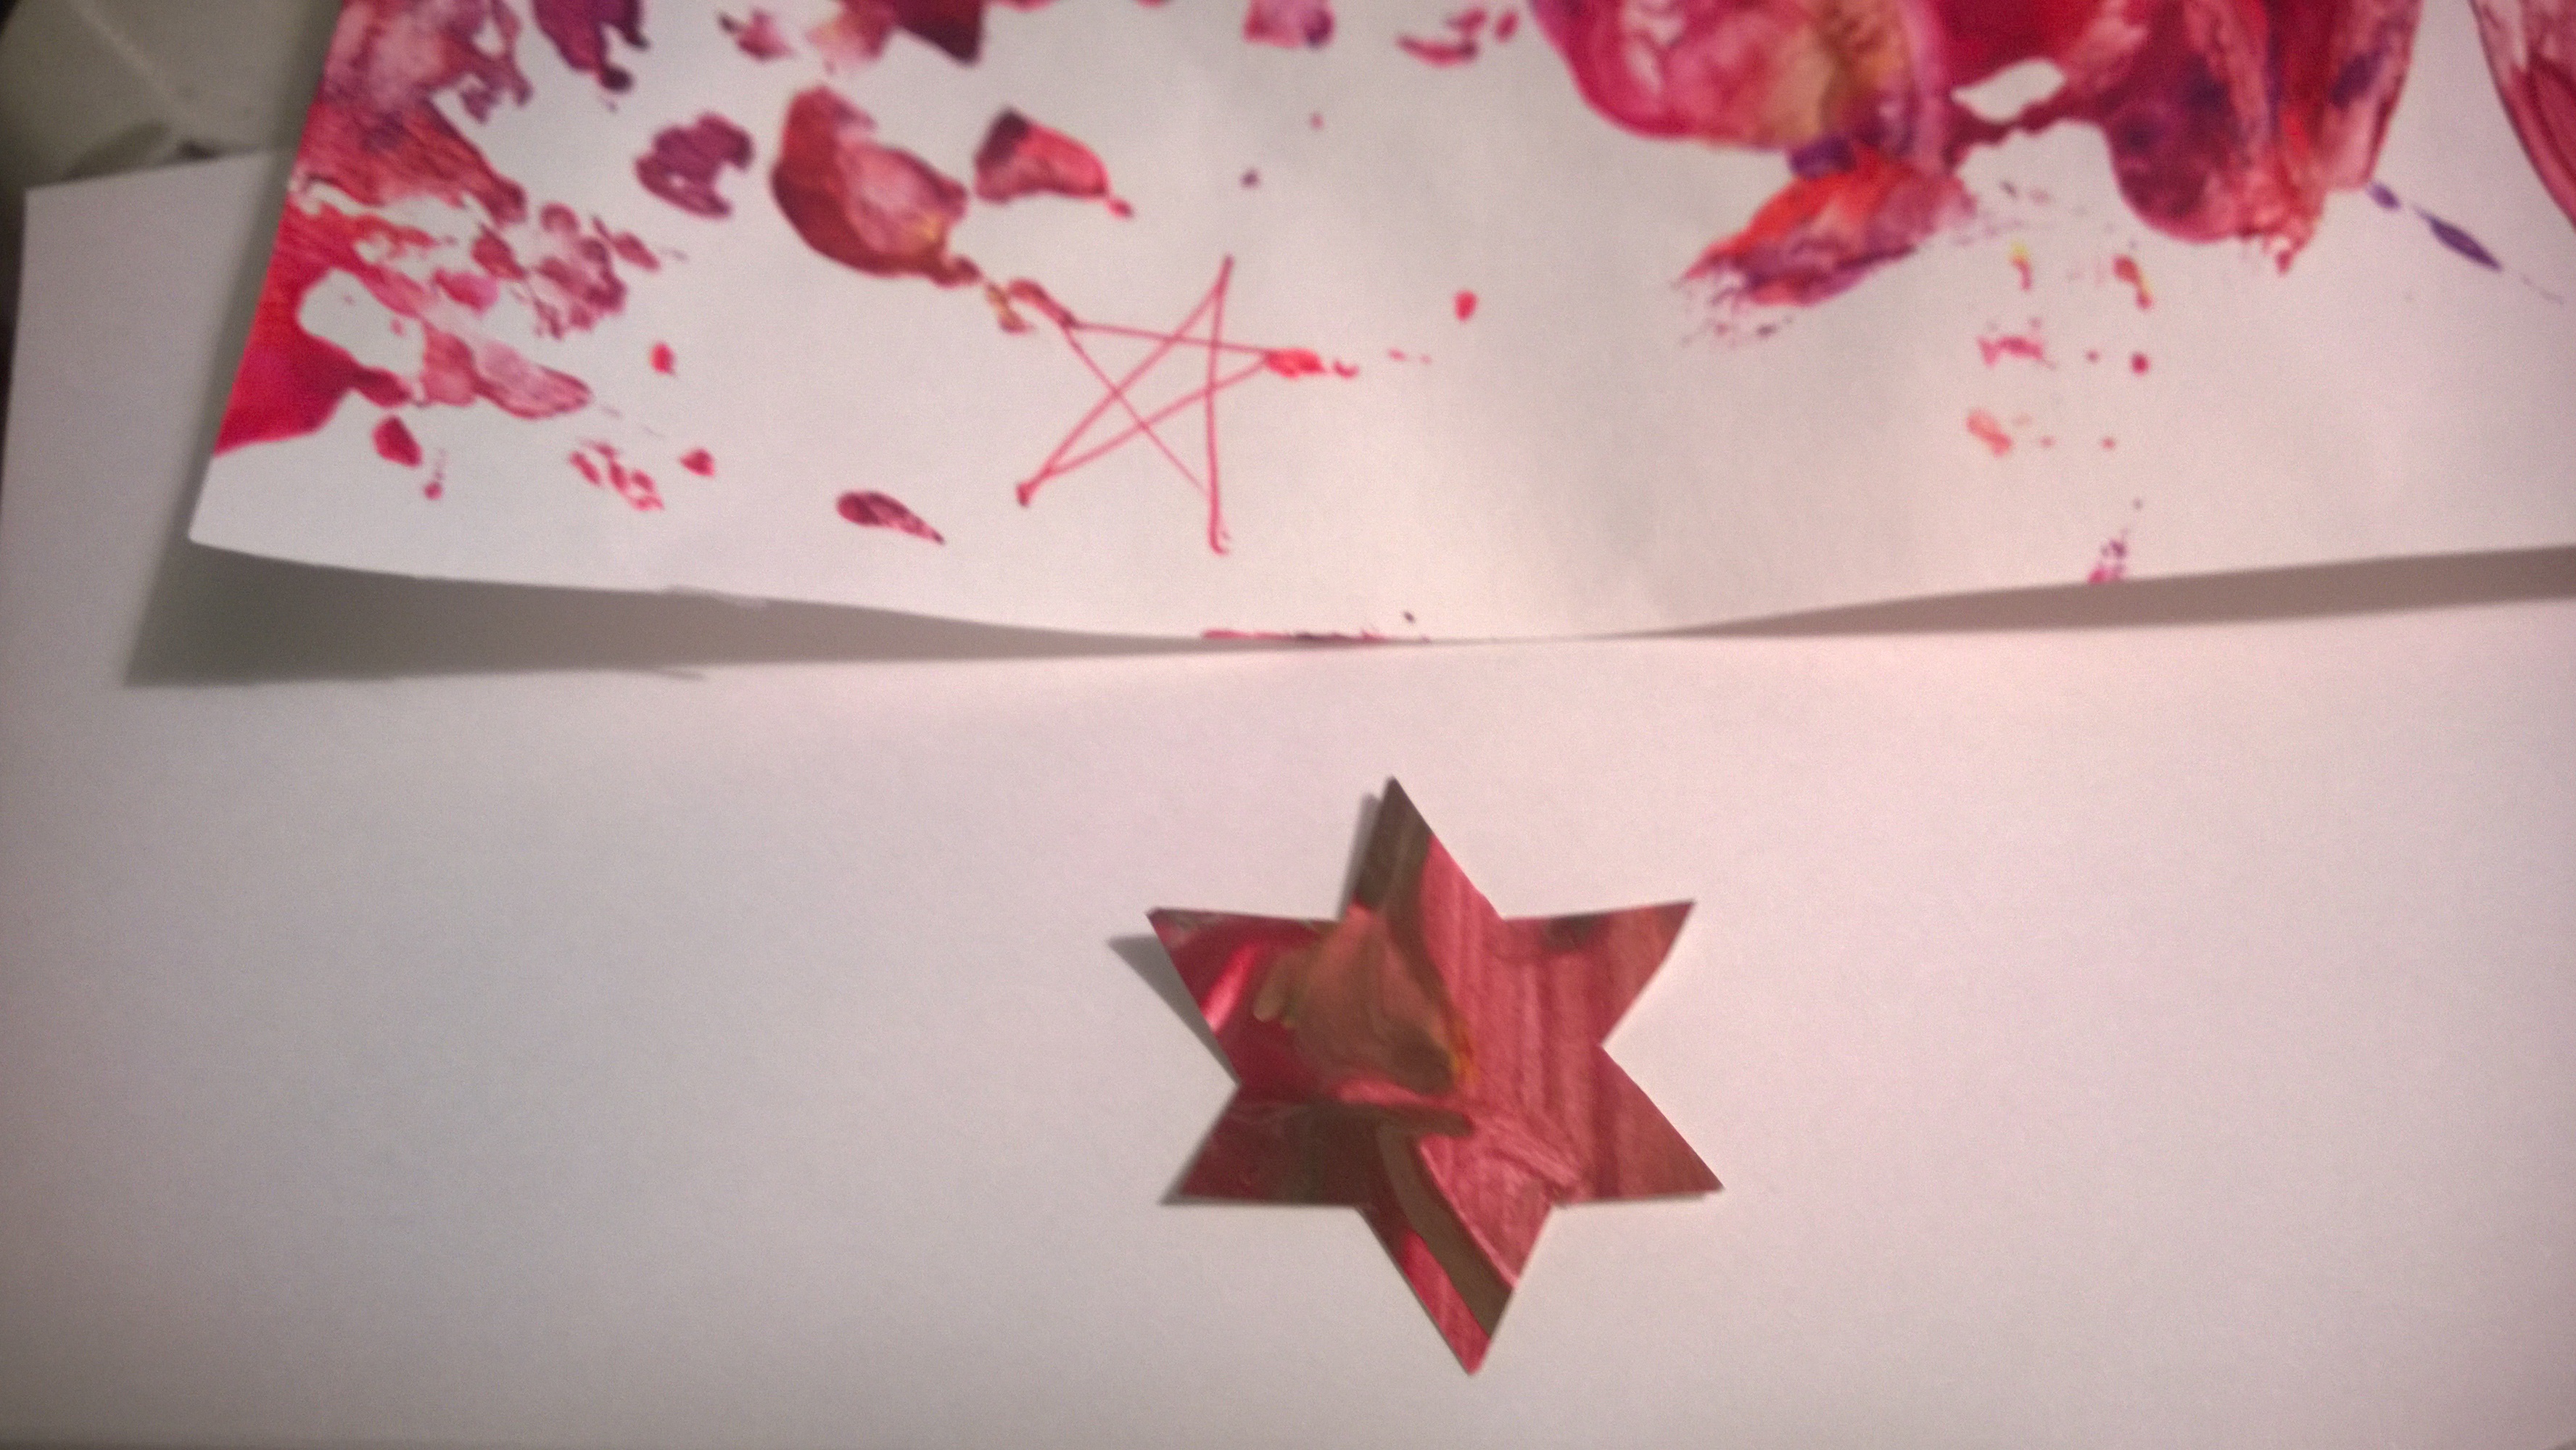 I mean how on earth do you accidentally cut out a 6 point star instead of a 5 point star? Hello?
Anyway, after several other tries later and a few swear words, I have something I’m happy enough with to go on the card.
So here it is. The finished card. Now, I know it’s not good, but I am just hoping Mummy can see that it was made with love, and see that it really took some effort (despite how random and slapdash it actually looks!).
 I hope you enjoyed the first Daddy Post. I promise not to come back too often – Mummy clearly has more skills on the blogging and Creative Challenge front than me – but this has been great fun to write and to share my little attempt at creativity!

Making Granny’s Birthday Card
It was Granny’s 60th Birthday on Saturday! I had been hunting for a lovely card but honestly really struggled to like one that was special enough. A lot of the ones I saw in the shops were a bit naff really. I saw a couple of lovely handmade ones online but honestly they were so expensive and actually inspired me to make my own!
I do enjoy being a bit creative, I made all of our wedding invites and thank you cards etc. so it’s not the first time I have made a card, BUT I thought I would get Monkey’s help. After the disaster that was the Valentine’s cards we tried to make, I thought I would keep his role a little simpler and in the realms of something I know he loves to do… paint! 🙂
It’s also worth mentioning at this point that my decision to create this card comes in no small part from being so inspired by so many of my fellow creative challengers! In particular Lorna from A little bit of our life and all of her various crafty offerings, and Michelle at Twice a Mummy Double the Fun with her finger painted easter activities!
S0 we started off with some finger painting! Ages ago I’d bought some paint pots that were in some nice pinky colours (Granny loves her pretty girly colours) so we used those. They are such a mash of colours now as monkey likes dipping from one to another! Squeezy bottles of paint squirted onto paper plates is definitely a better method of toddler painting!!
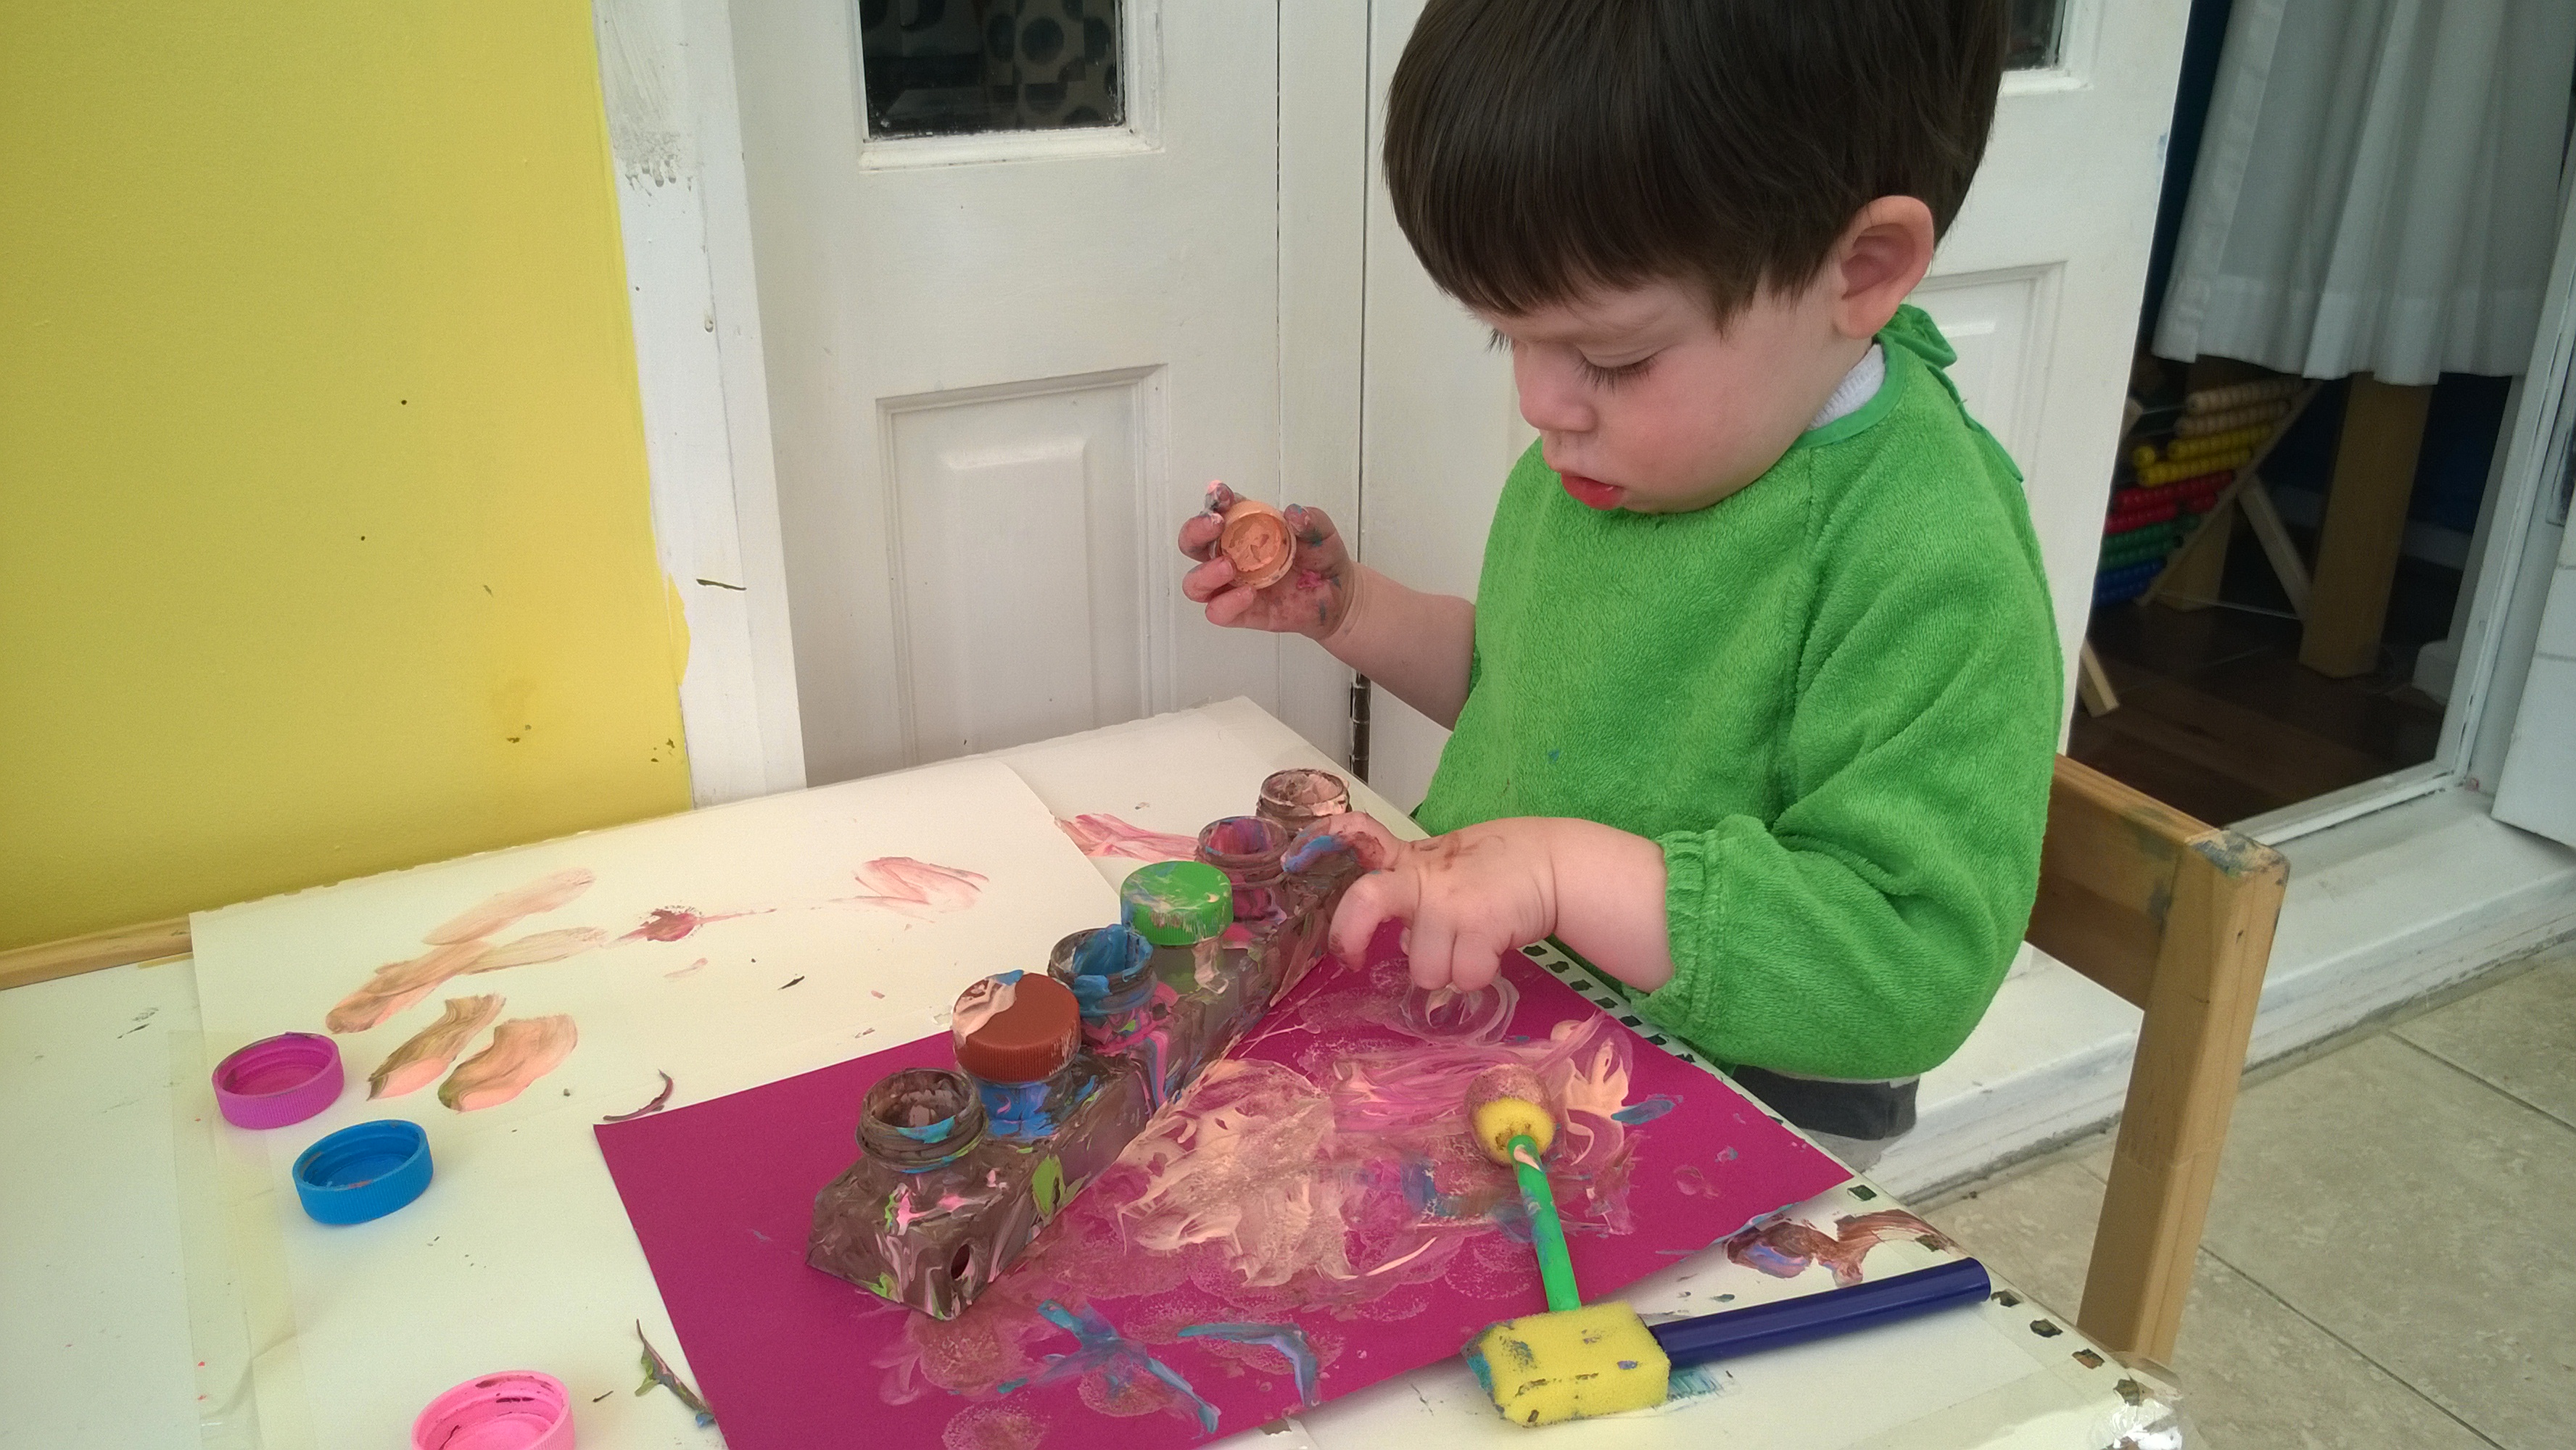
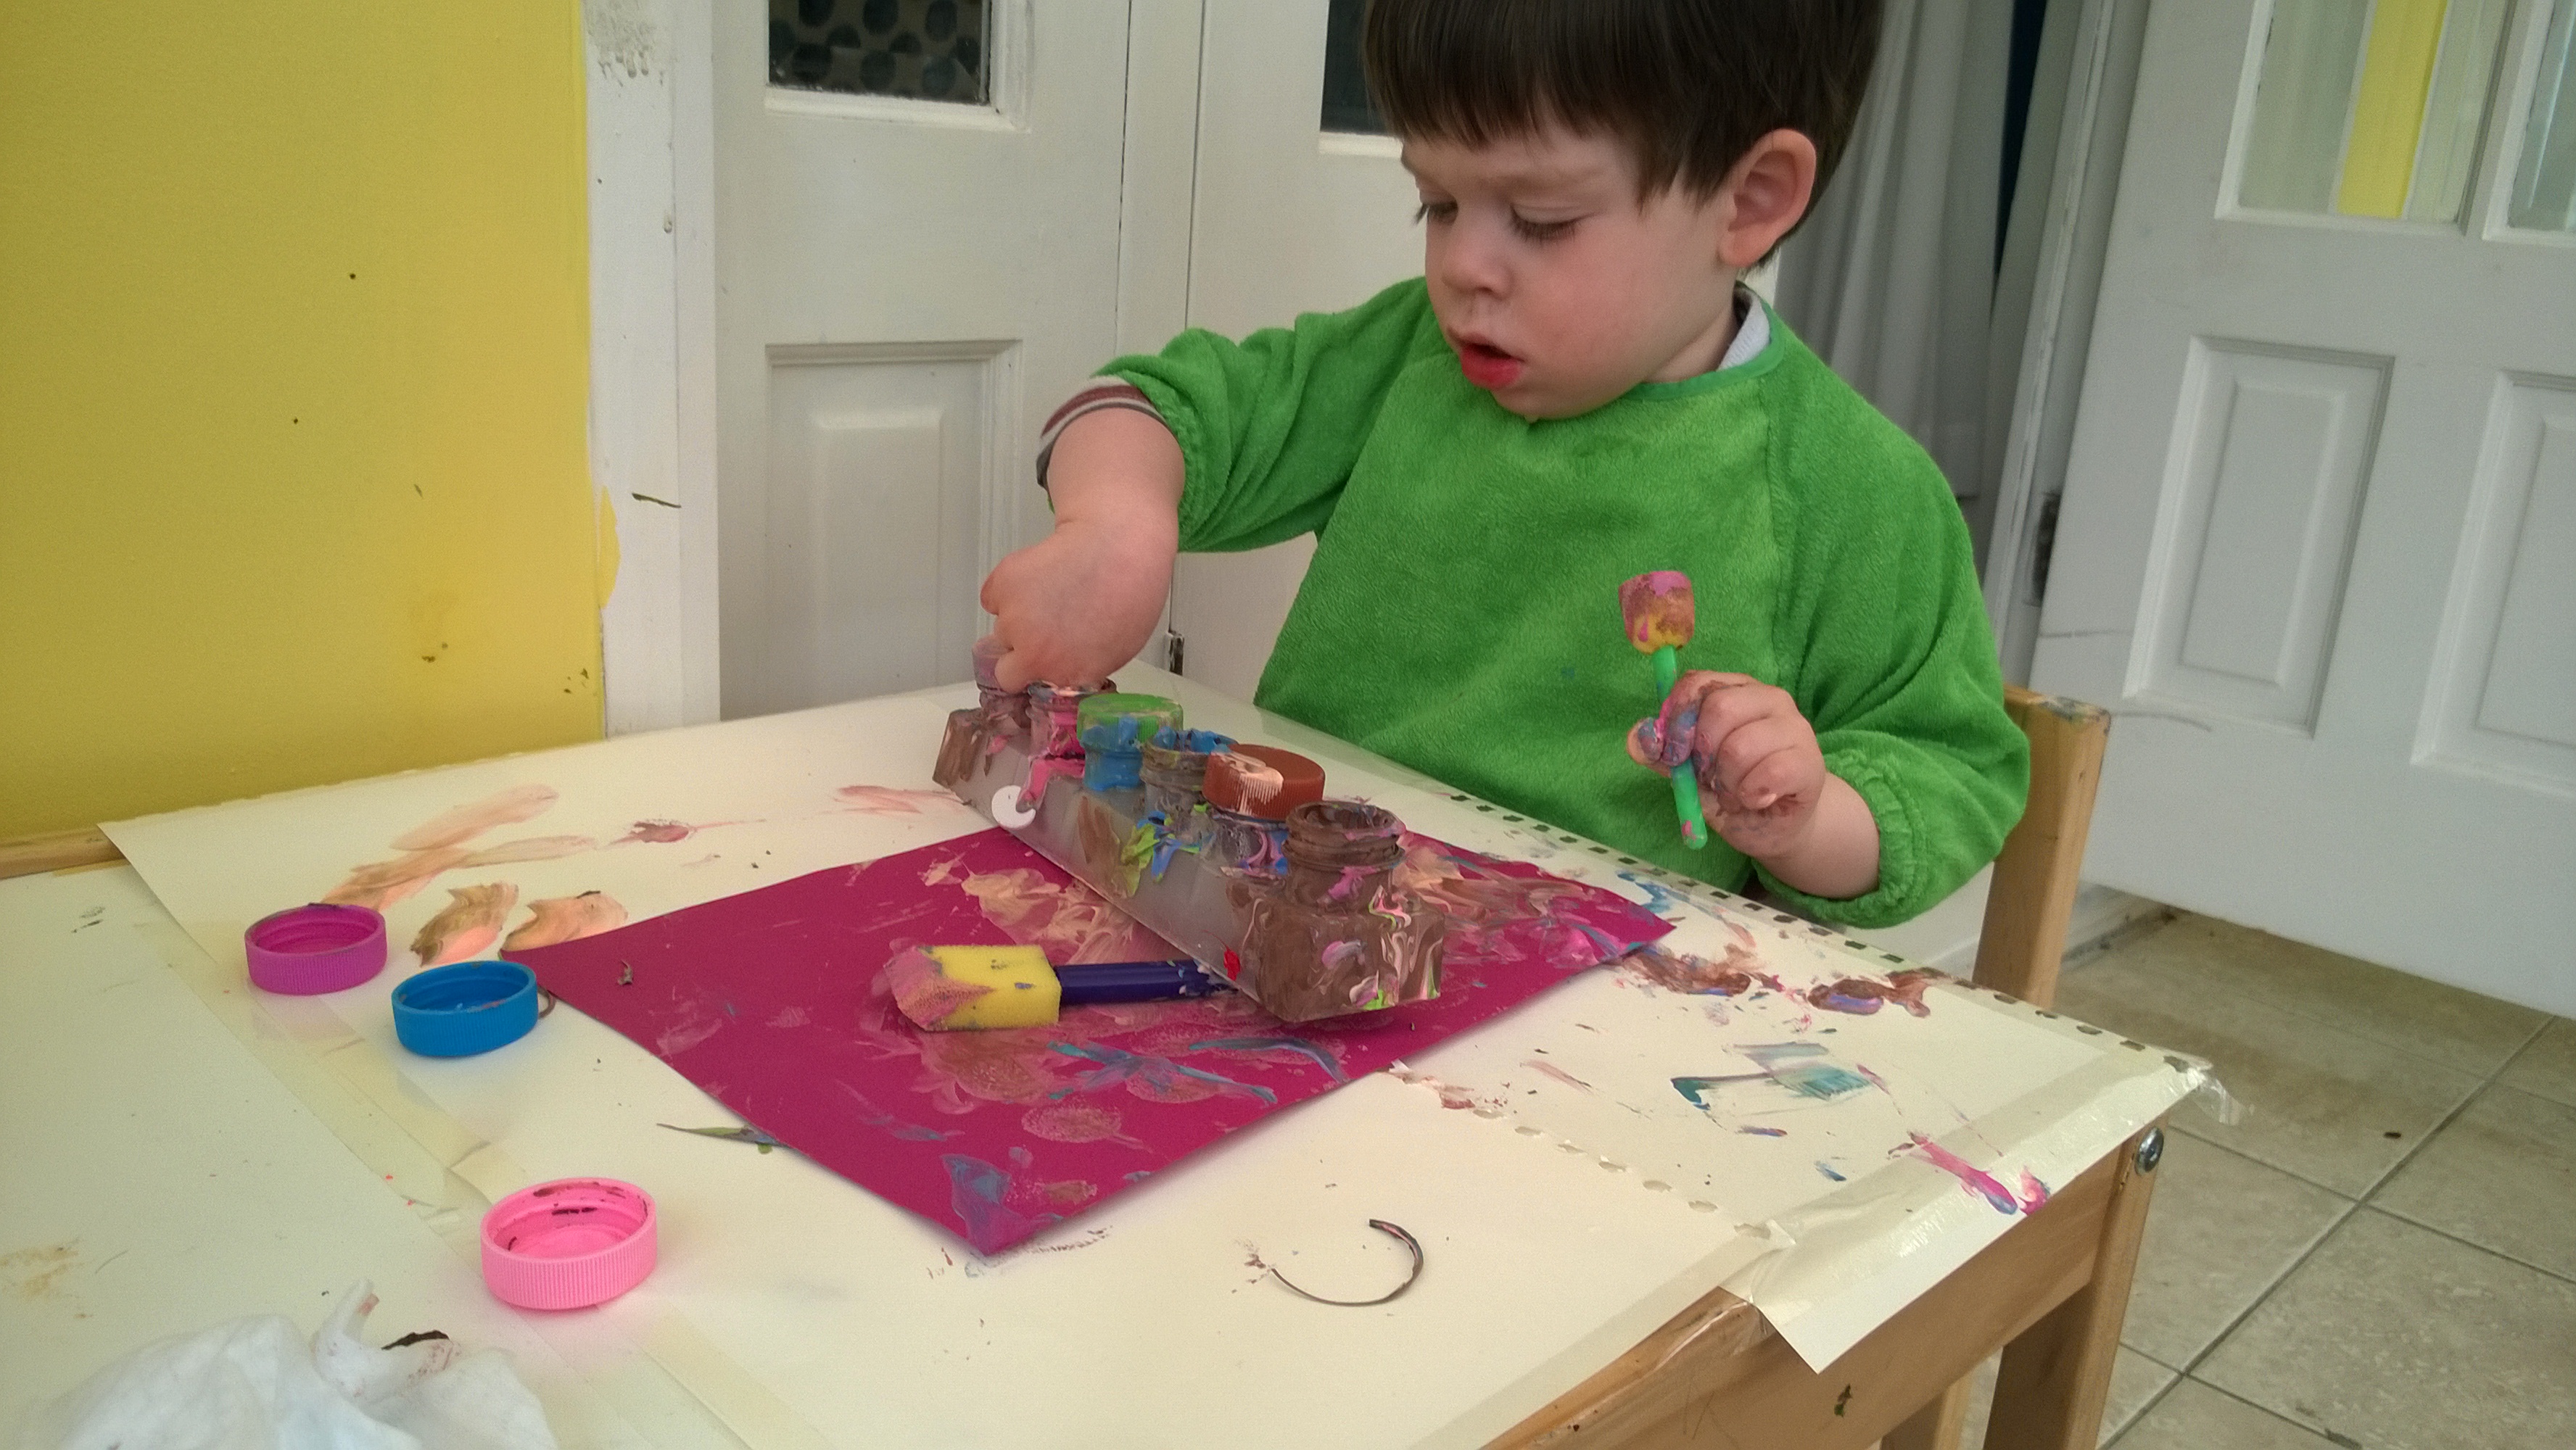
It went well though and he had a lot of fun.
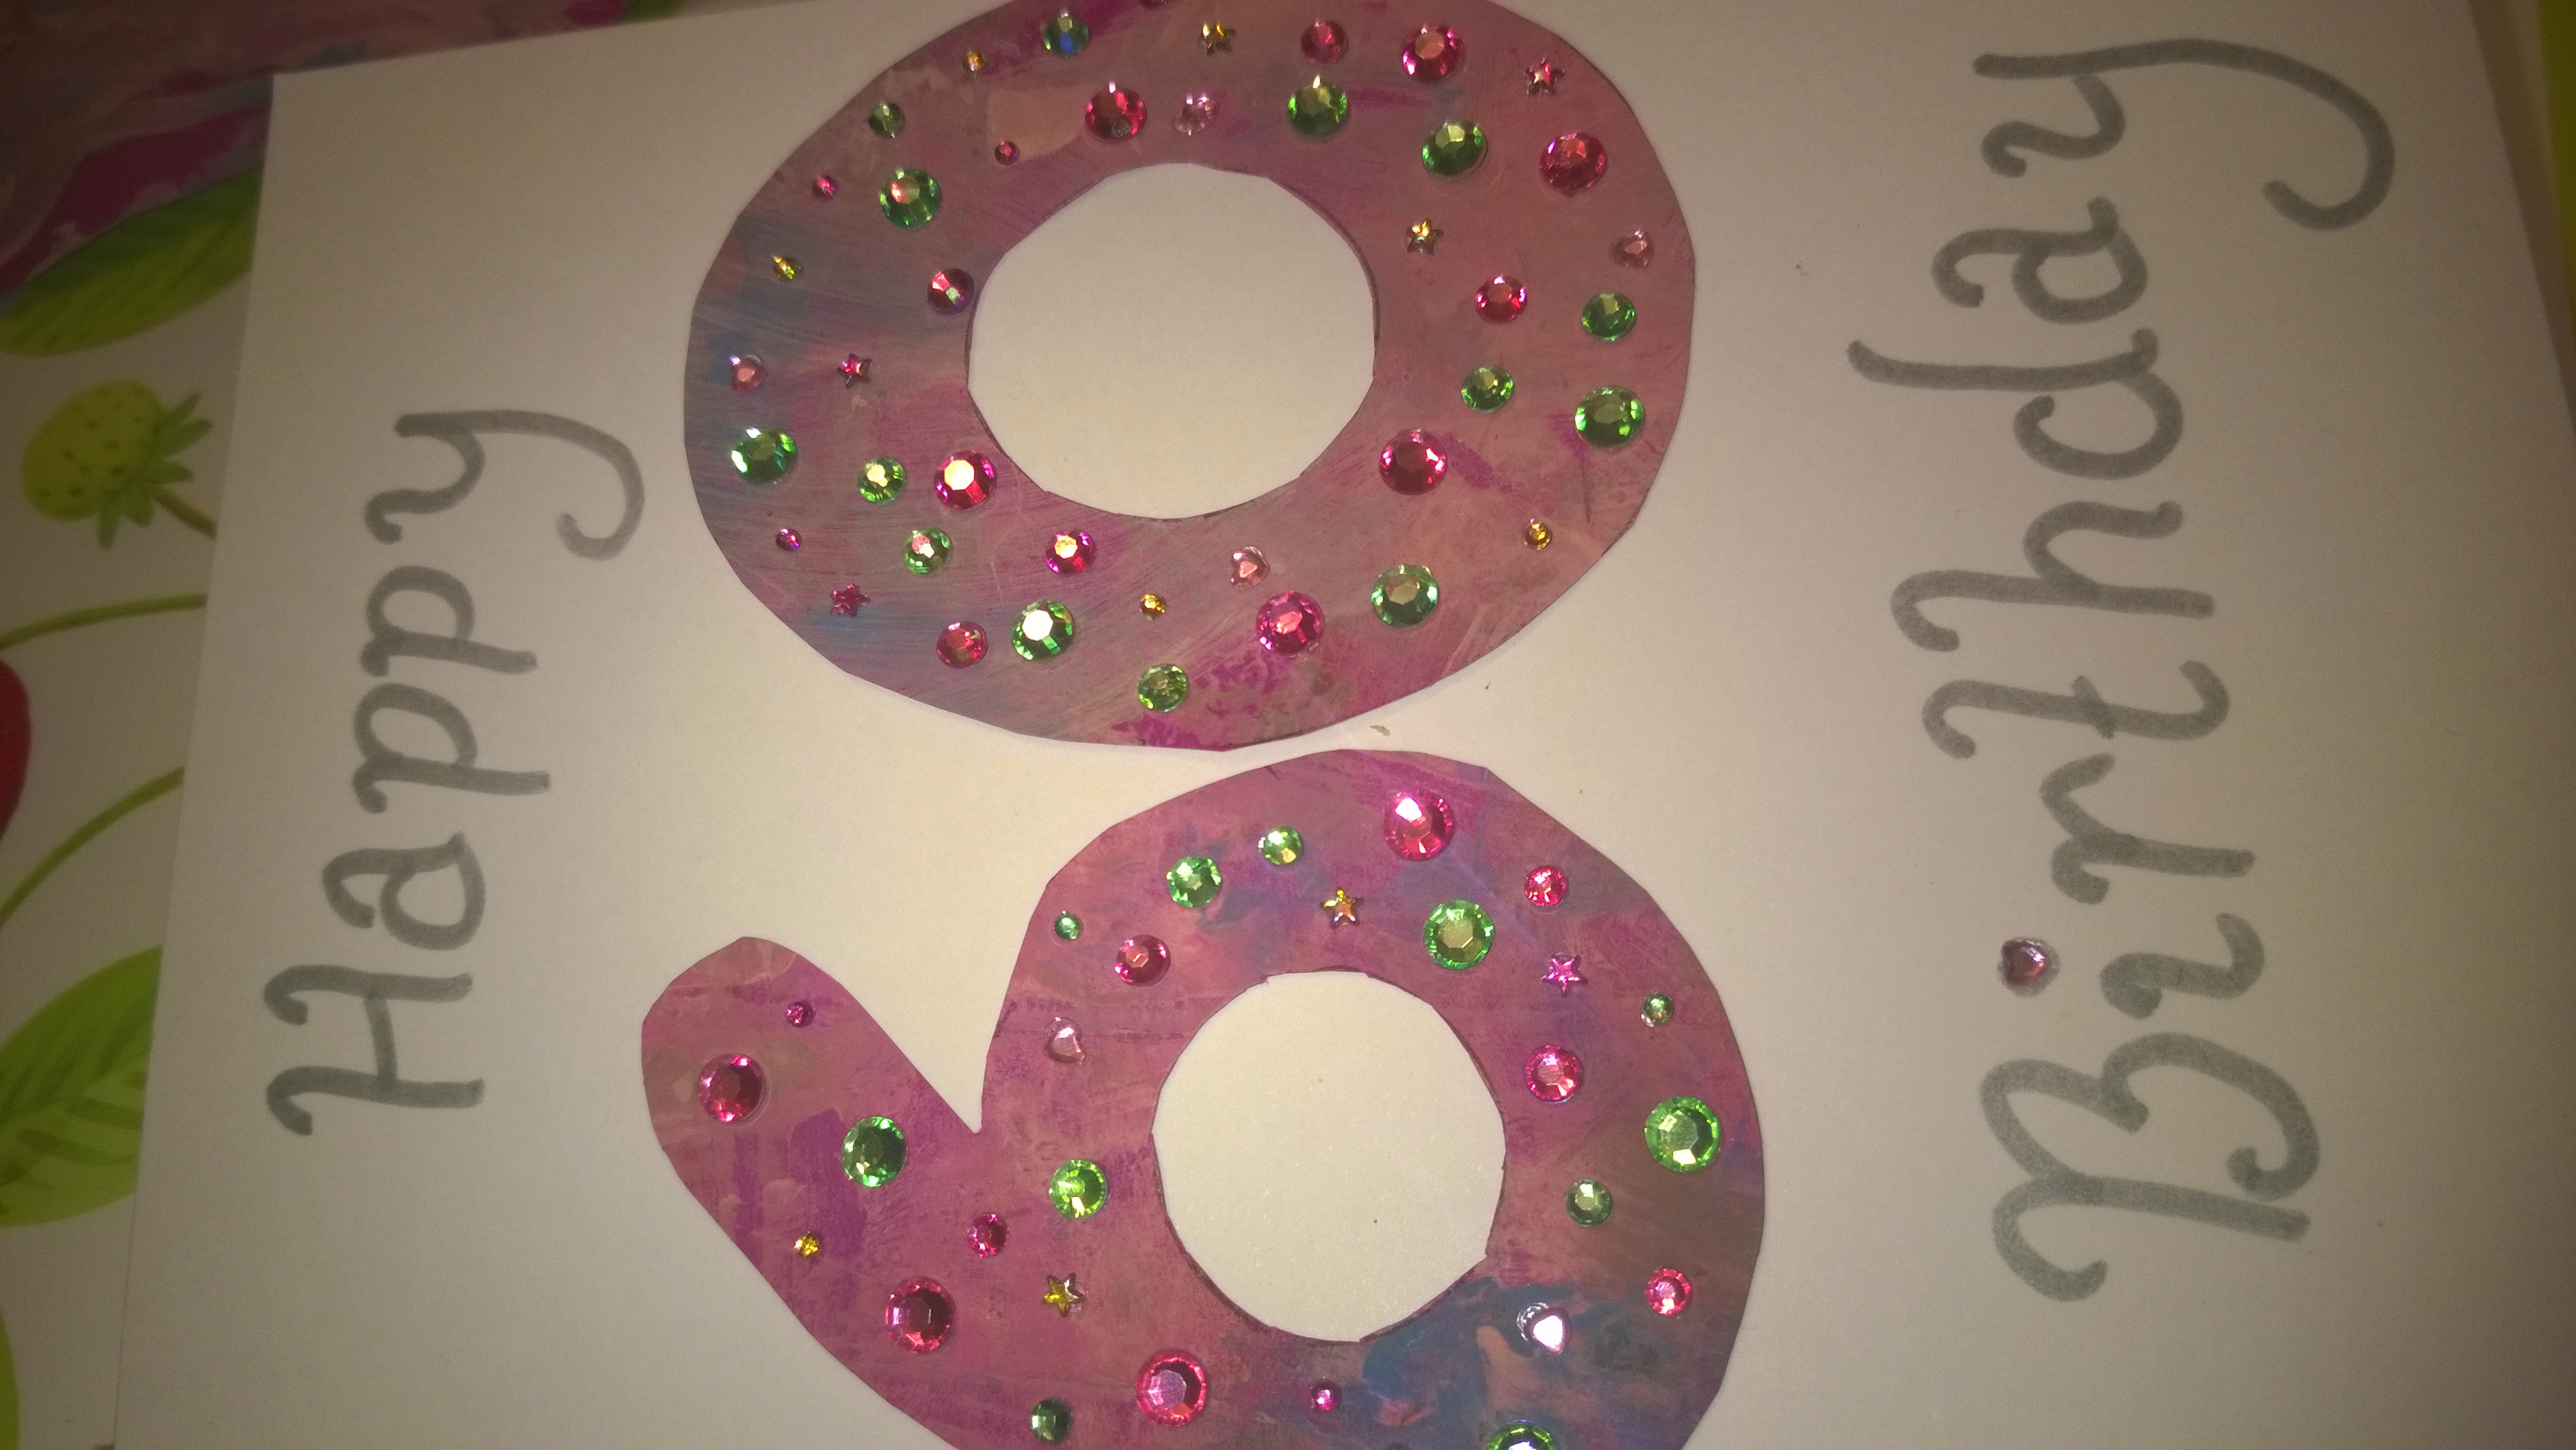
Then I cut a 6 and 0 from his artwork to pop onto the card.
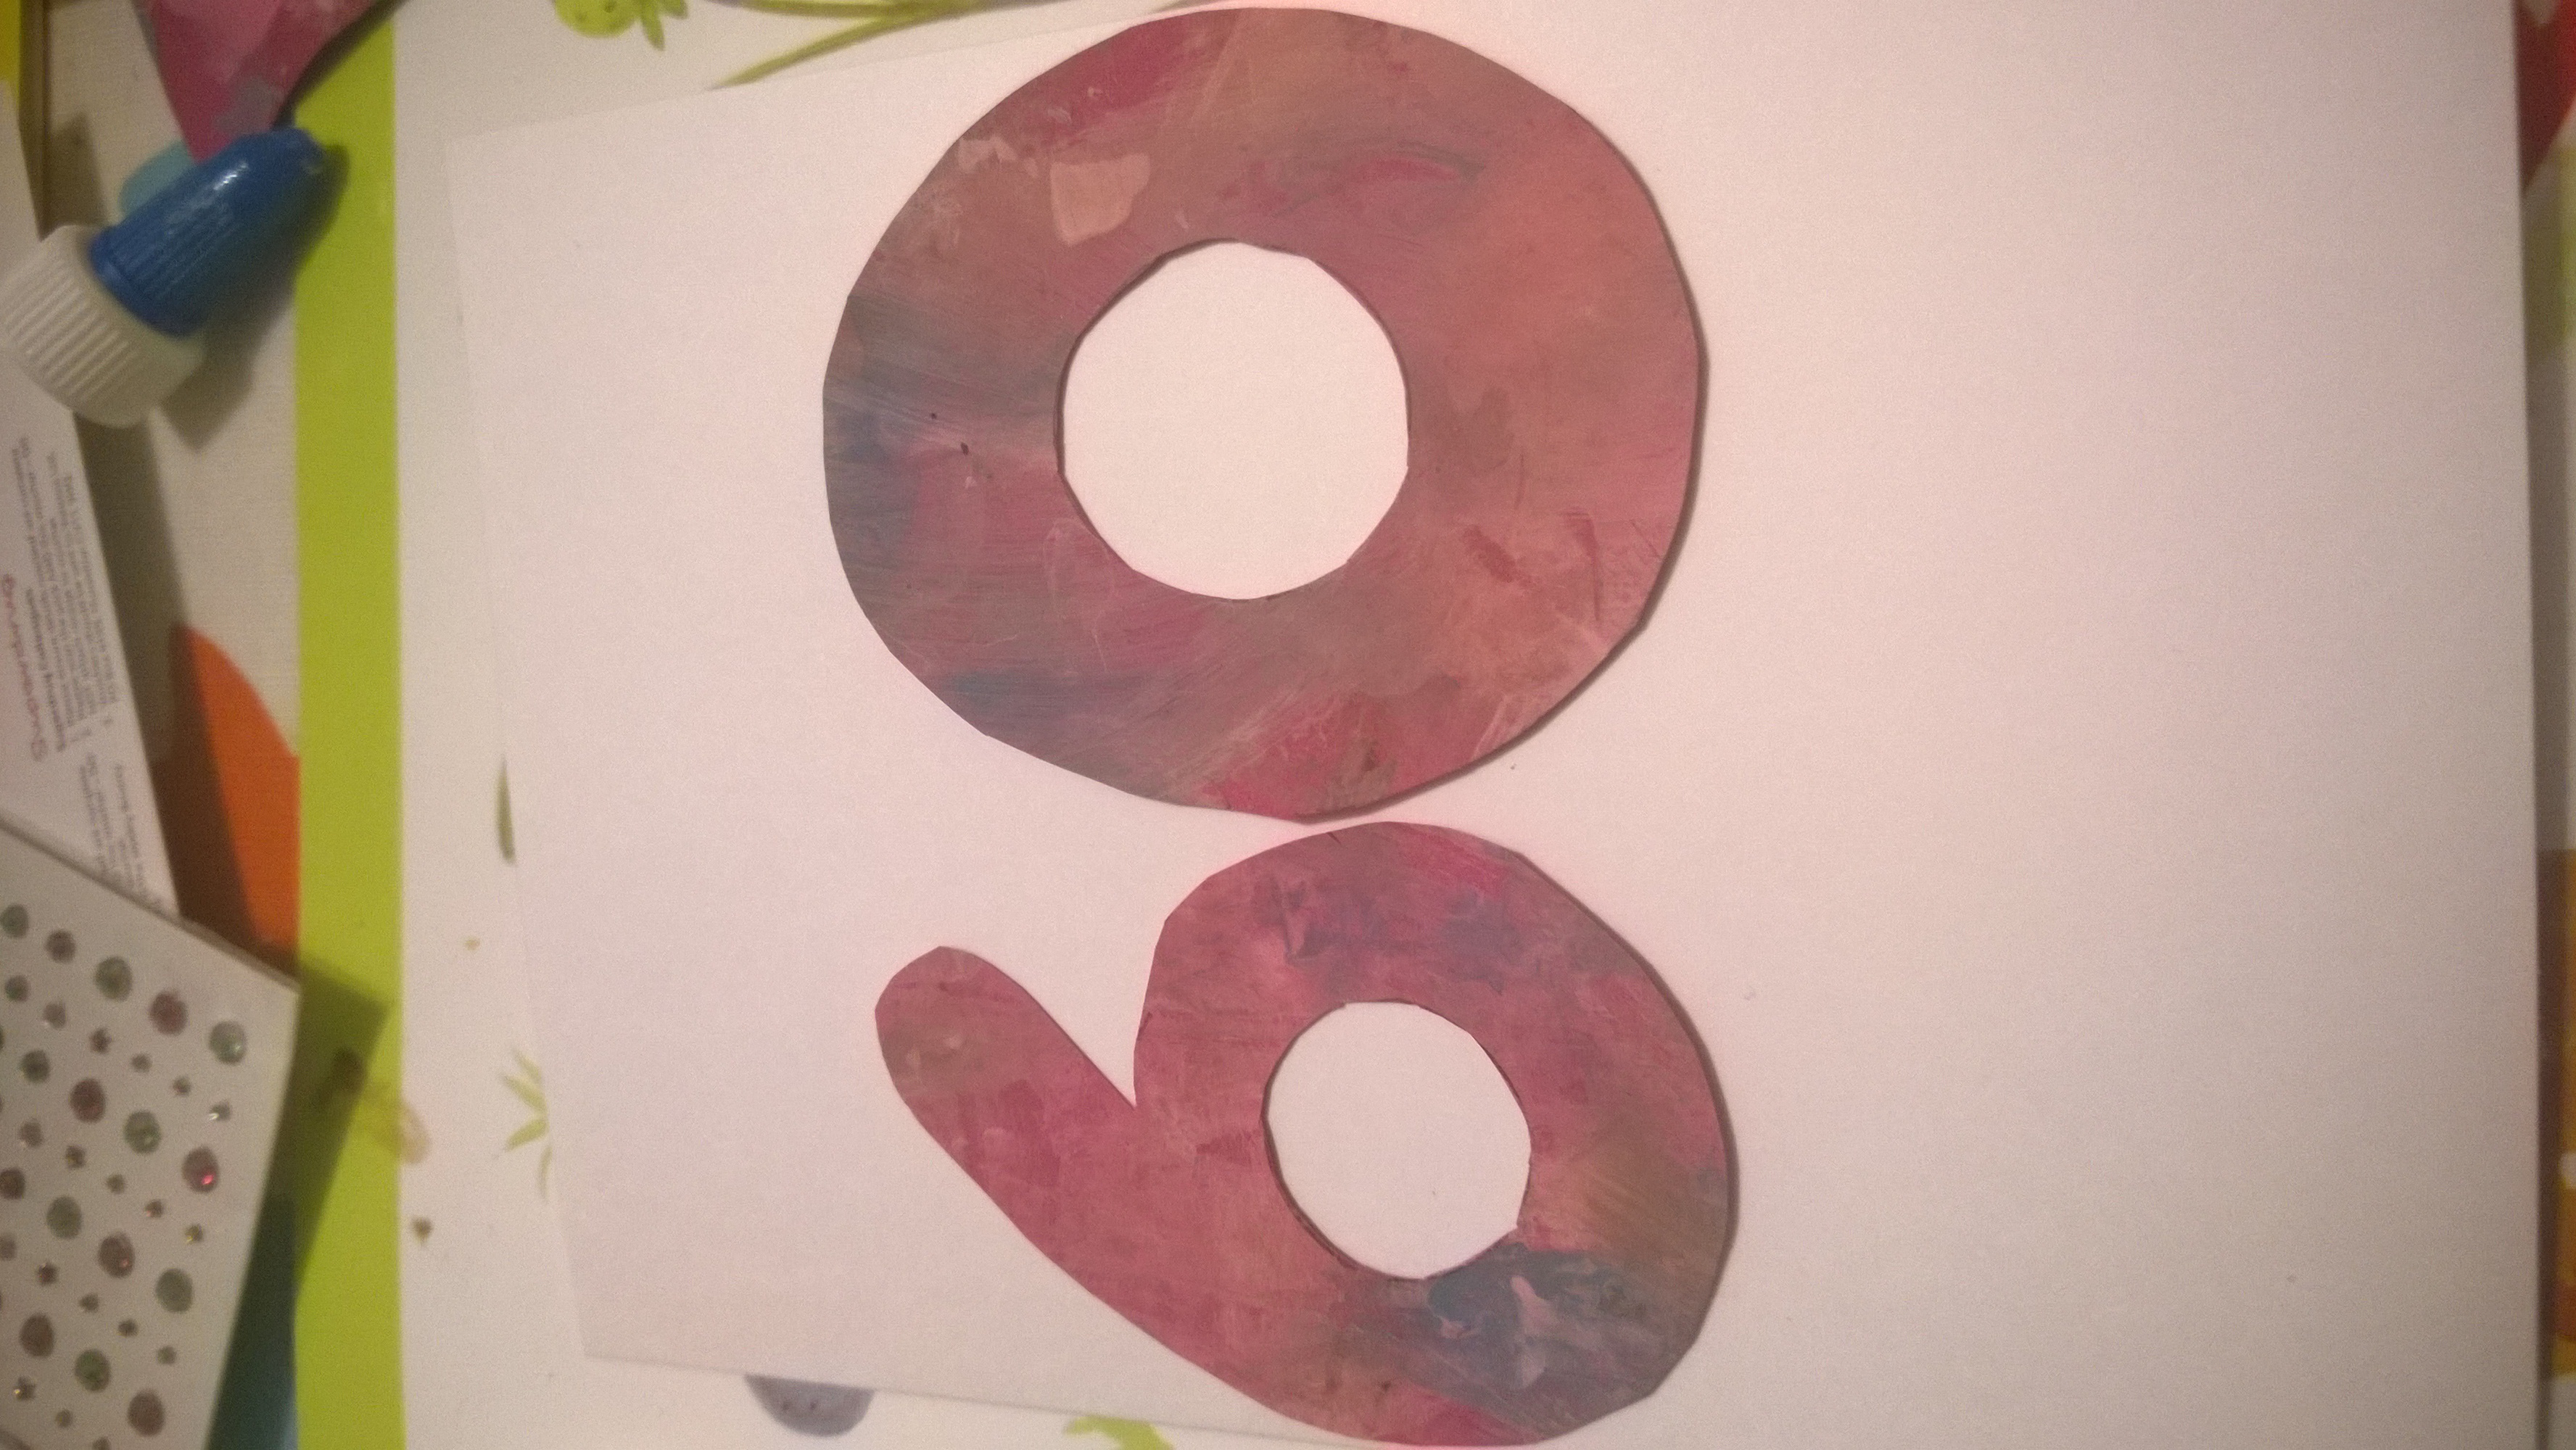
I’d also bought some lovely sparkly stickers to make it a bit more special!
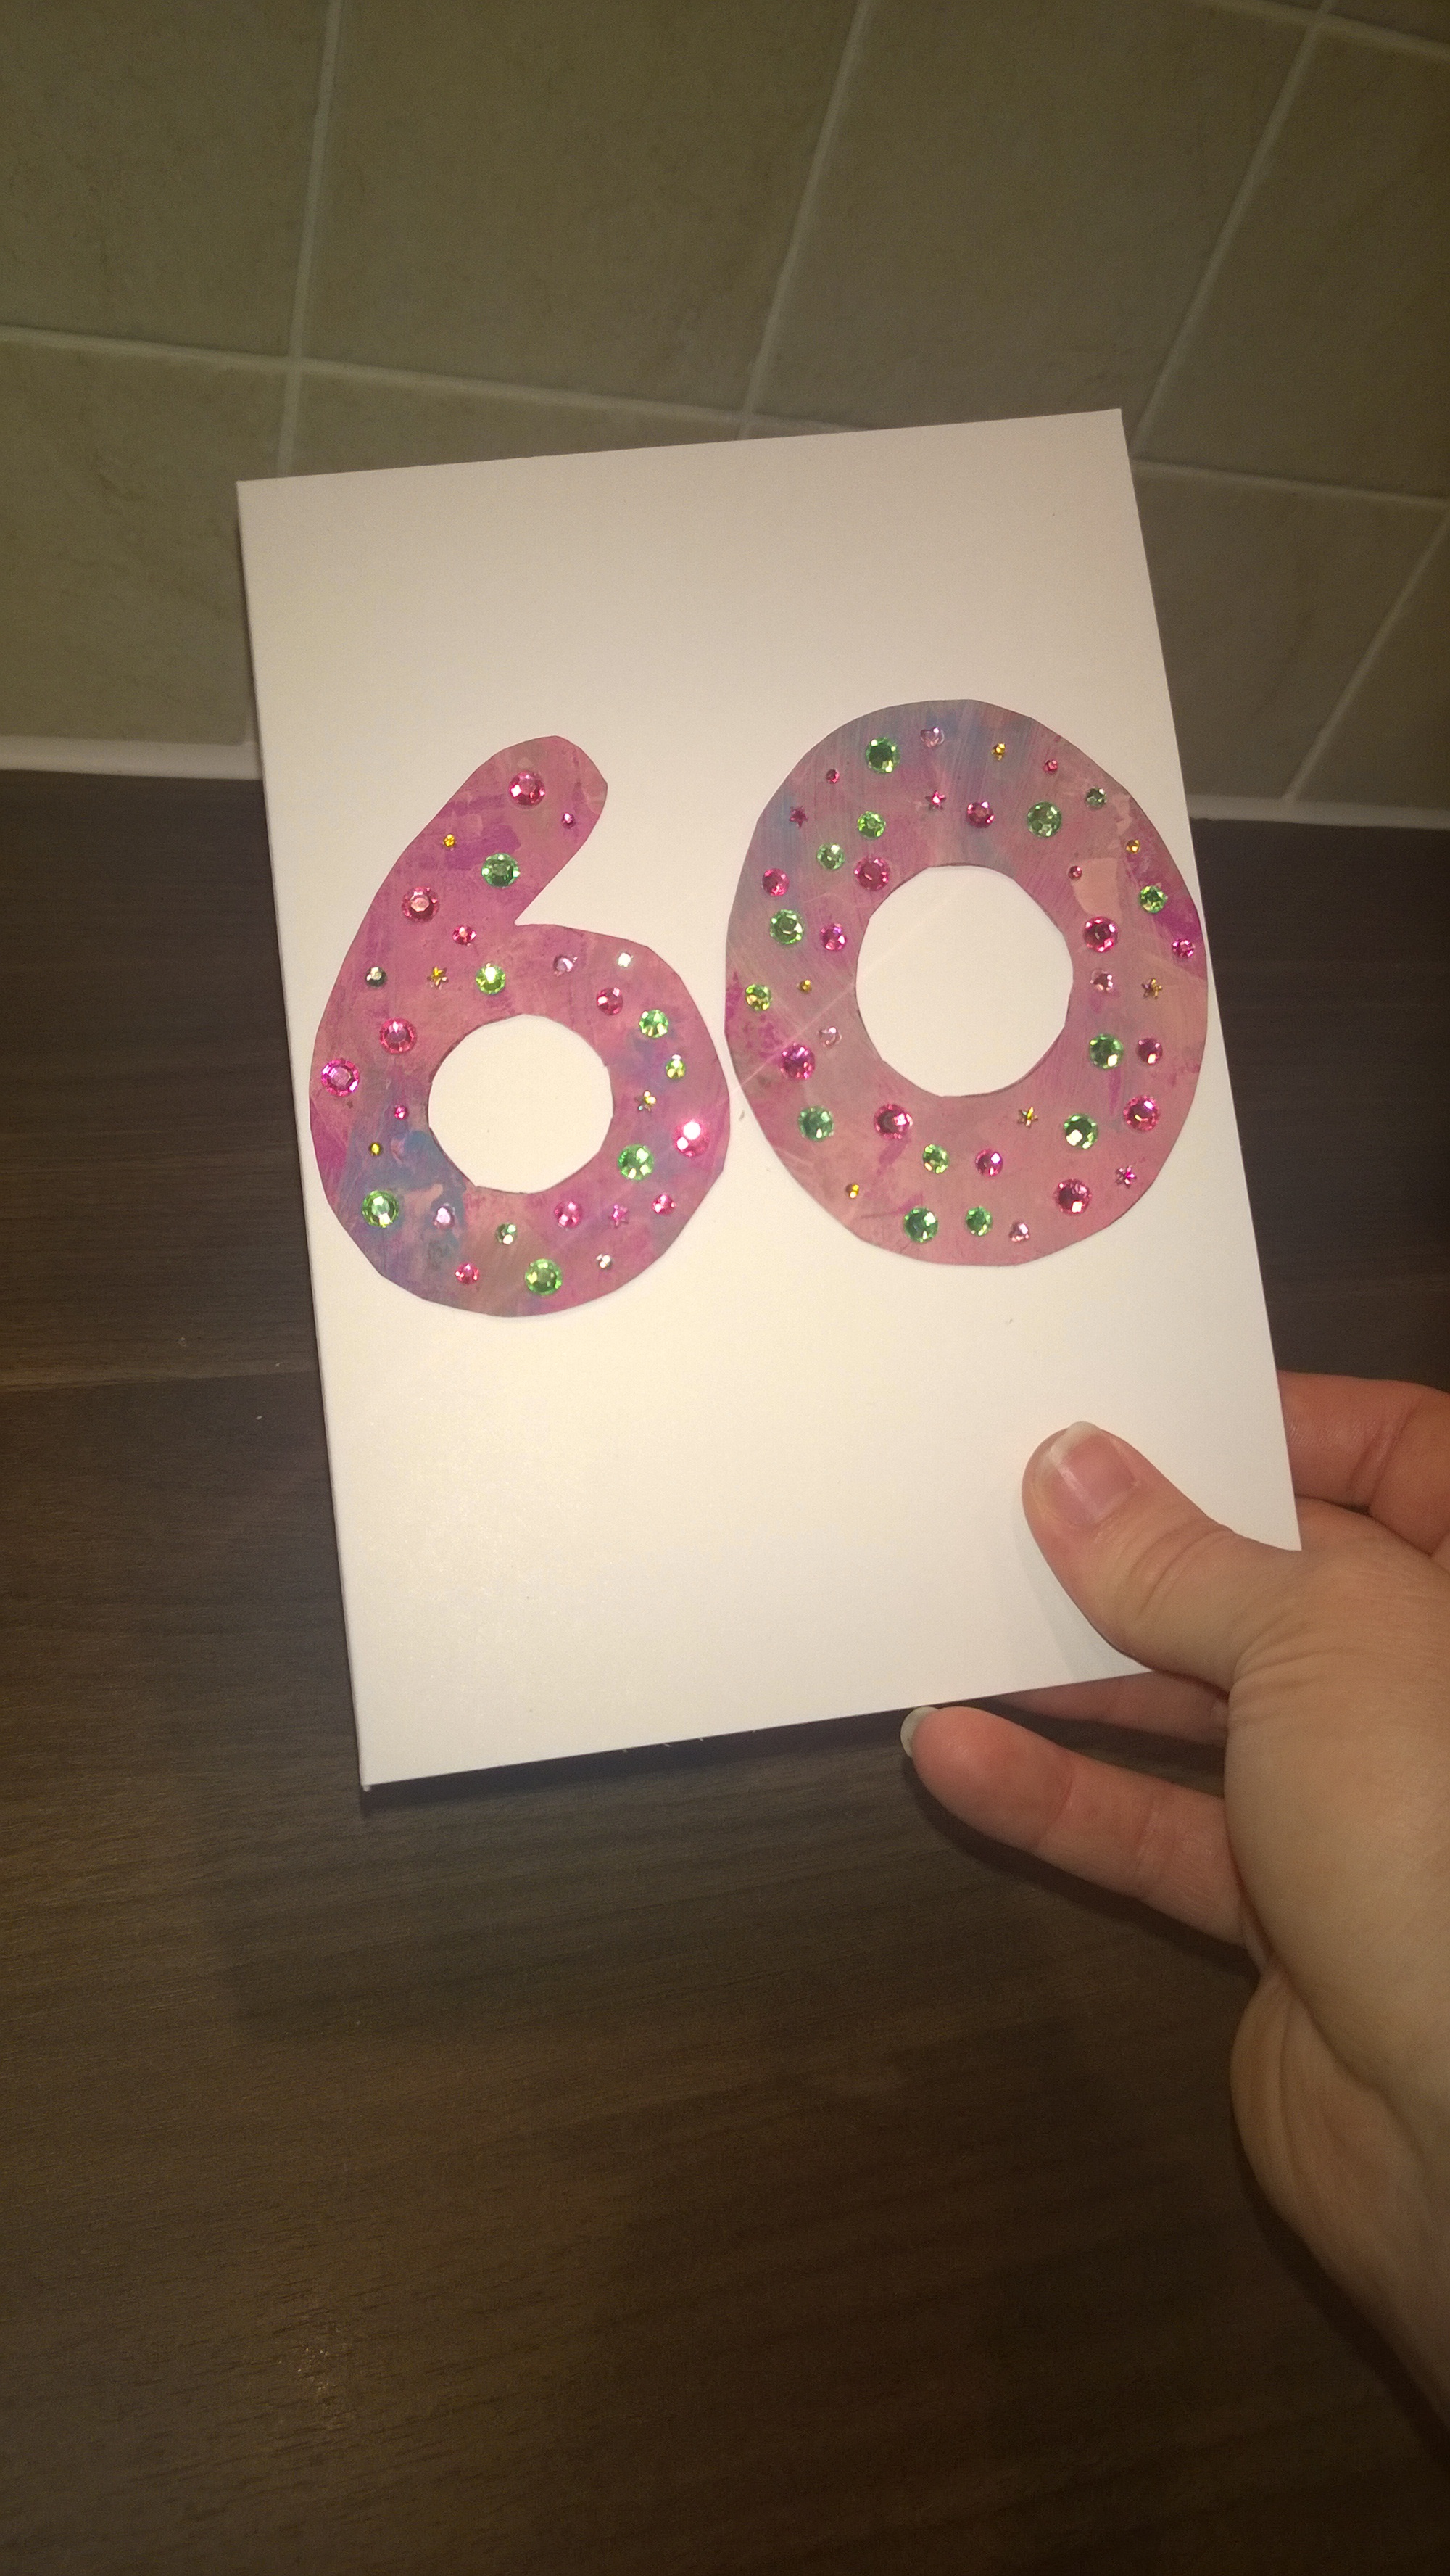
An with a bit of fancy ish writing (I know I am no calligrapher!) it was finished!
I’d also bought some lovely special birthday teddy stickers and Monkey made a lovely picture for Granny with those too 🙂
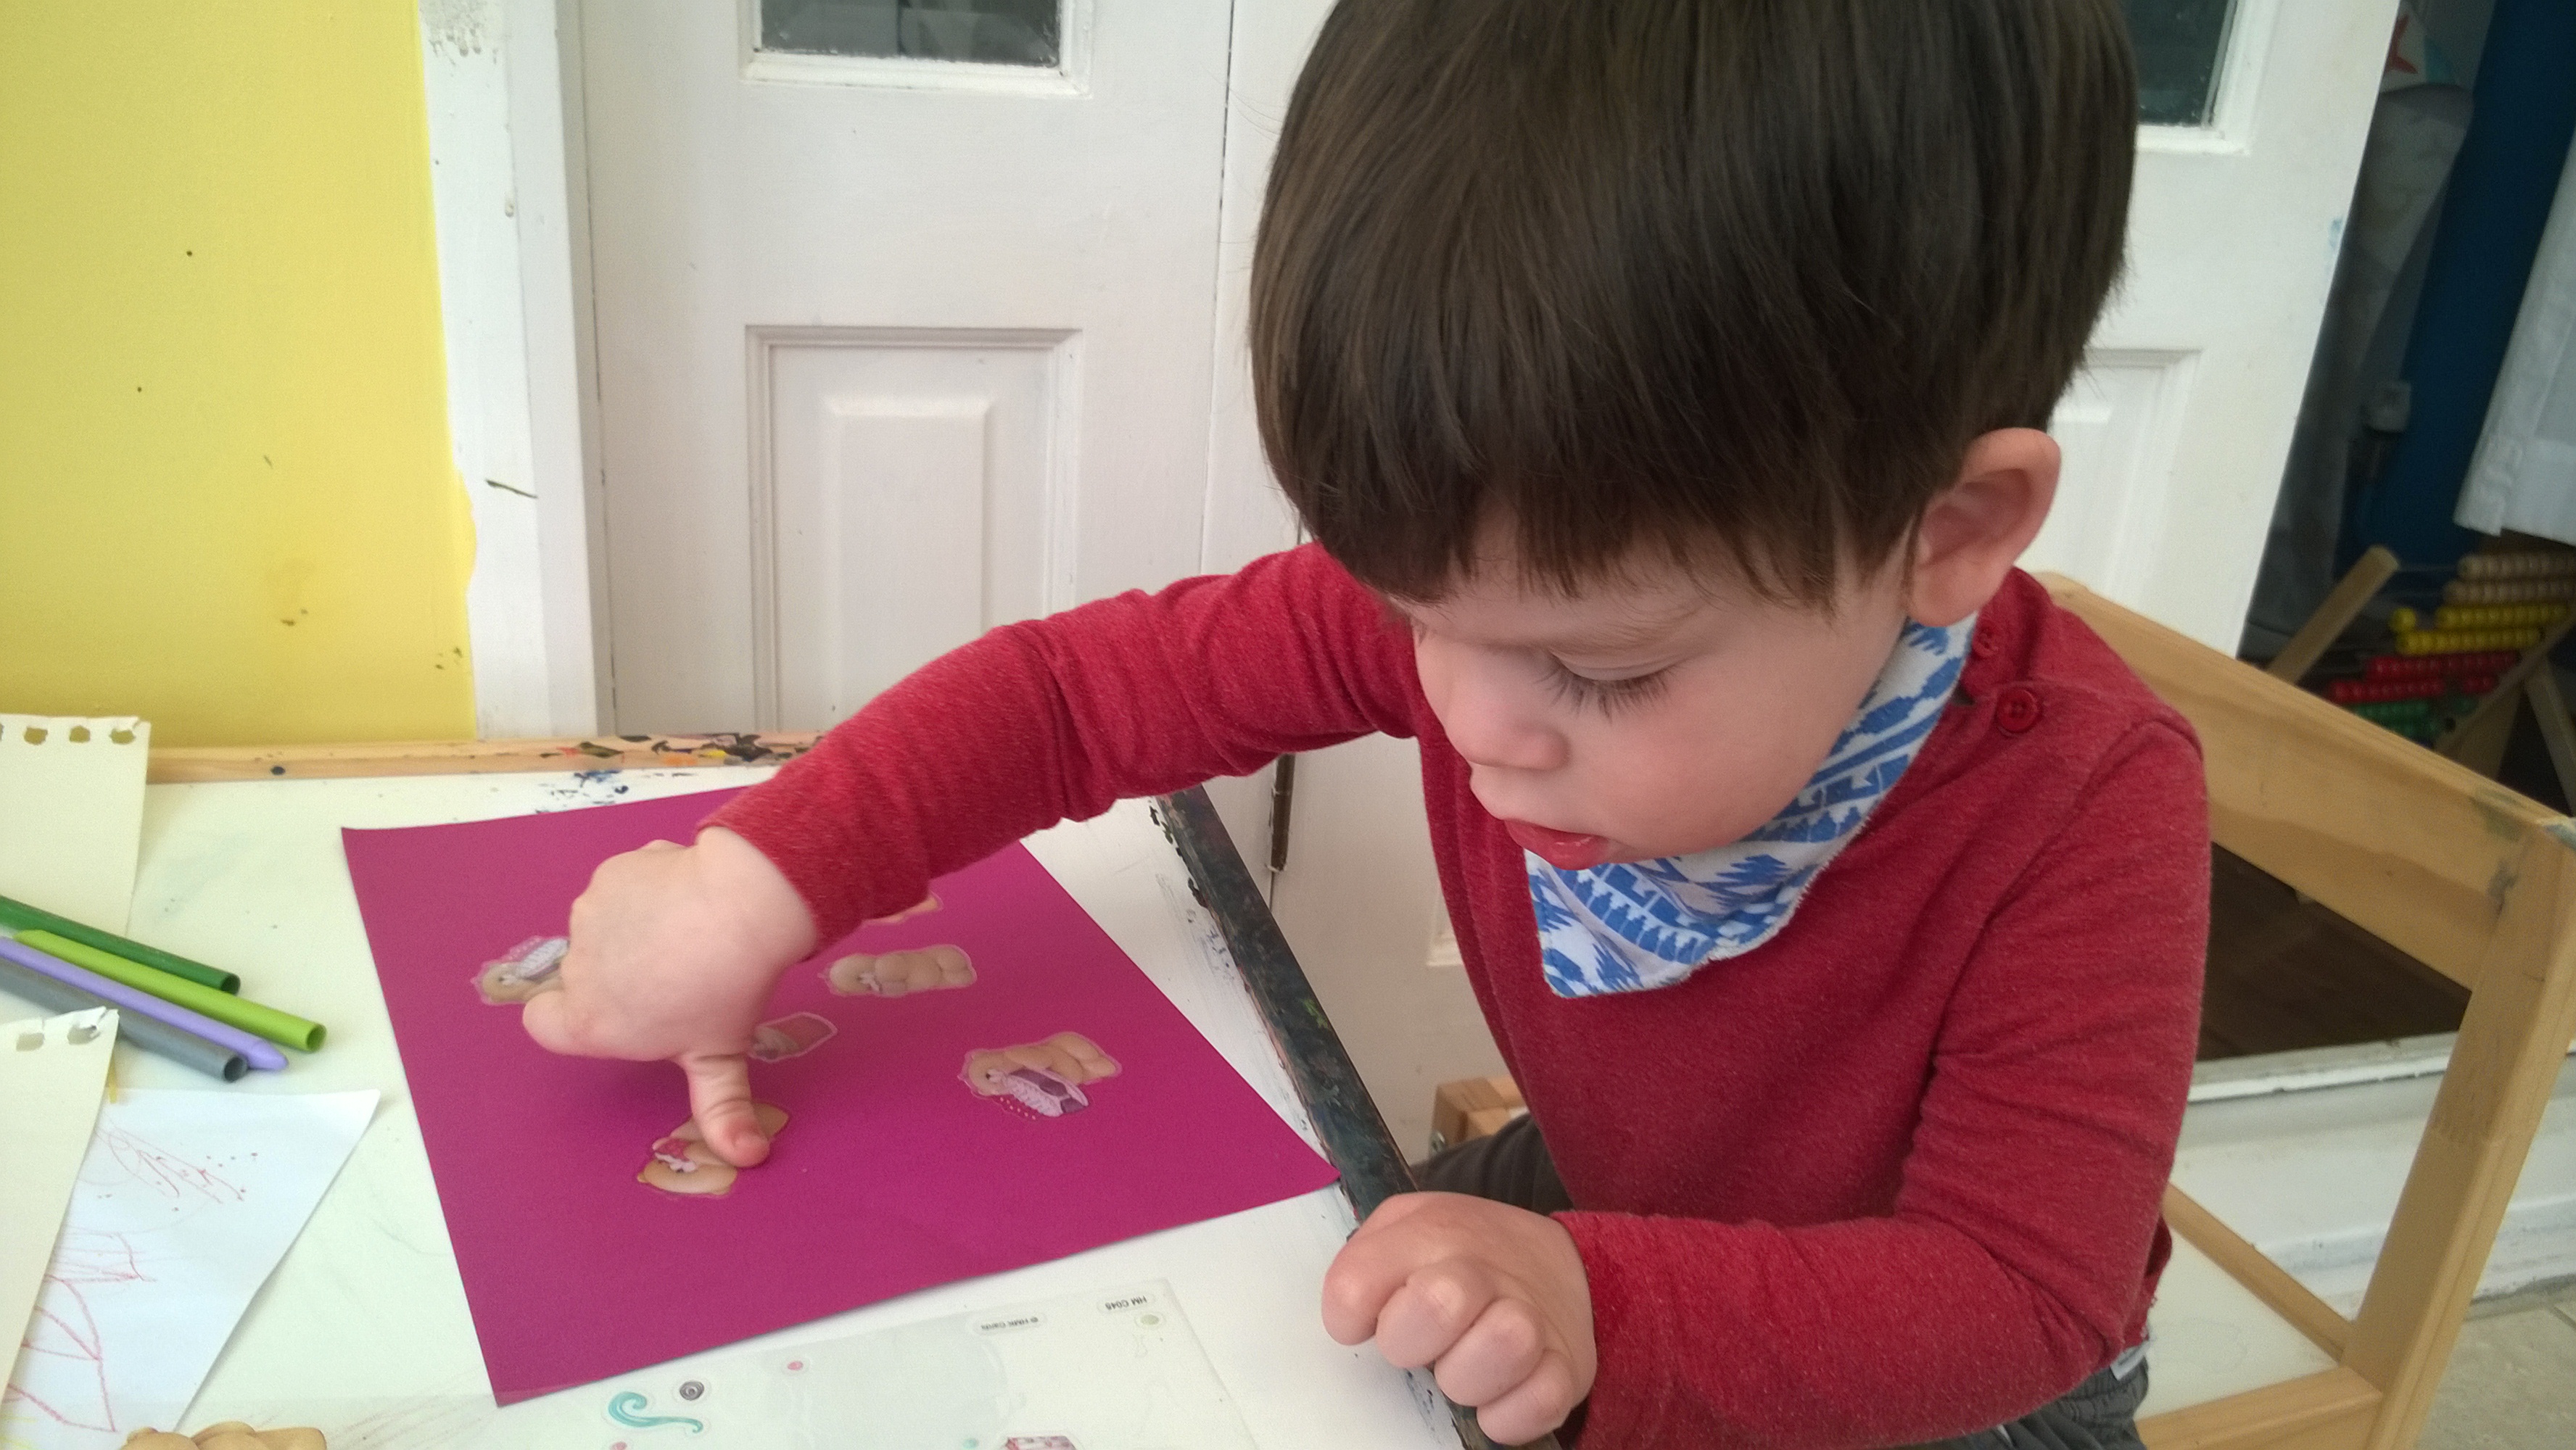
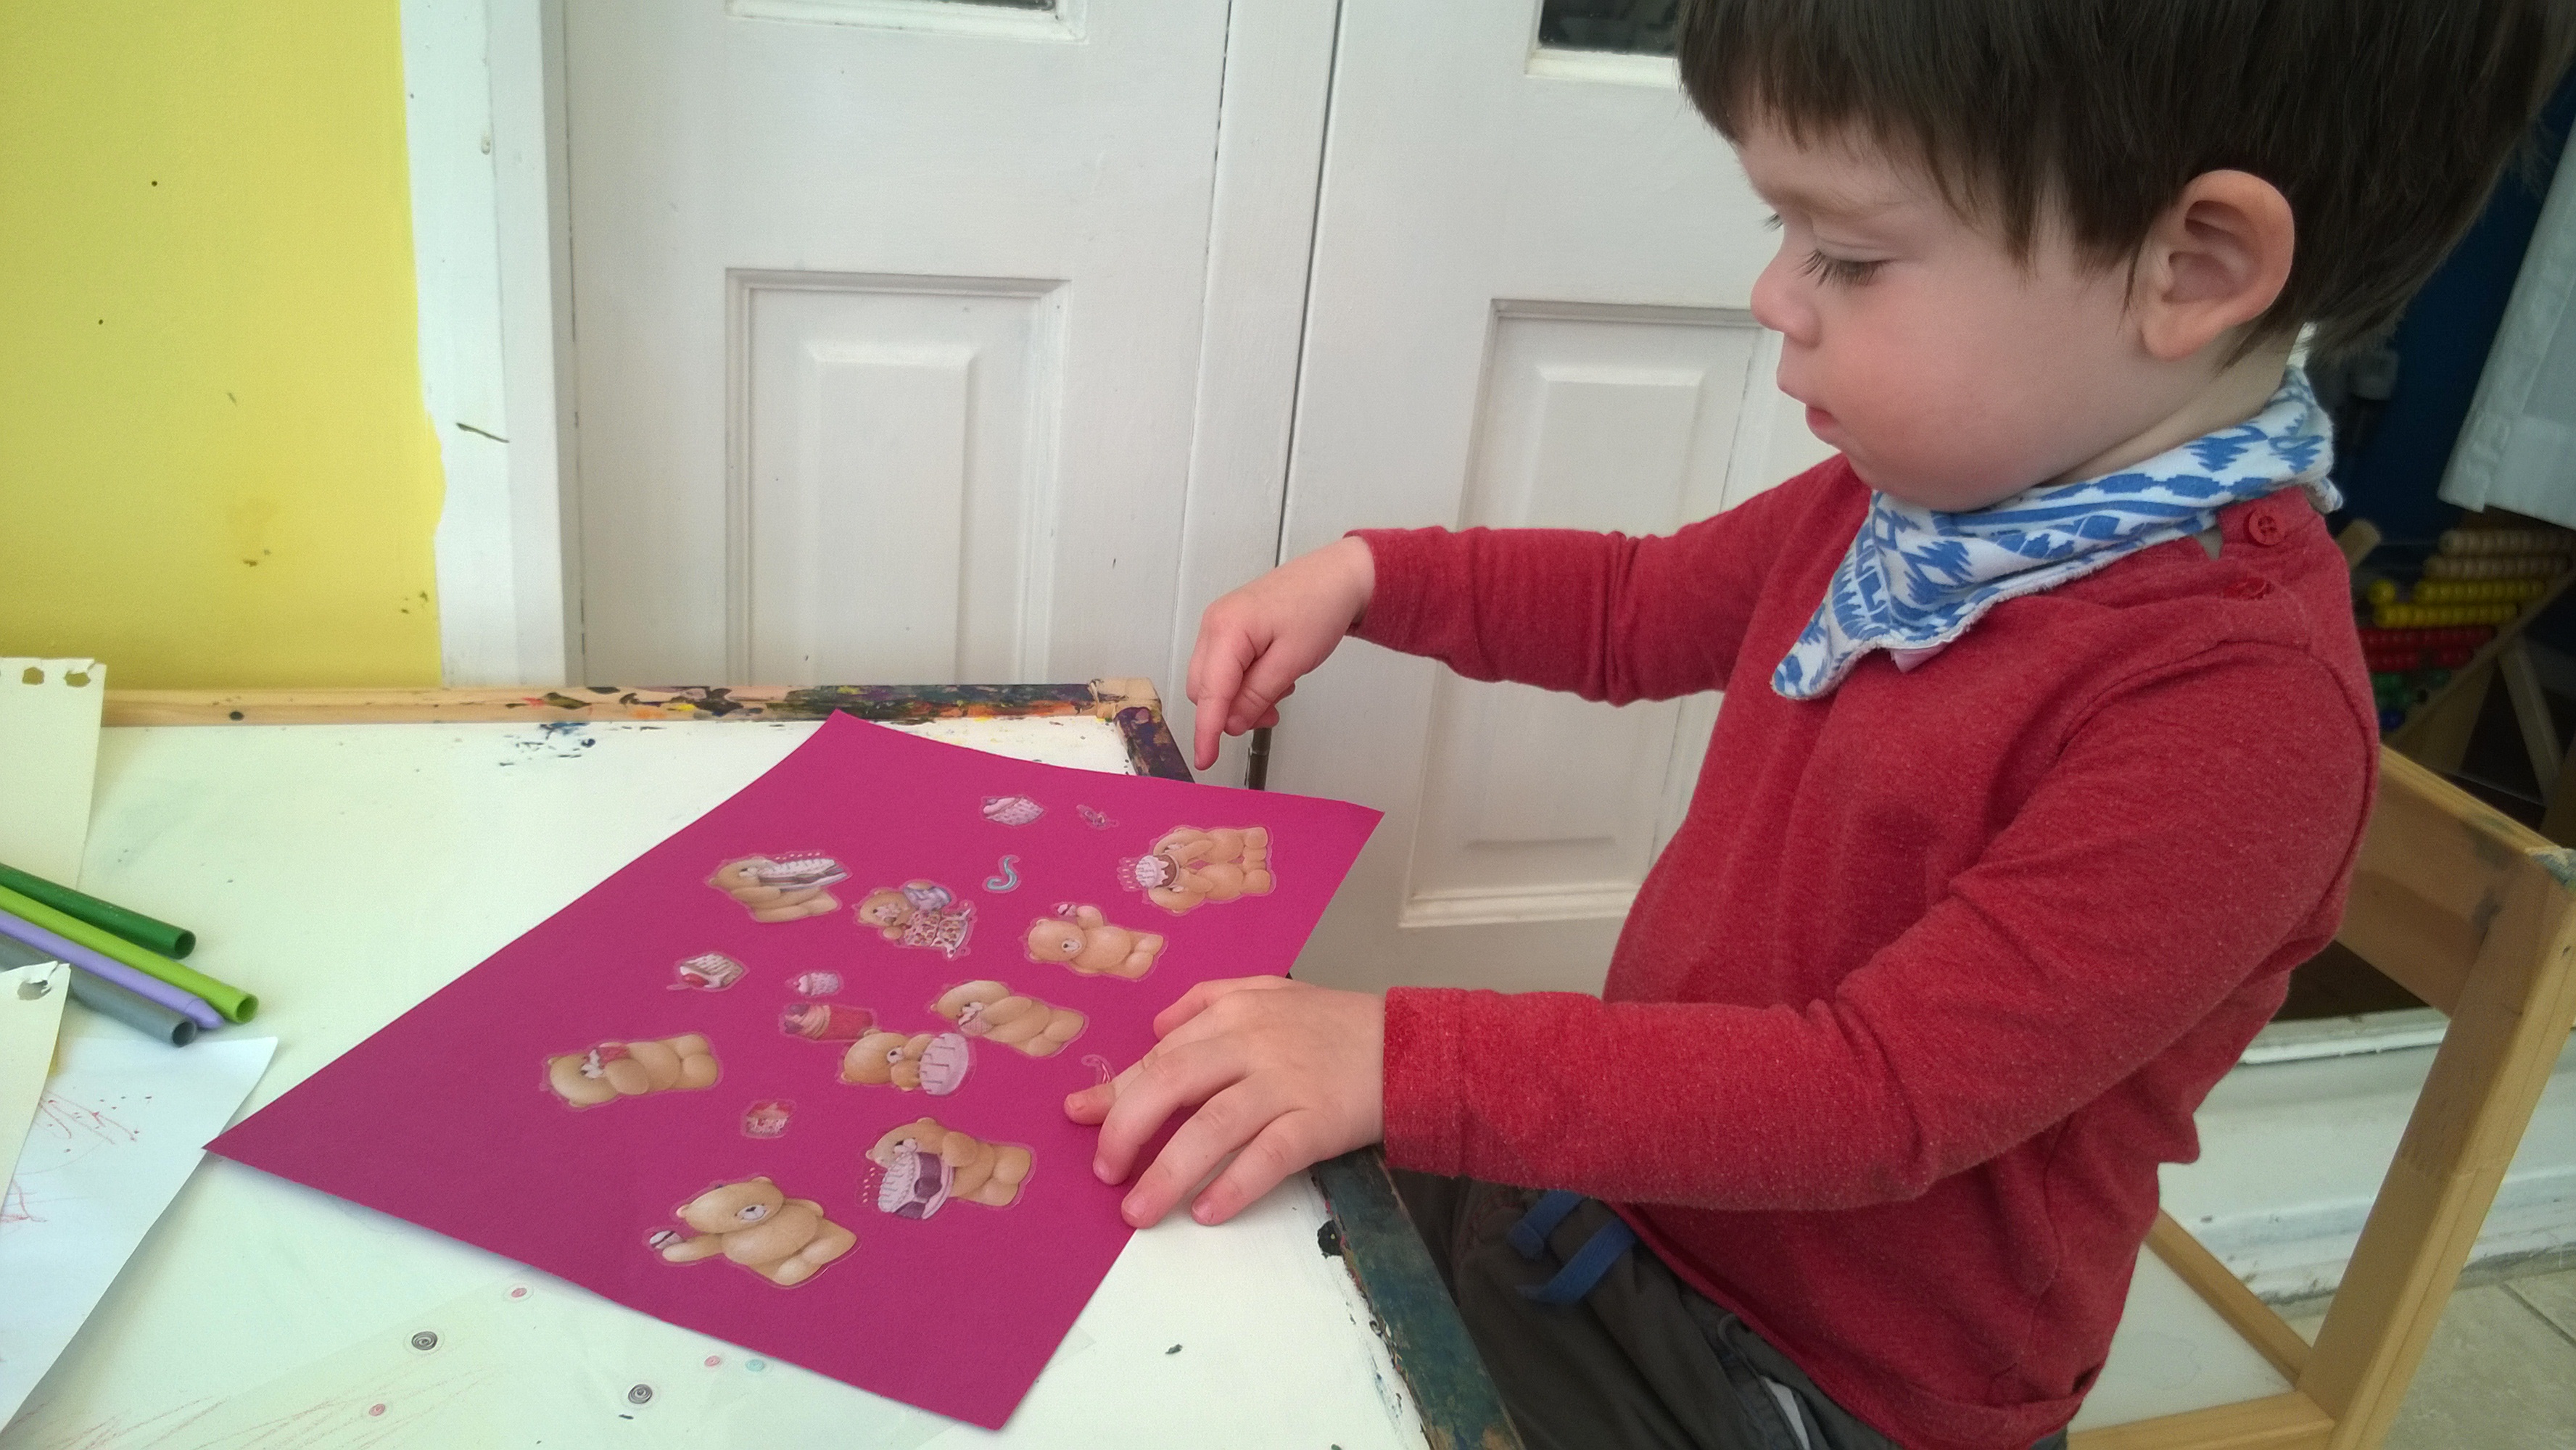
Which he was dead proud of! He showed Daddy and I many times hehe

Granny was very pleased with her card and special picture, and she was very spoilt – as you should be on your birthday – especially a big one like your 60th!
How creative have you and/or your little ones been this week?

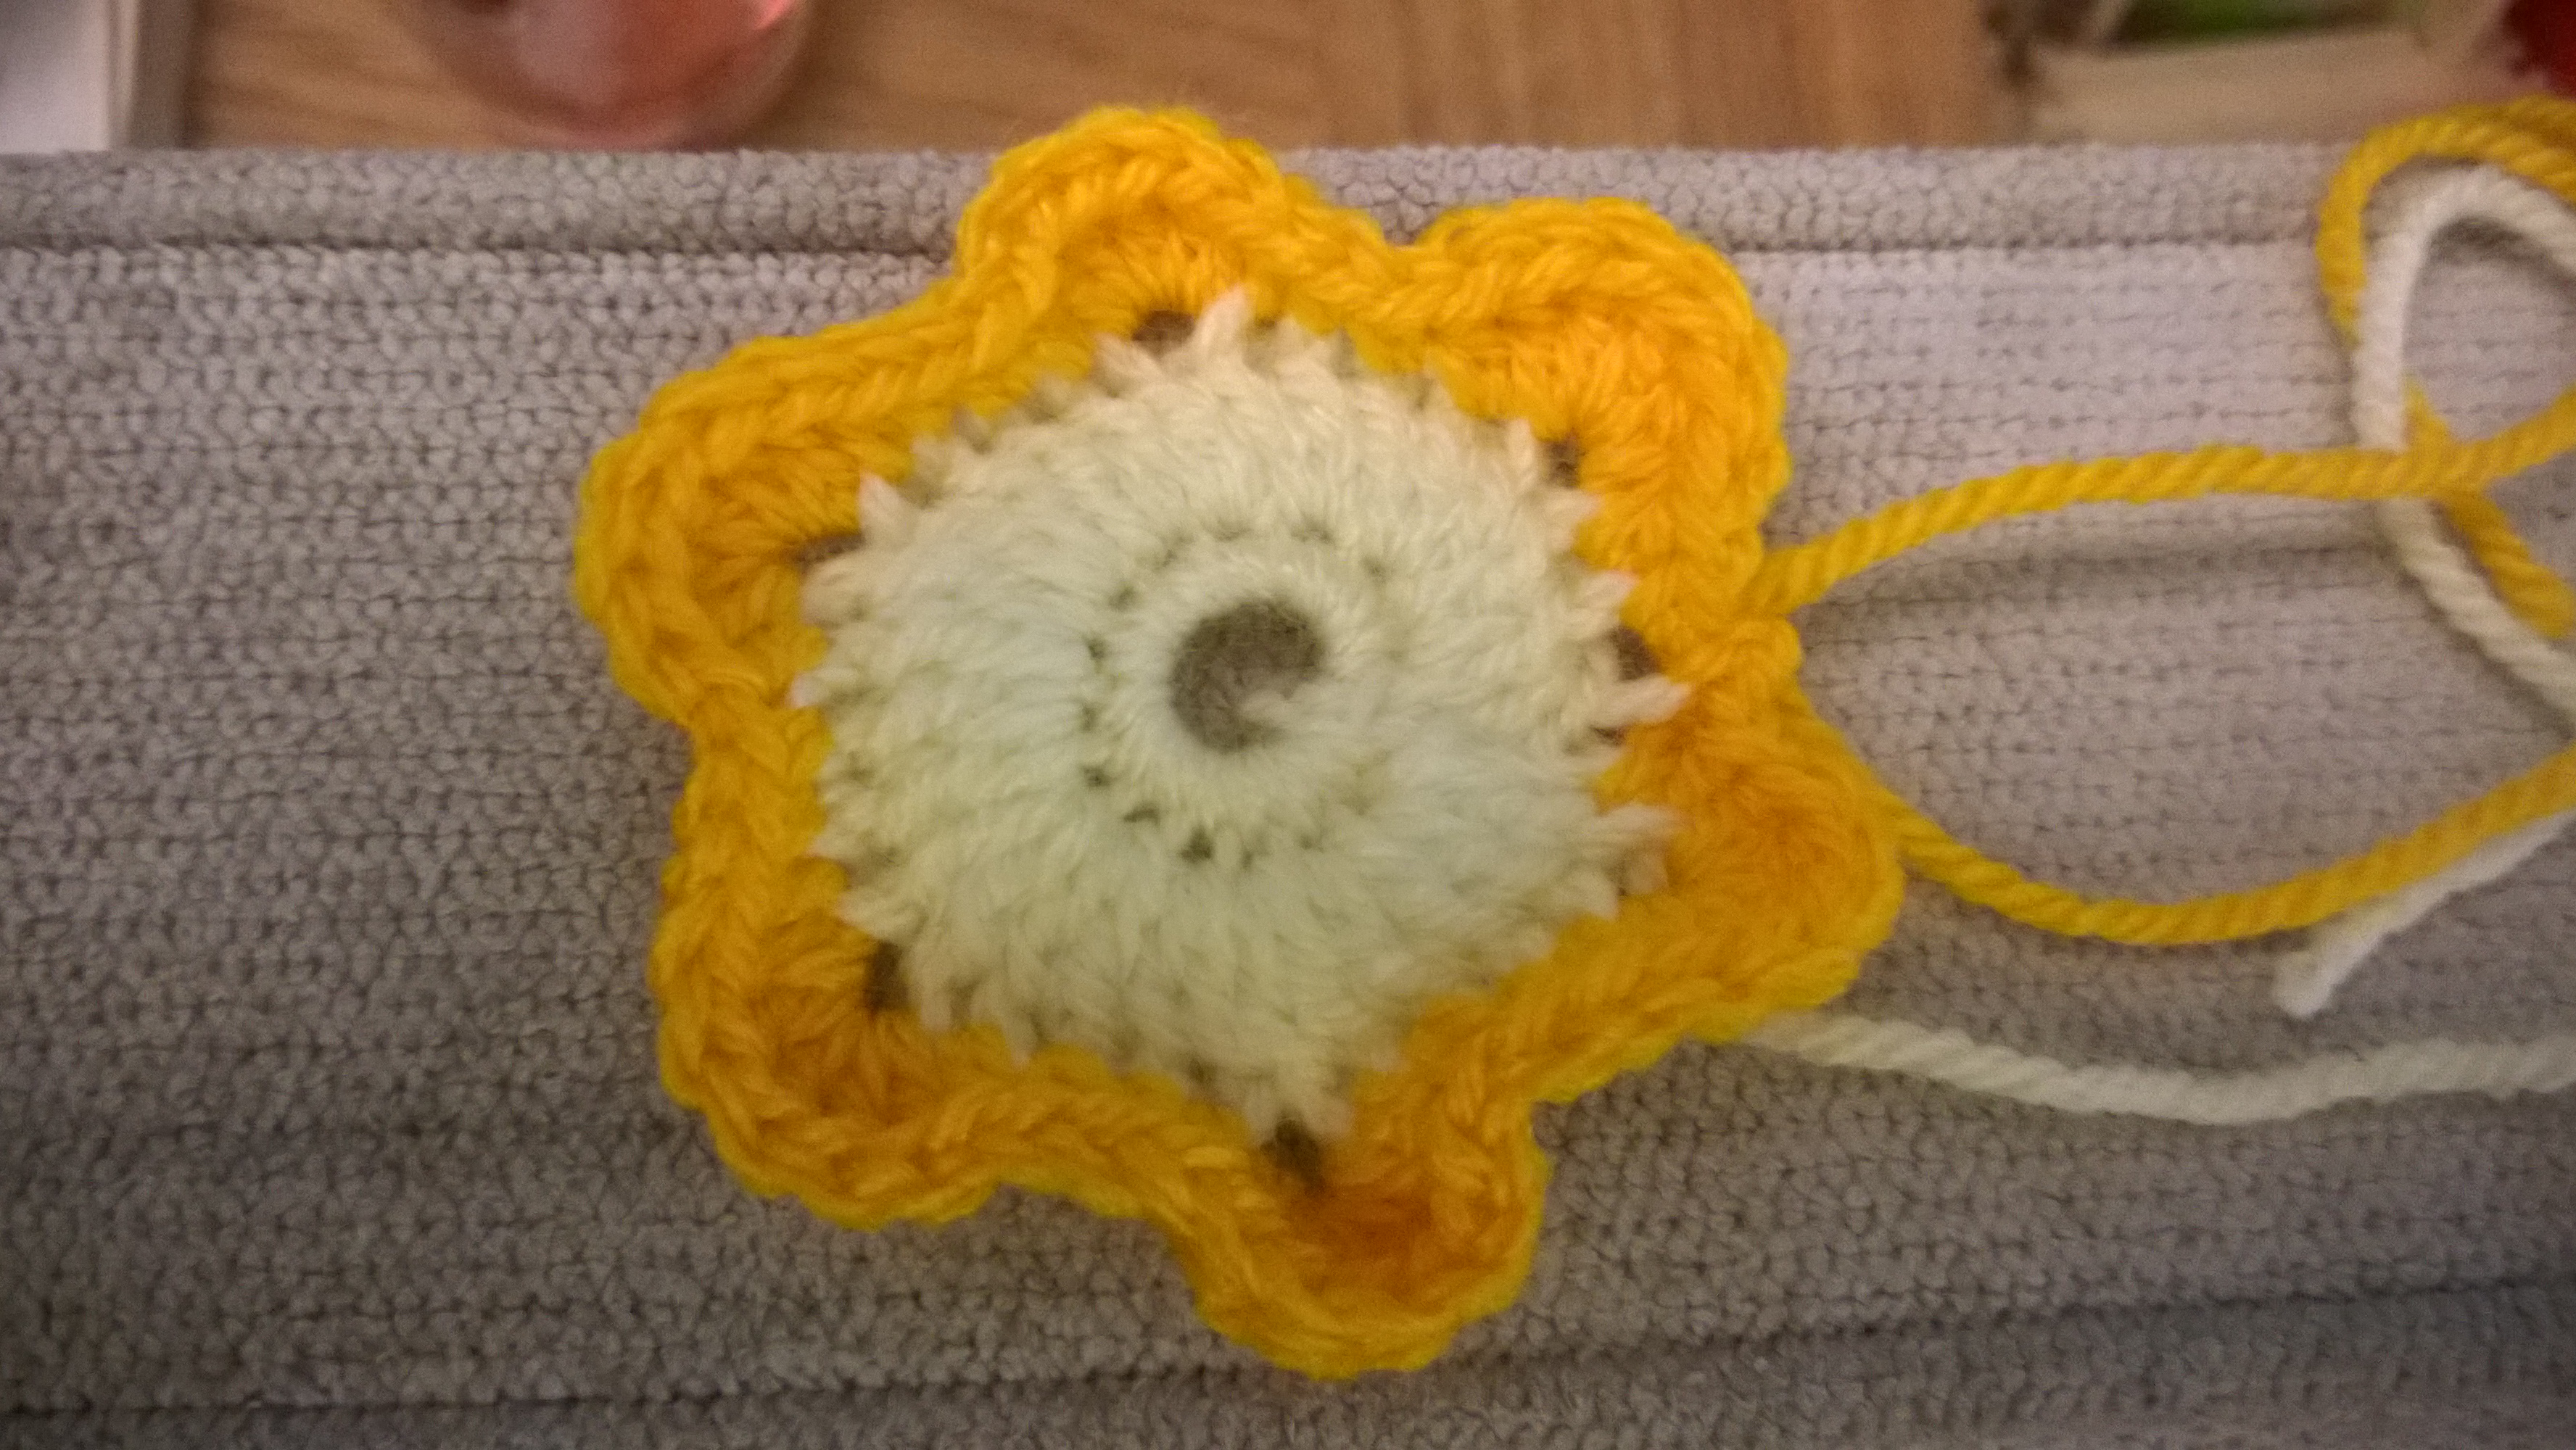
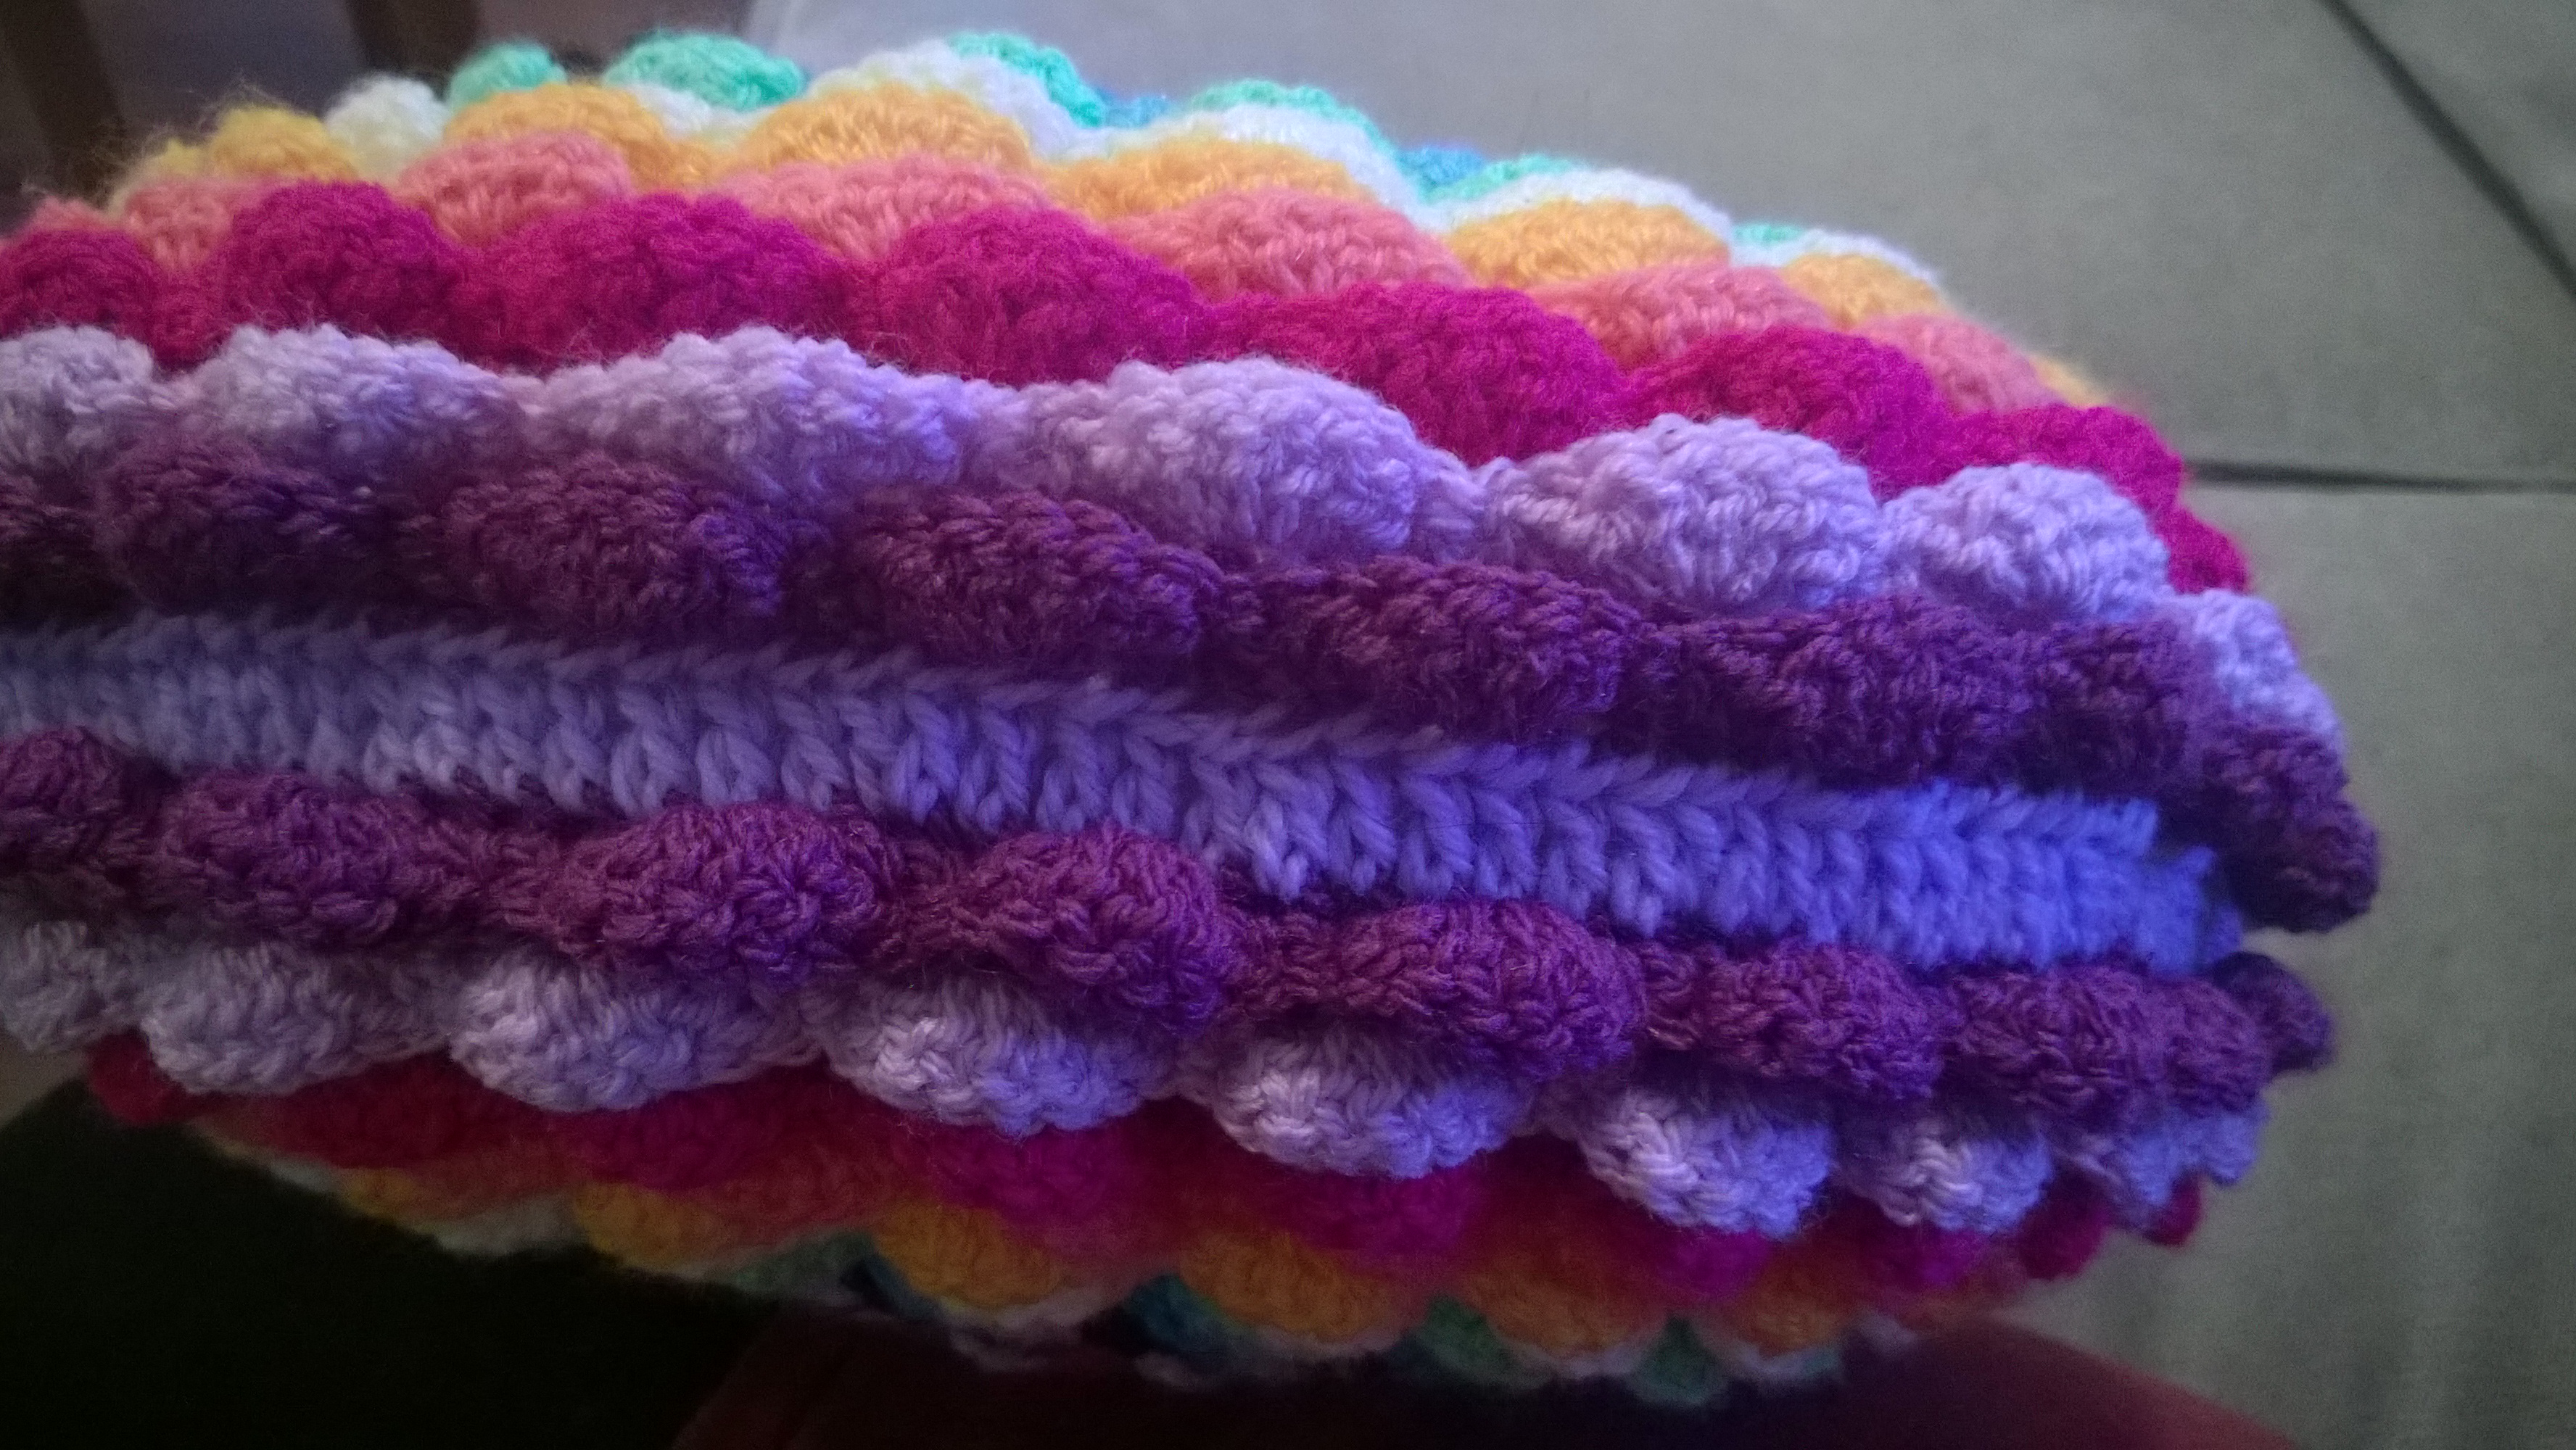
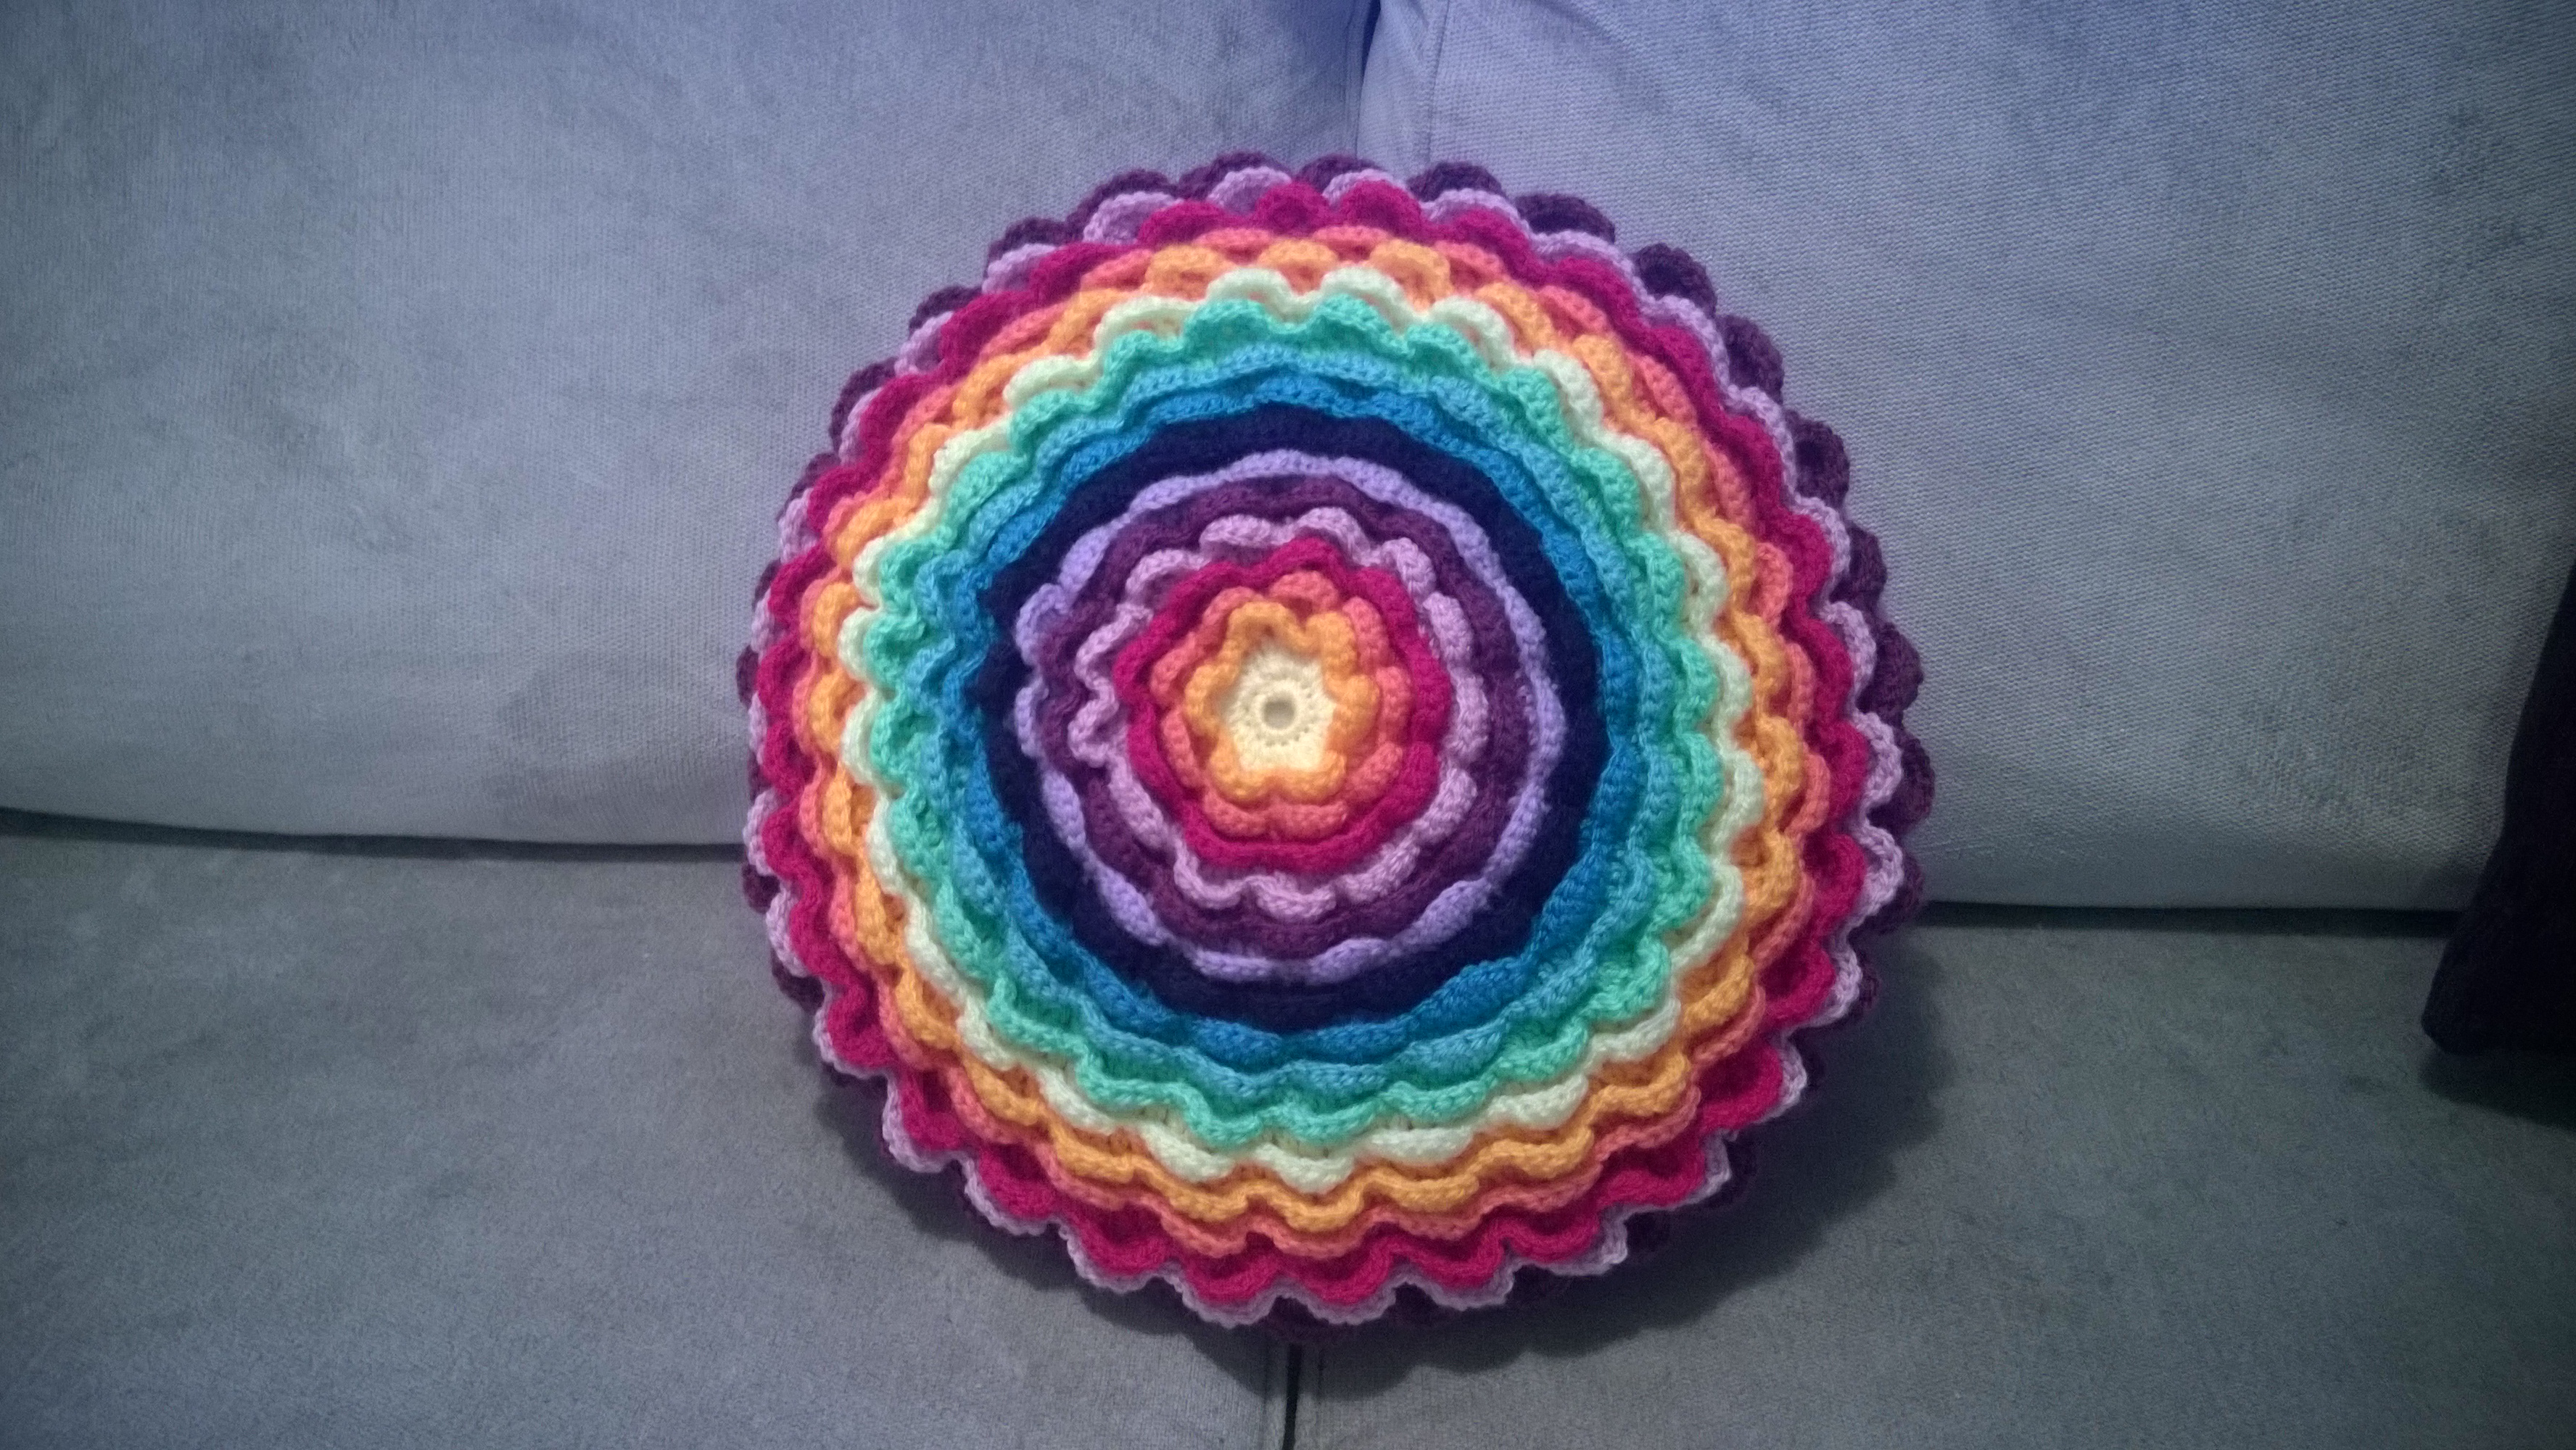
My Crochet Cushion finally completed!
I haven’t blogged about anything crochet related for a while now. Mainly because I have been working on a big-ish project, a lovely rainbow cushion! I got the pattern from my mother-in-law ages ago but it took me a while to get round to it, as I was busy with my Granny Square Blanket and then I did some cute Christmas Crochet Creatures. Come January though it was time to get cracking.
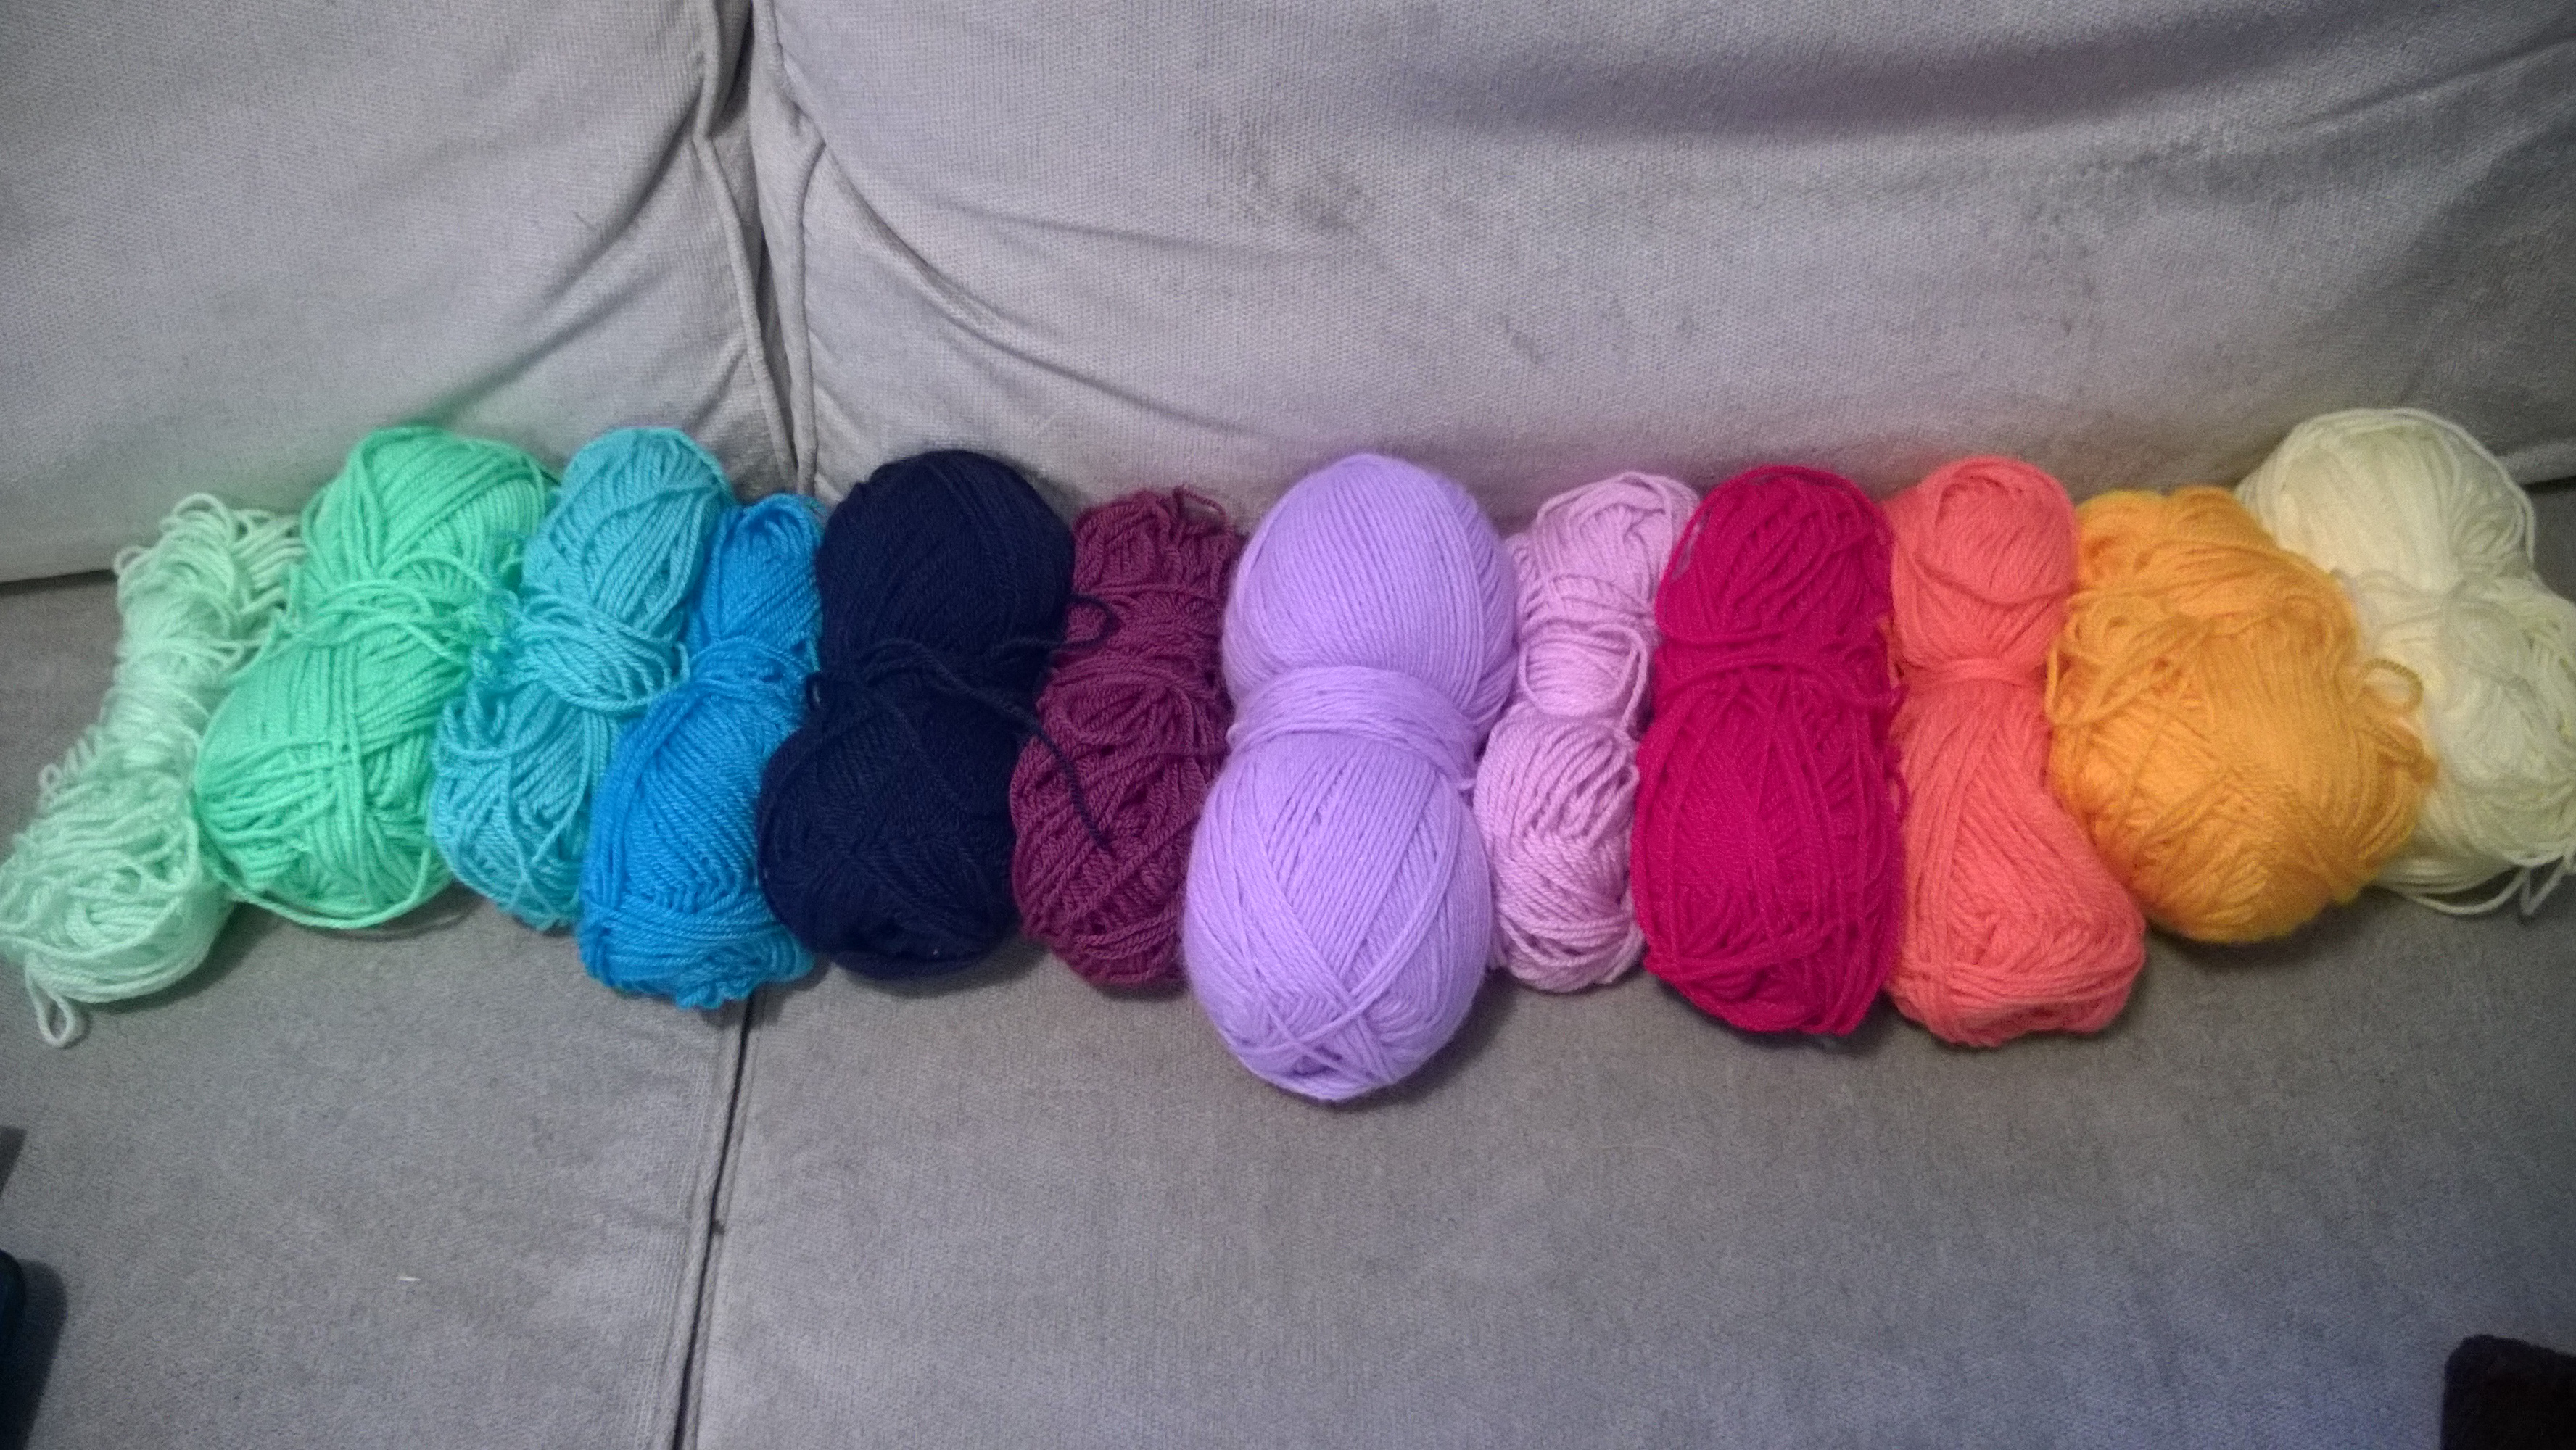
Rather than buy the colours listed in the patterns I decided to use up what wool I could from my bag as I have lots of part used balls leftover. I am a bit OCD about colours and like them to be in spectrum order – I don’t know why particularly but we have some colourful mugs and they HAVE to be on the mug rack in spectrum order. Weird I know!
So these are the colours I got cracking with.
It started off well enough as it was quite small, I made a big mistake somewhere on the first side of the cushion but thought I had rectified it enough (turns out I hadn’t but i will come back to that later!). In the pattern the reverse of the cushion doesn’t have frilly edges like the front, but hubby and I had a chat and decided we’d quite like the cushion to be the same on both sides.
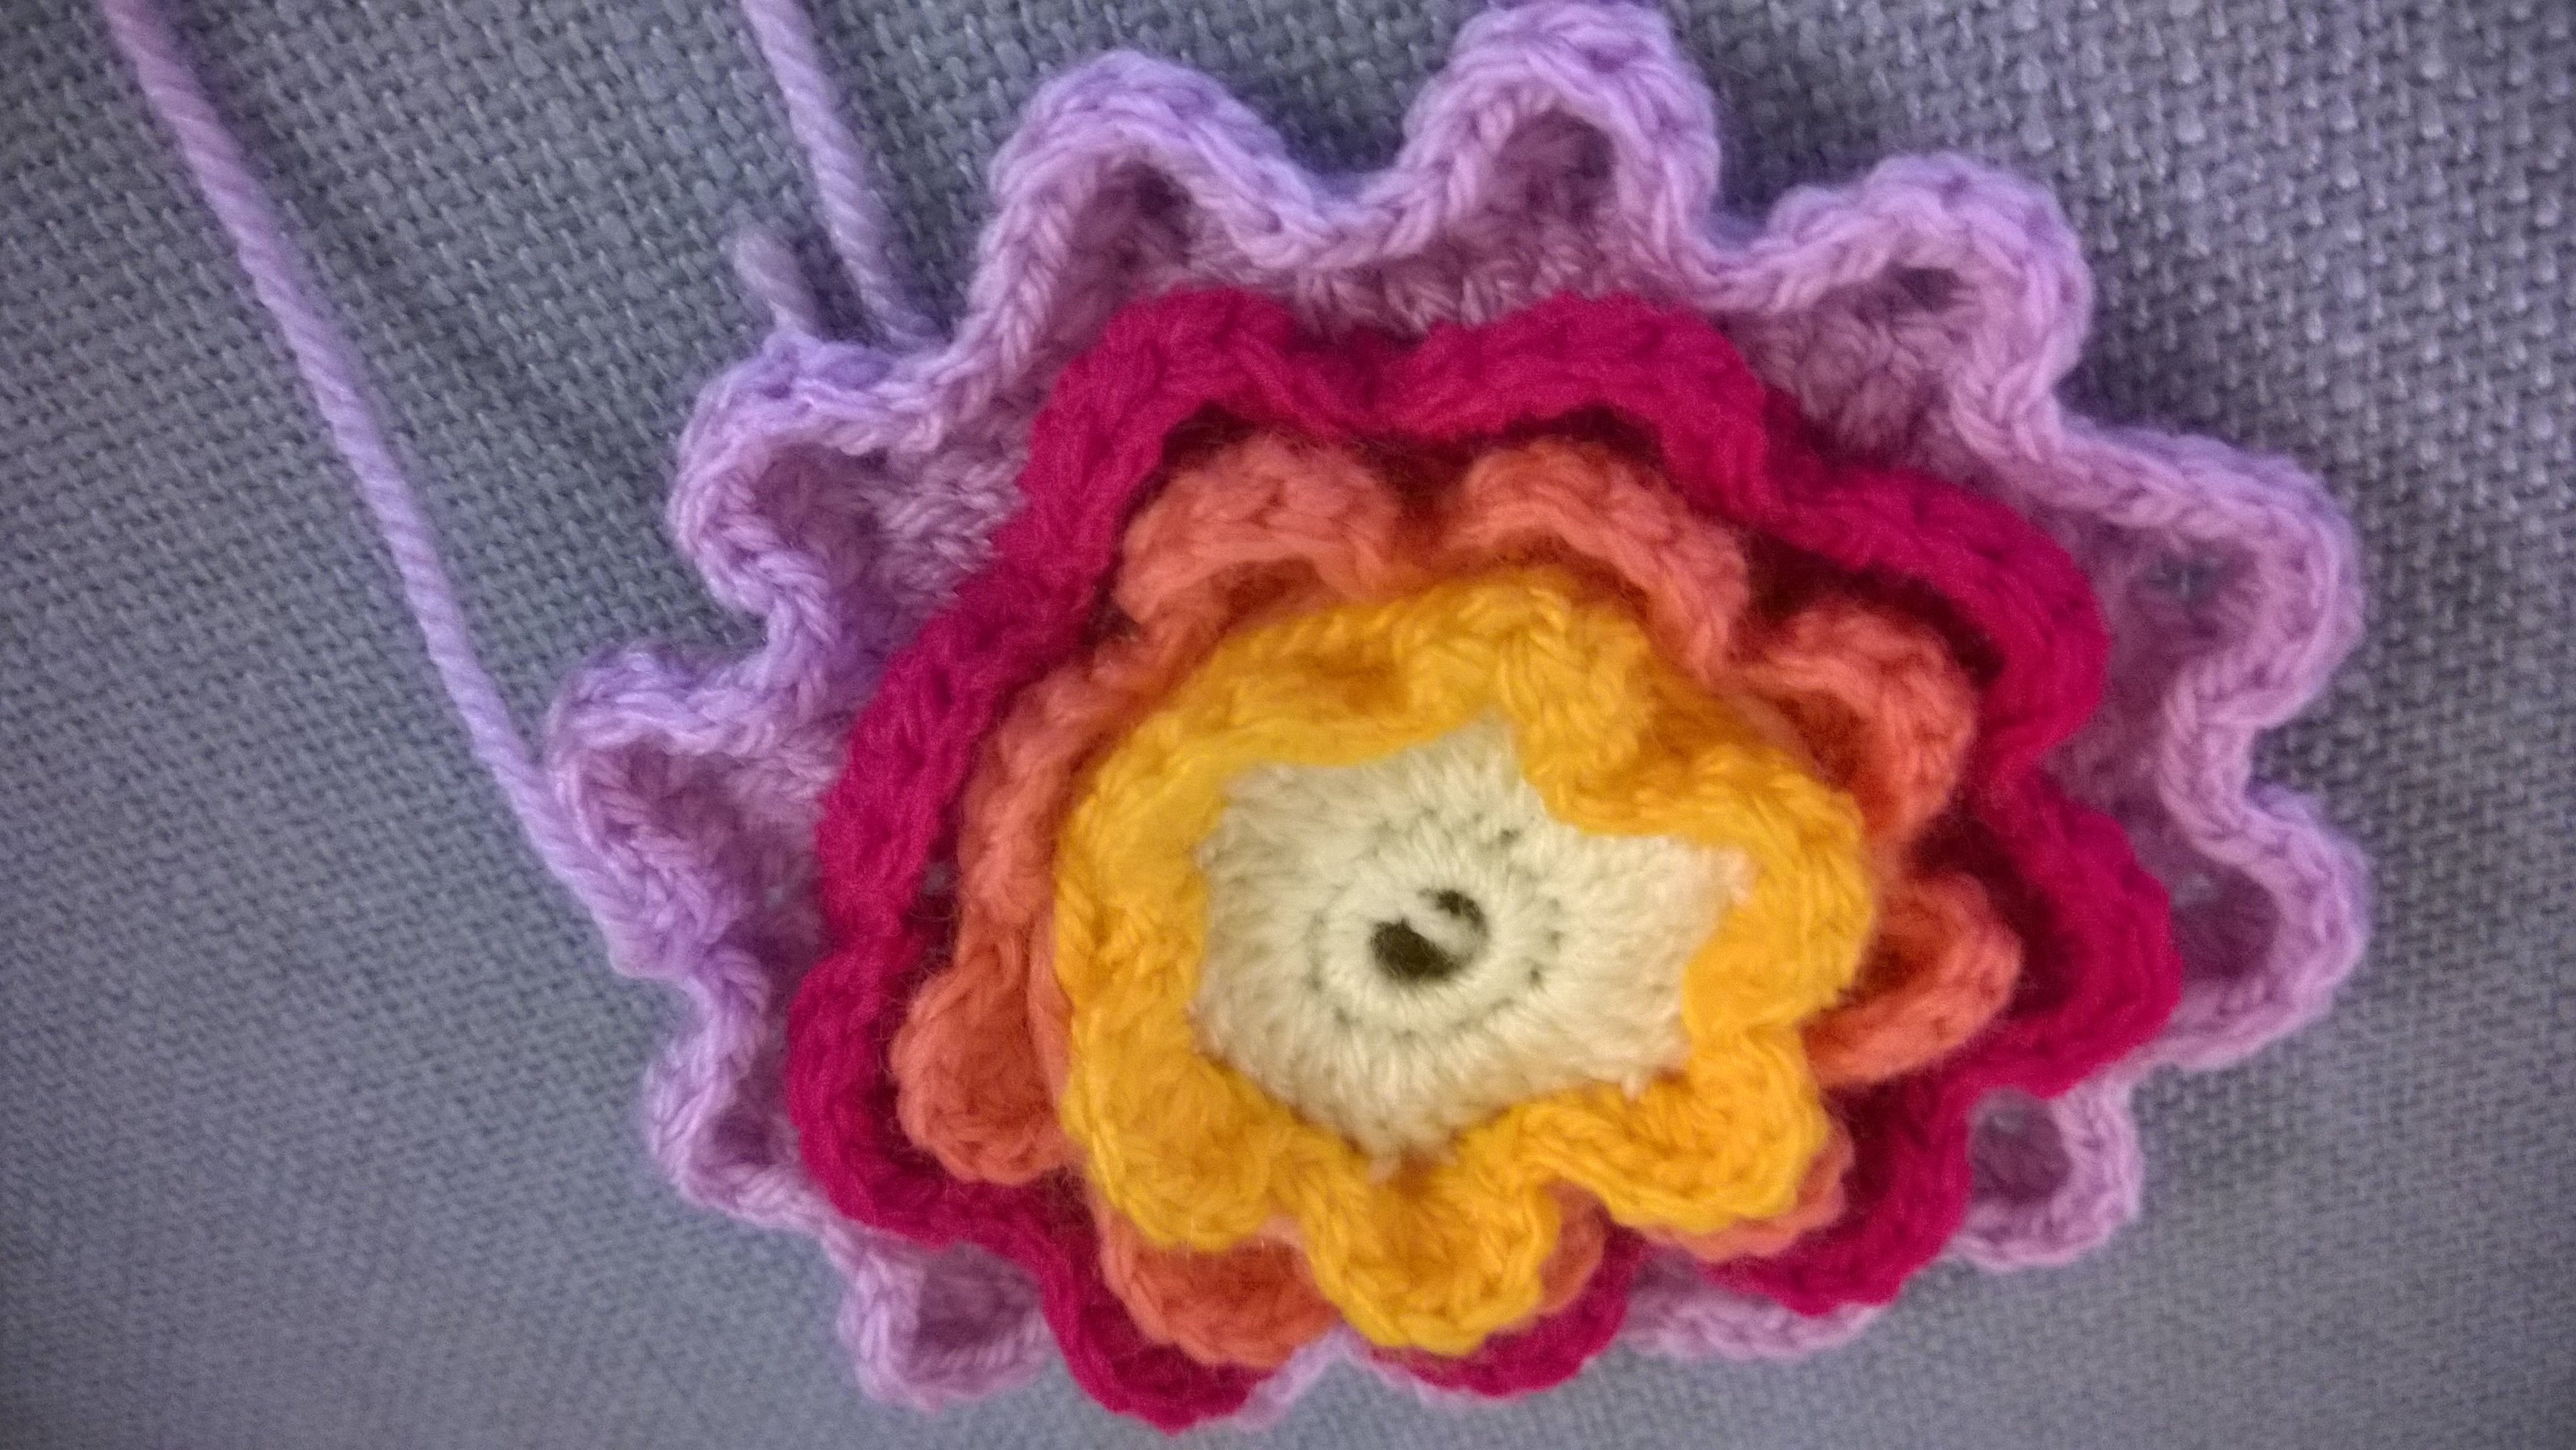
As I mentioned, it starts off quite easily but as it gets bigger, and the rounds get longer, it starts to take a lot longer to finish a row, and, well get s a bit repetitive and dull. I have now well and truly decided that I am better off with smaller projects. I just don’t have the patience to work on big things. Much as i love the way they look, I get so bored and then can’t be bothered to crochet in the evenings and it takes months for me to finish it as a result. It’s a hobby I have really been enjoying but I really don’t enjoy the big projects quite as much. Which is a shame, as I think the blankets and cushions look so lovely when they are finished.
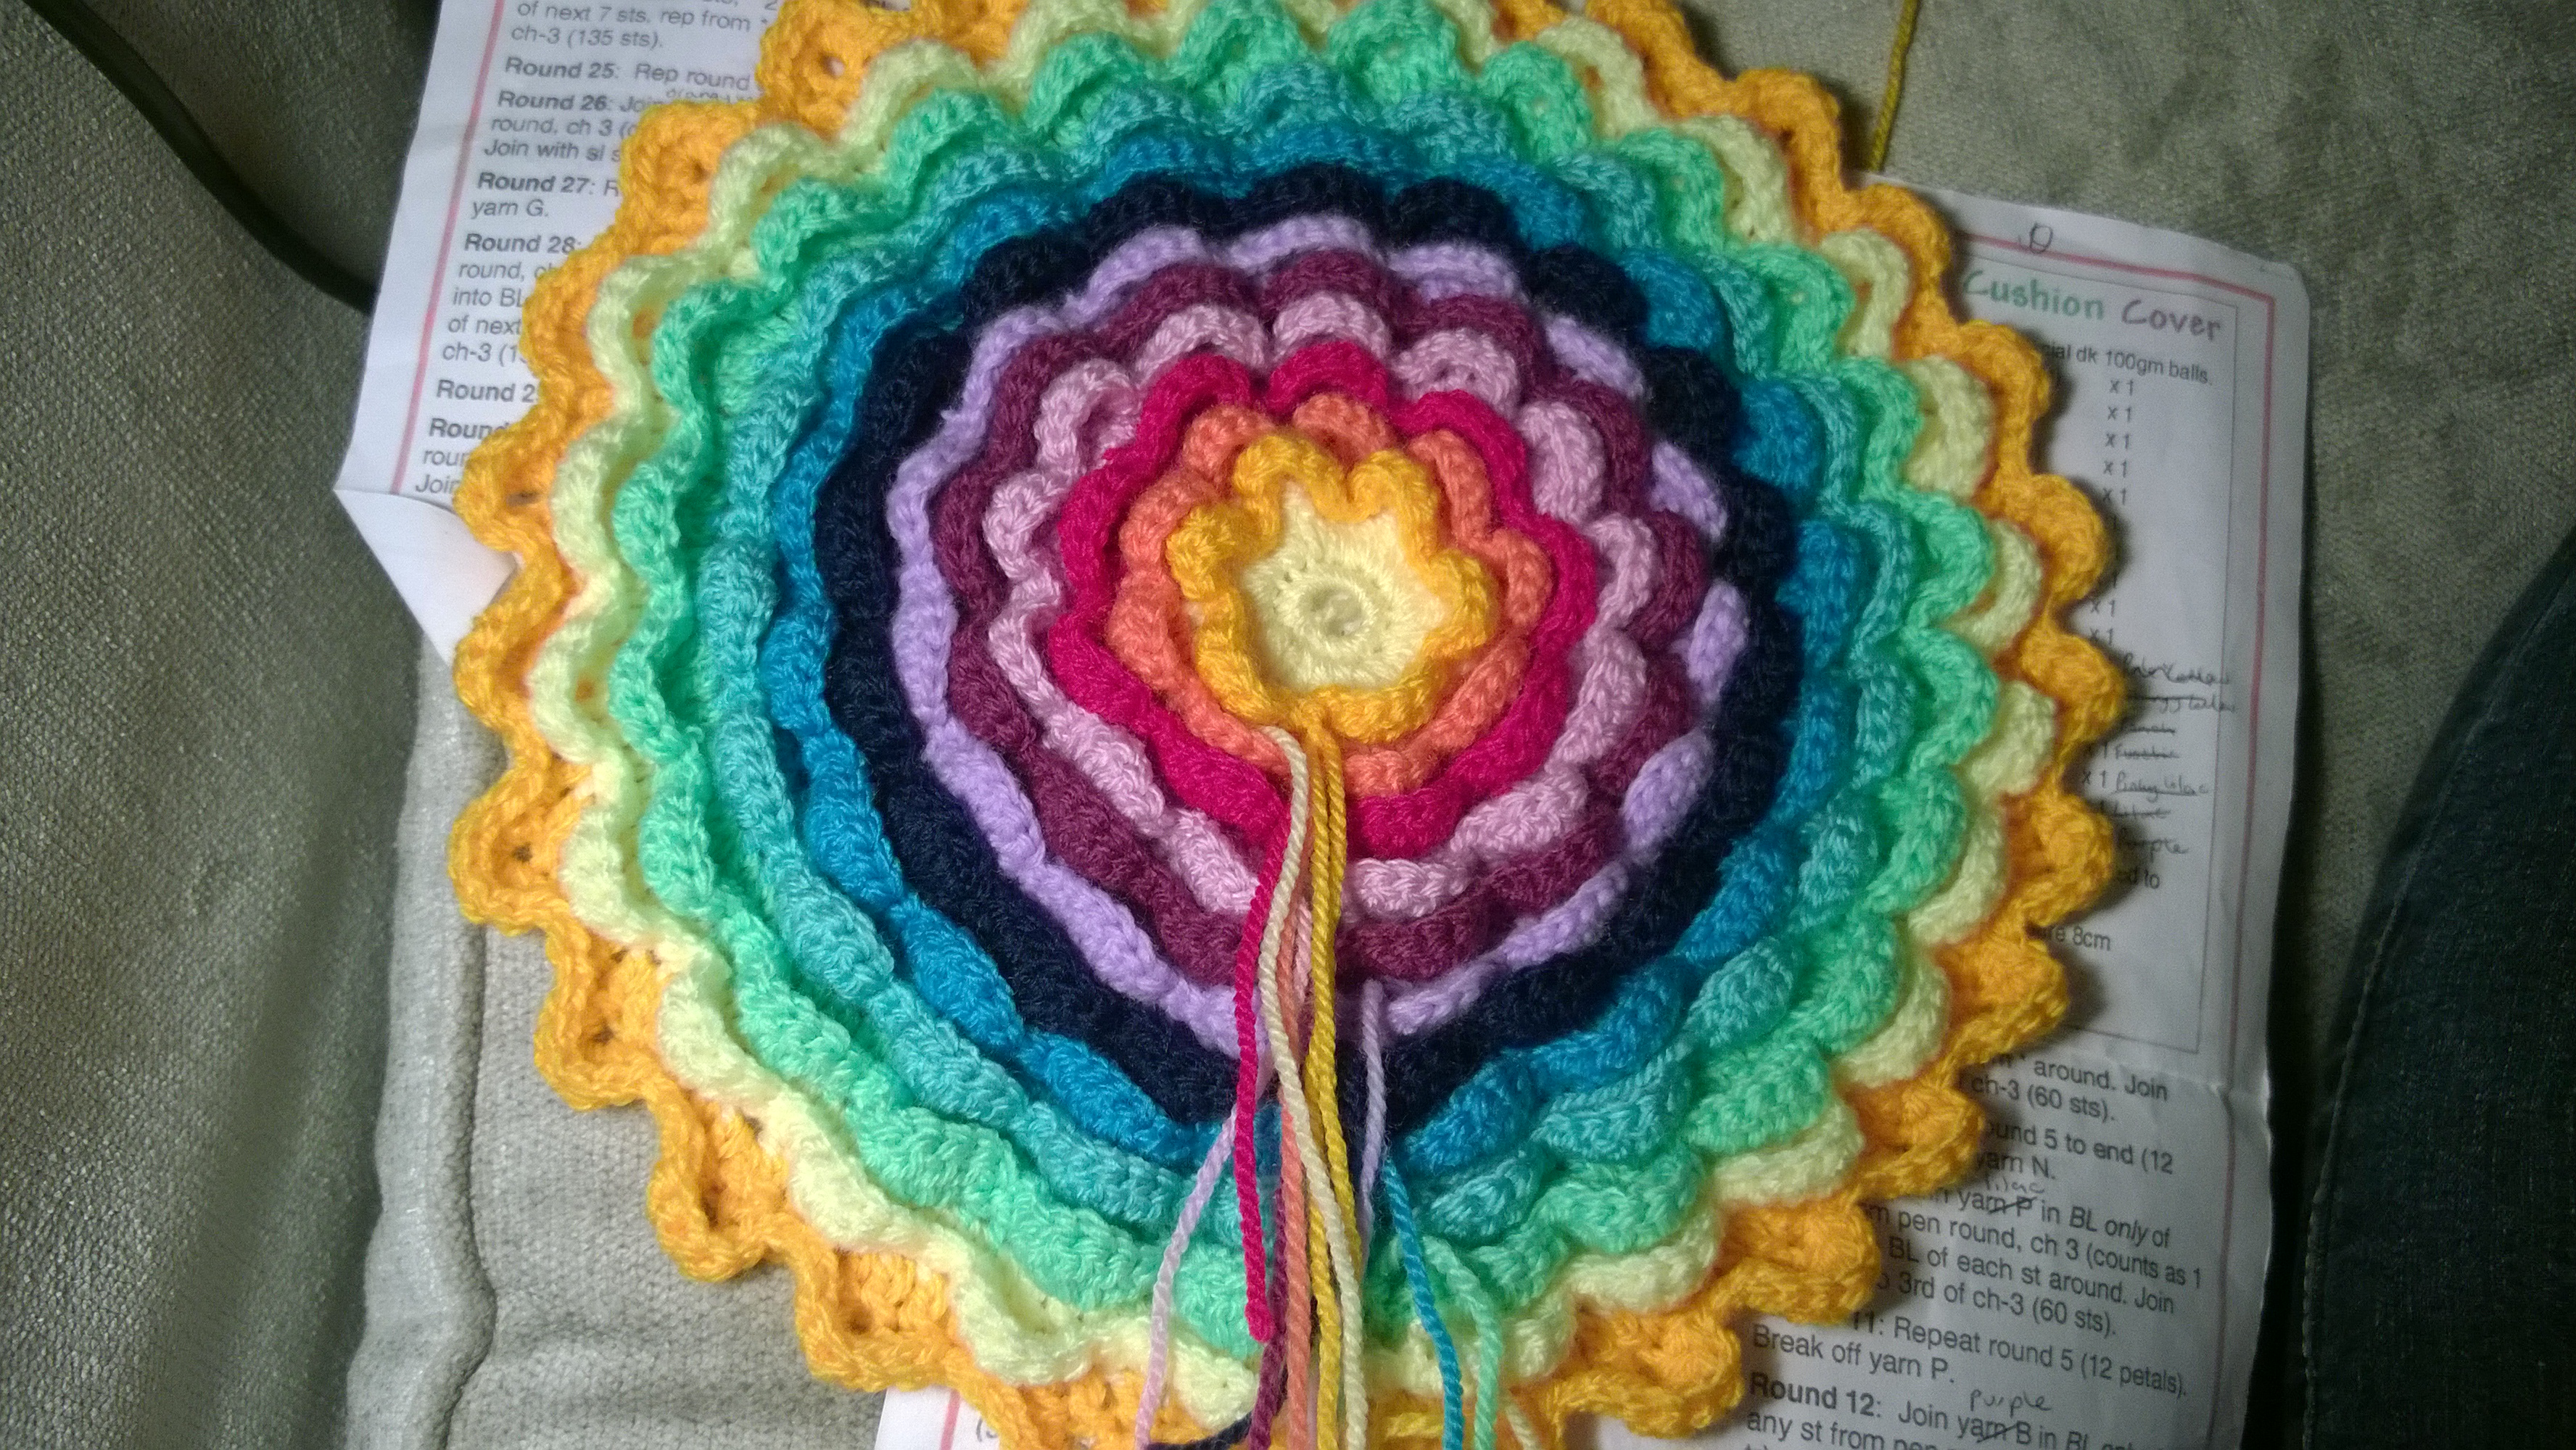
Anyway, it has taken me a while but I got to a point where both sides of the cushion were progressing nicely… then I compared them and realised that the side which I made a mistake on earlier was actually quite a bit smaller than the second side. boooo. It’s not the end of the world, it’s only about a round smaller, but that was a little demoralising and led to the cushion being put to one side again for a couple of weeks…. honestly I can be such an ostrich, I totally bury my head in the sand and ignore problems sometimes! Which isn’t the best idea!
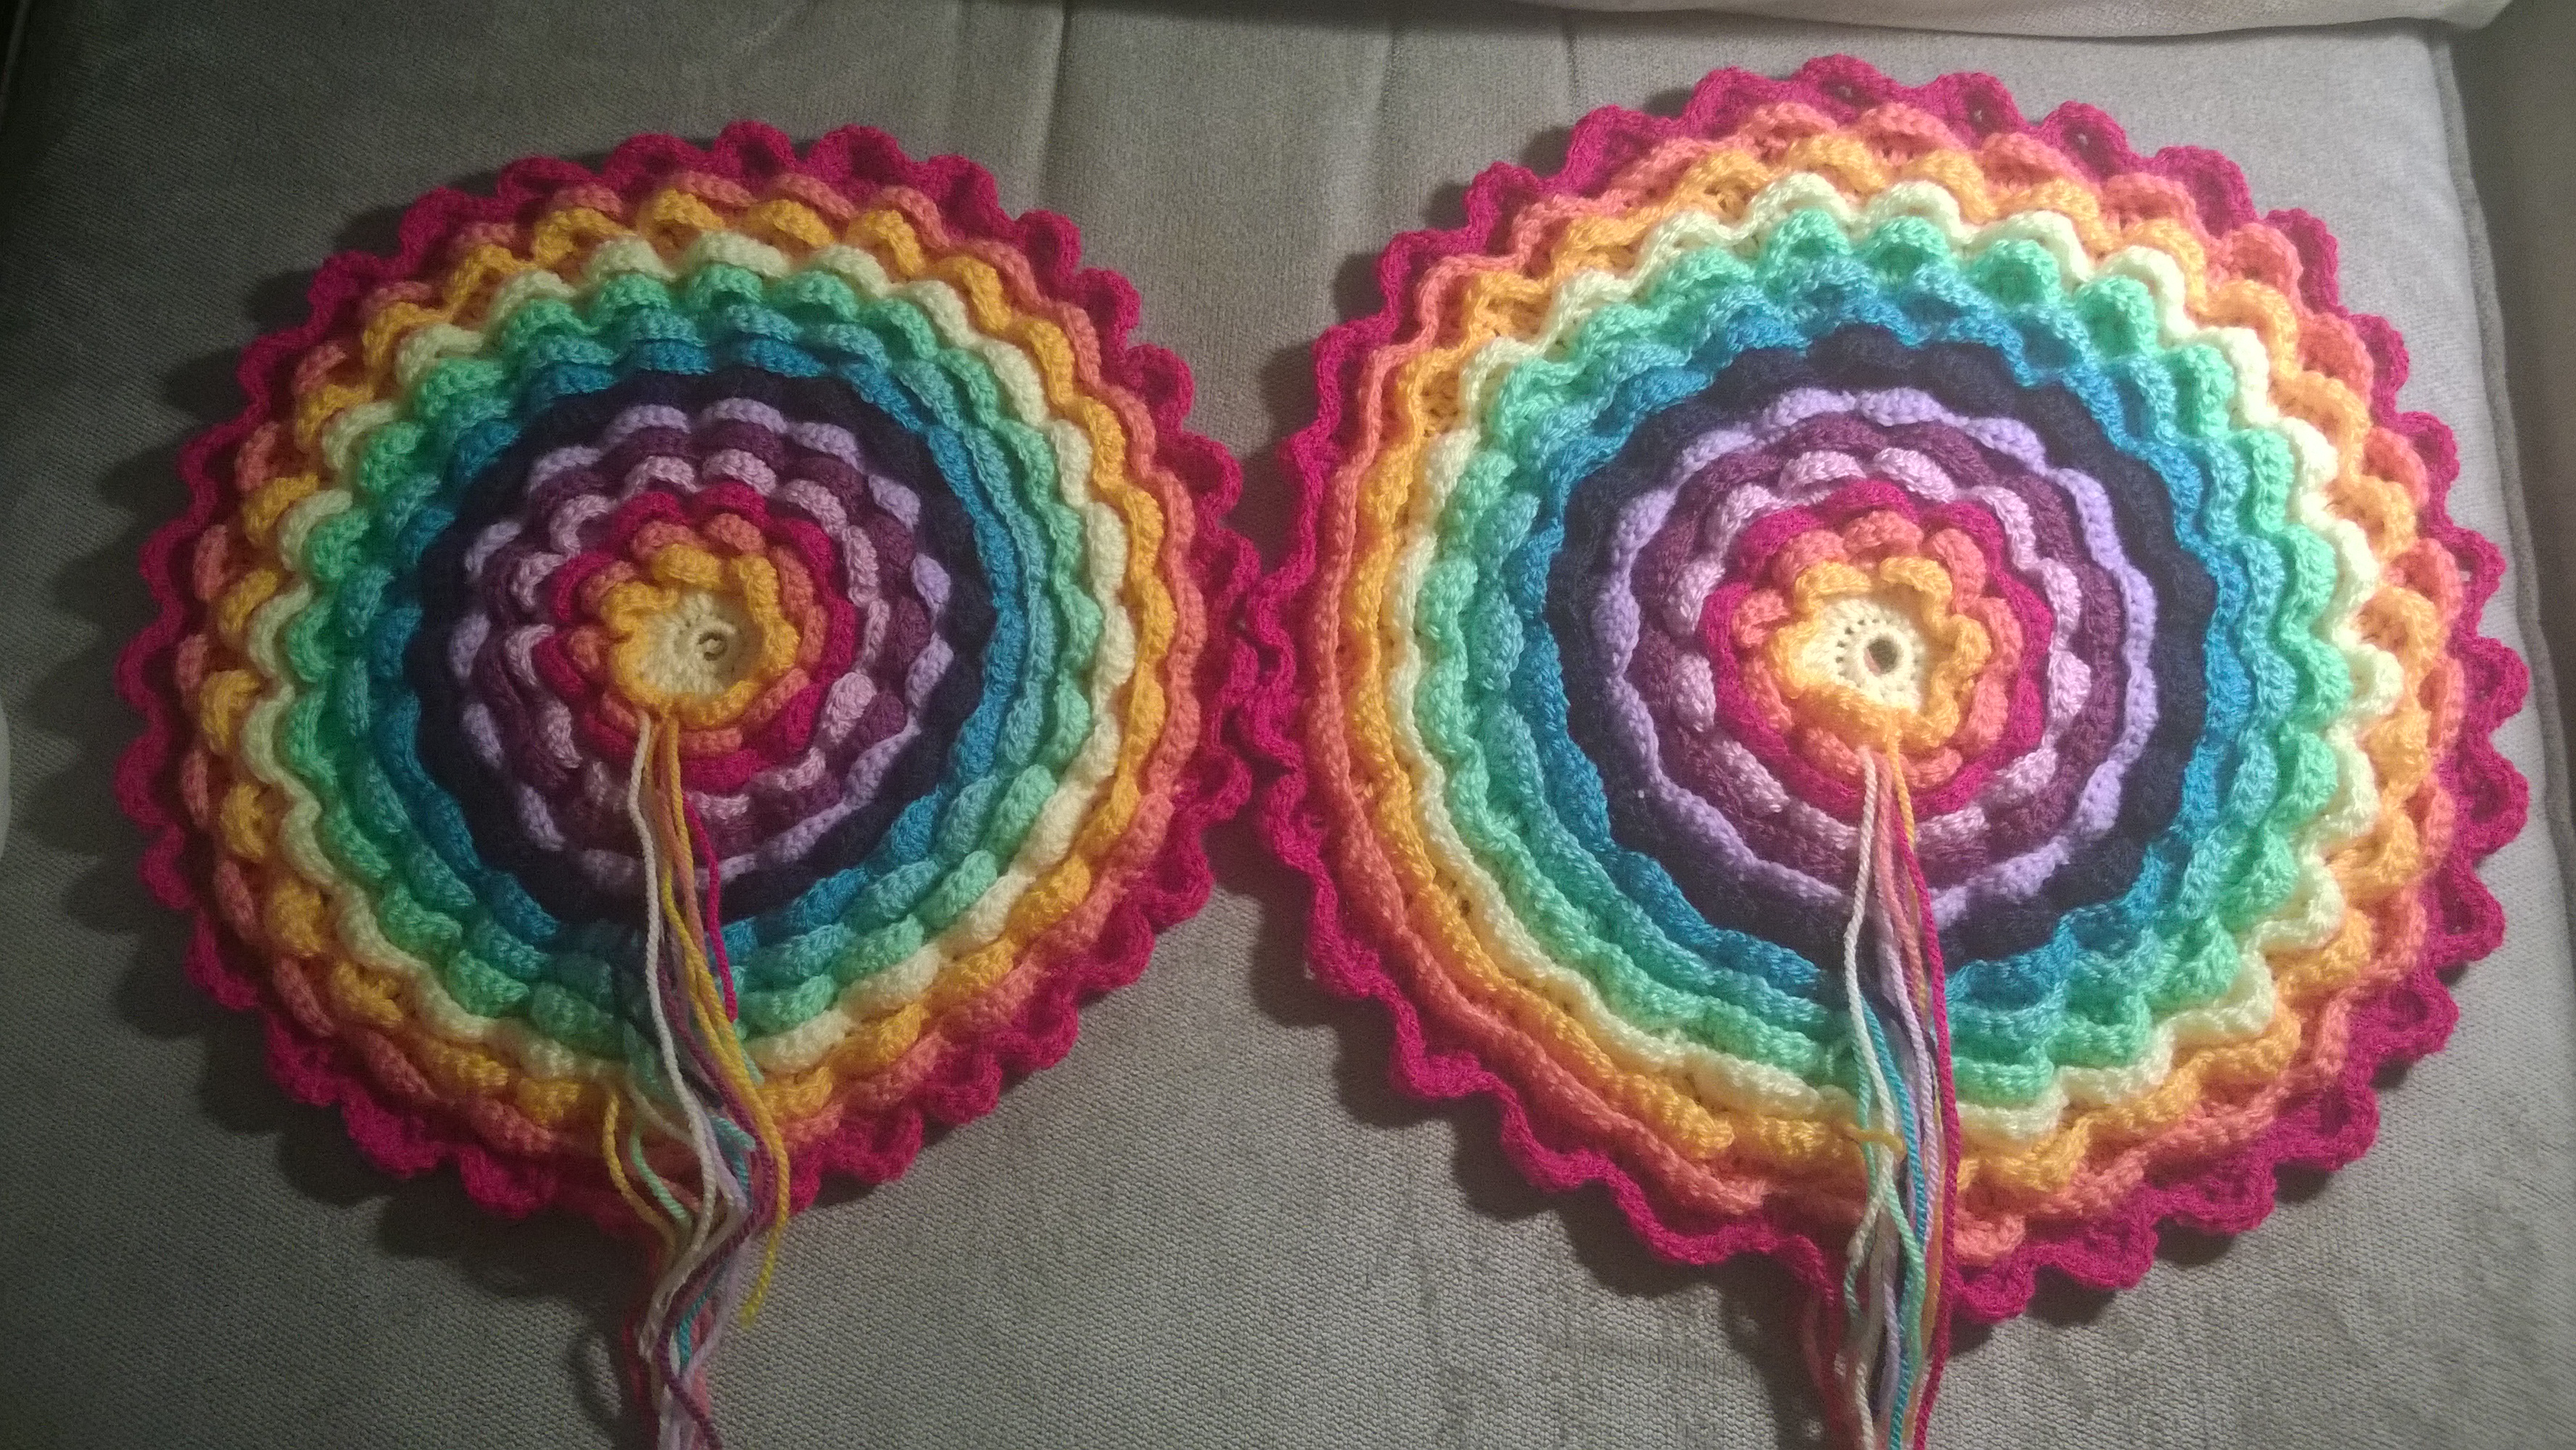
I eventually picked it up again, determined to actually get it finished and knew I just needed an extra row of trebles on the smaller side. I would have dine it in the same dark purple as the final rows… except for the fact that I ran out, I literally only just had enough to actually complete the final row of frills as it was (And that was doing a stitch less in some of the petals on that row) oops! So I had to use lilac for the joining row.
But you know what, I am proud that I have finally finished it and it doesn’t look toooo bad!
So that’s my creative challenge for this week (which has taken me months!) what’s yours?
Christmas preparations and child-proofing the tree!

Our tree
Well it’s that time of year again! But I have to say I have been surprisingly organised this year. Compared to most years where we are buying pressies on credit cards and getting presents and wrapping paper last minute, this year we have put aside some money each month, and bought all of our presents and wrapping paper etc. pretty far in advance! Not sure what has got into me!
It’s quite nice being pretty organised, much less stressful, but there’s something about the stress and last minute shopping that gets you in the christmassy mood, and I haven’t got that feeling yet to be honest. But I haven’t wrapped any presents yet so this week my task is to use Monkey’s afternoon naps for Christmas films and present wrapping, hopefully that will get me more in the mood! I’ve just finished writing all of the Christmas Cards (today’s job) so need to deliver those.
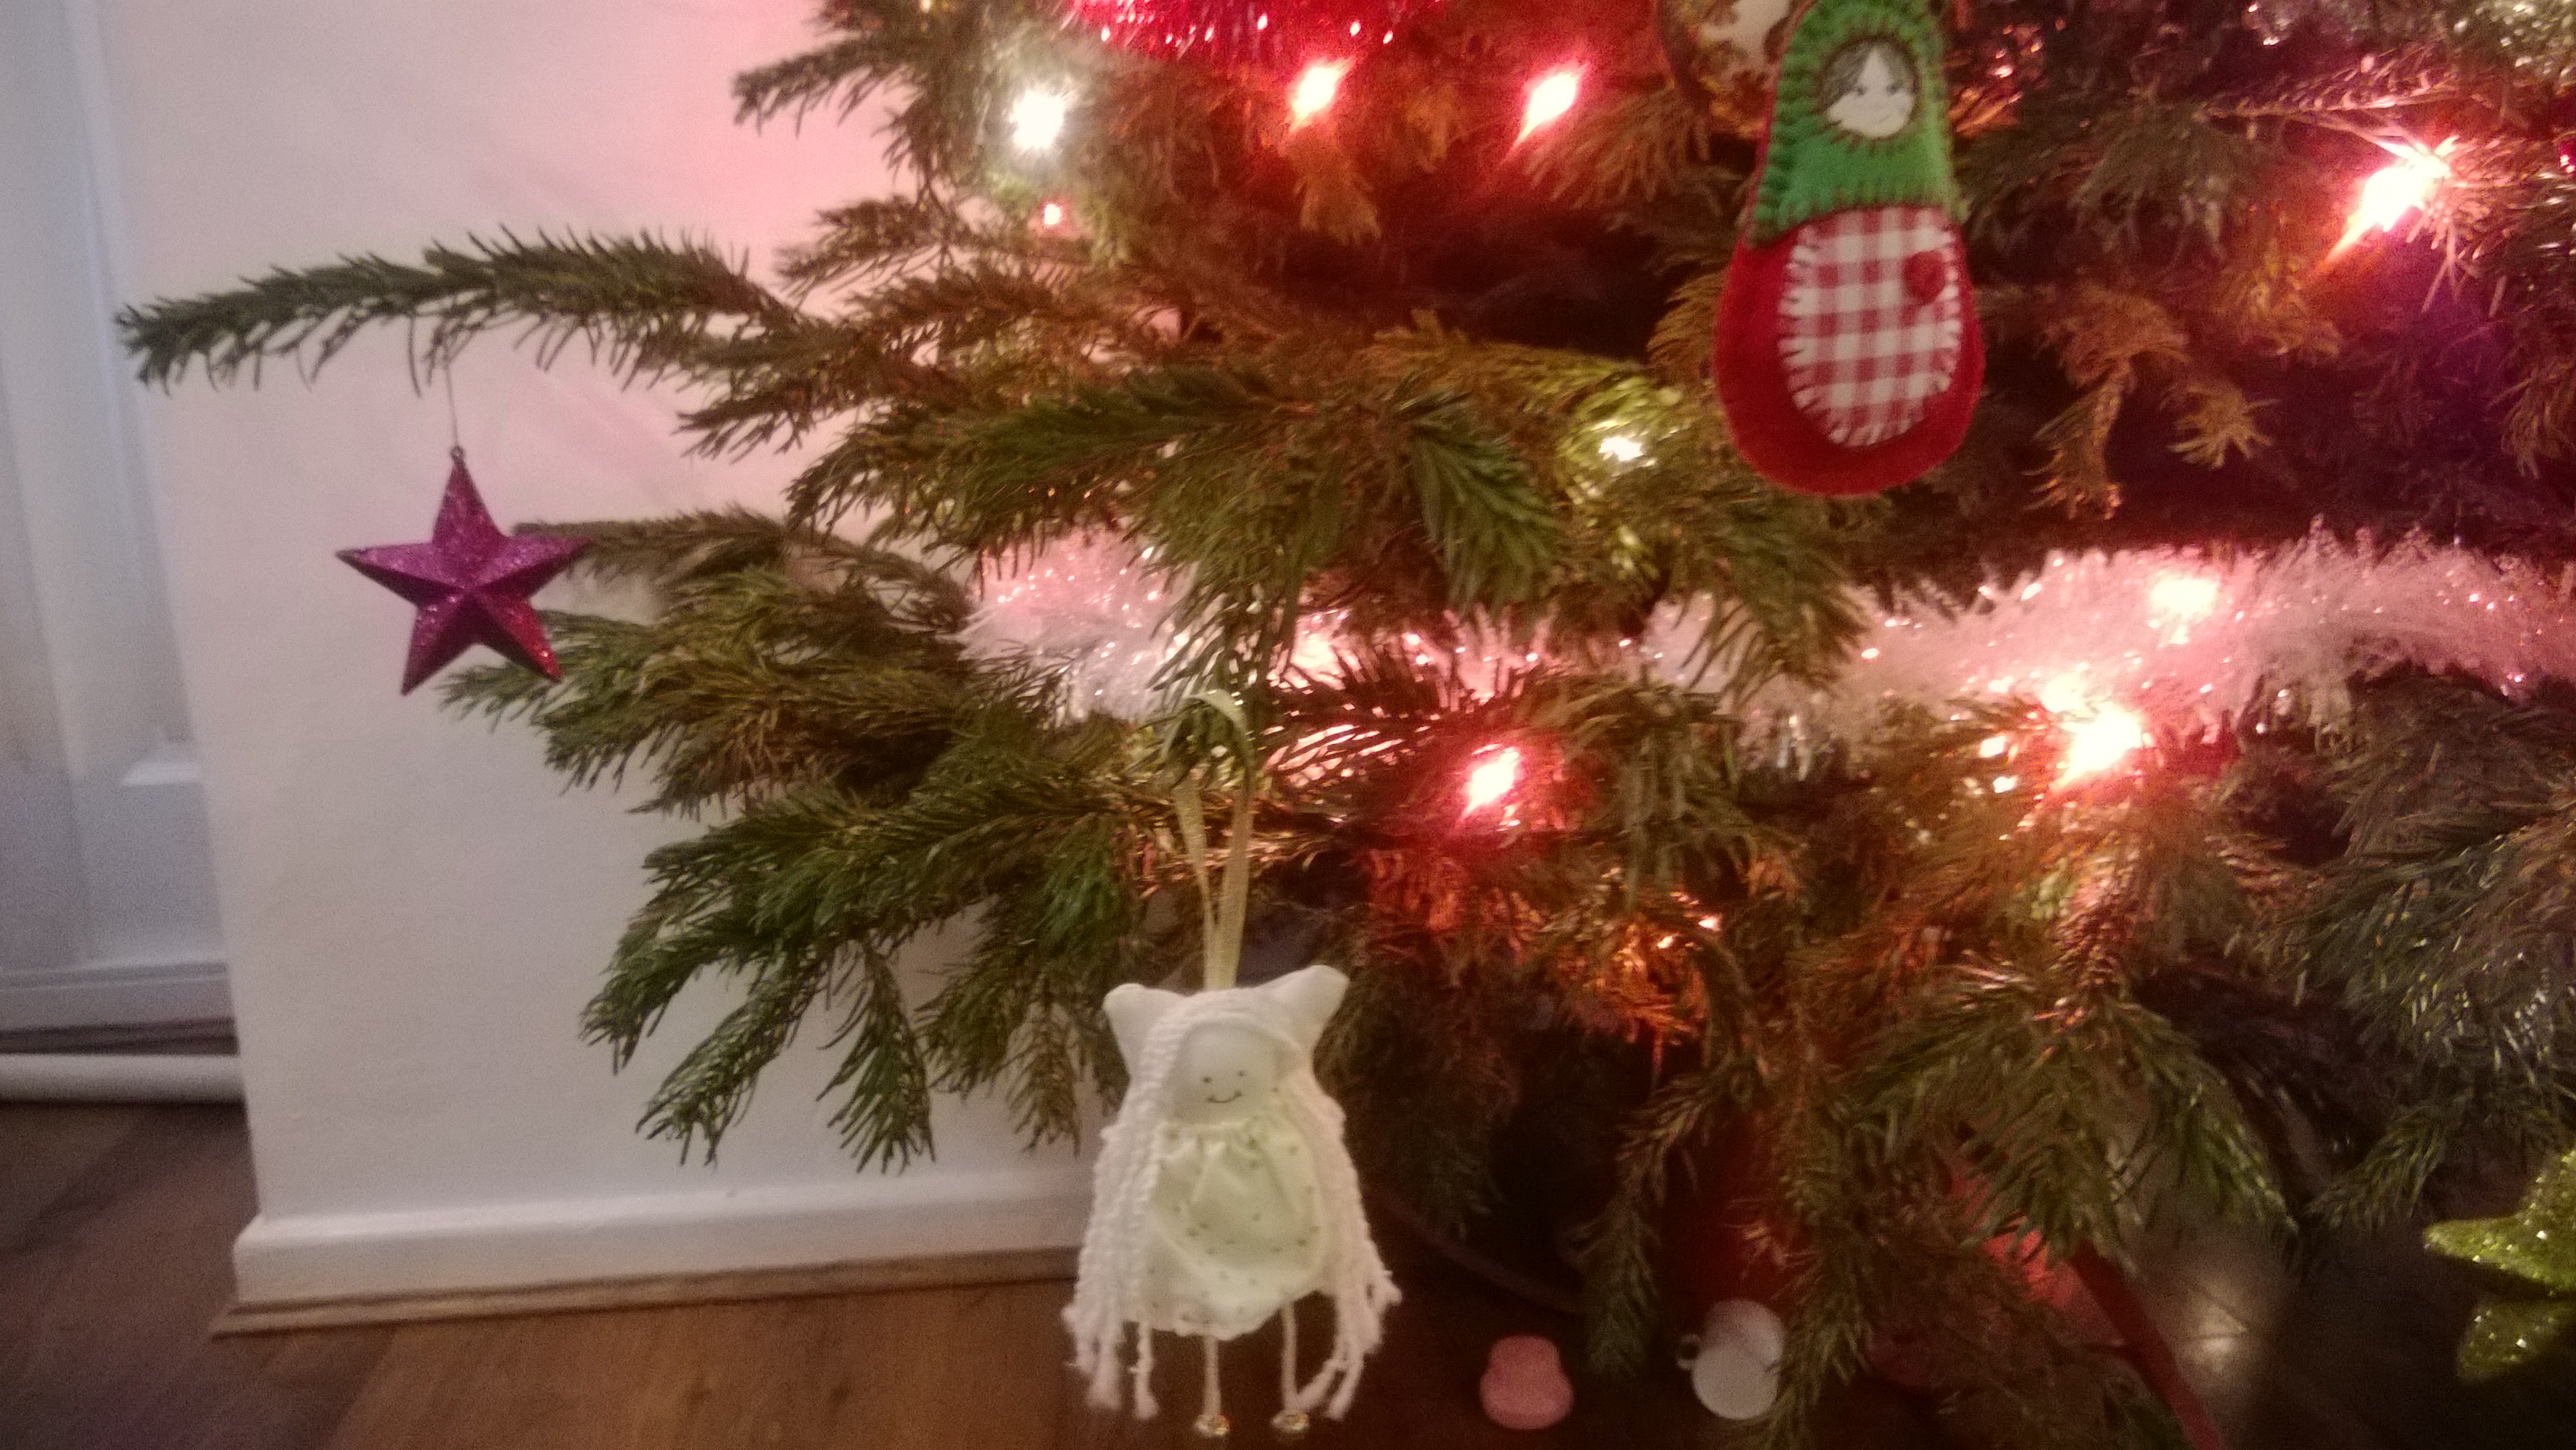
We are also all decorated, and we were slightly worried about how Monkey would get on with the tree. Apparently when his uncle was his age he kept pulling the tree over and pulling all the decorations off! Monkey is generally pretty good but still we wanted to try and make things as safe as possible, but we still wanted to have a big real Christmas tree, because we just love them!
For me, one of the most important things at home is that we have a safe enough environment for our main living area, so that a) Monkey can have a bit of a free reign without being told off all the time and b) I can leave him alone for a few minutes at a time without having to worry about what he is up to. There is door-gates on the kitchen and hall doors so that he can’t get up to any mischief if I have to pop upstairs or to the loo etc. So it is important to me that Christmas is no different, and while he needs to learn that certain things are off limits or shouldn’t be touched/pulled etc. I also want it to be safe for him so I don’t have to worry about him being on his own for a few minutes.
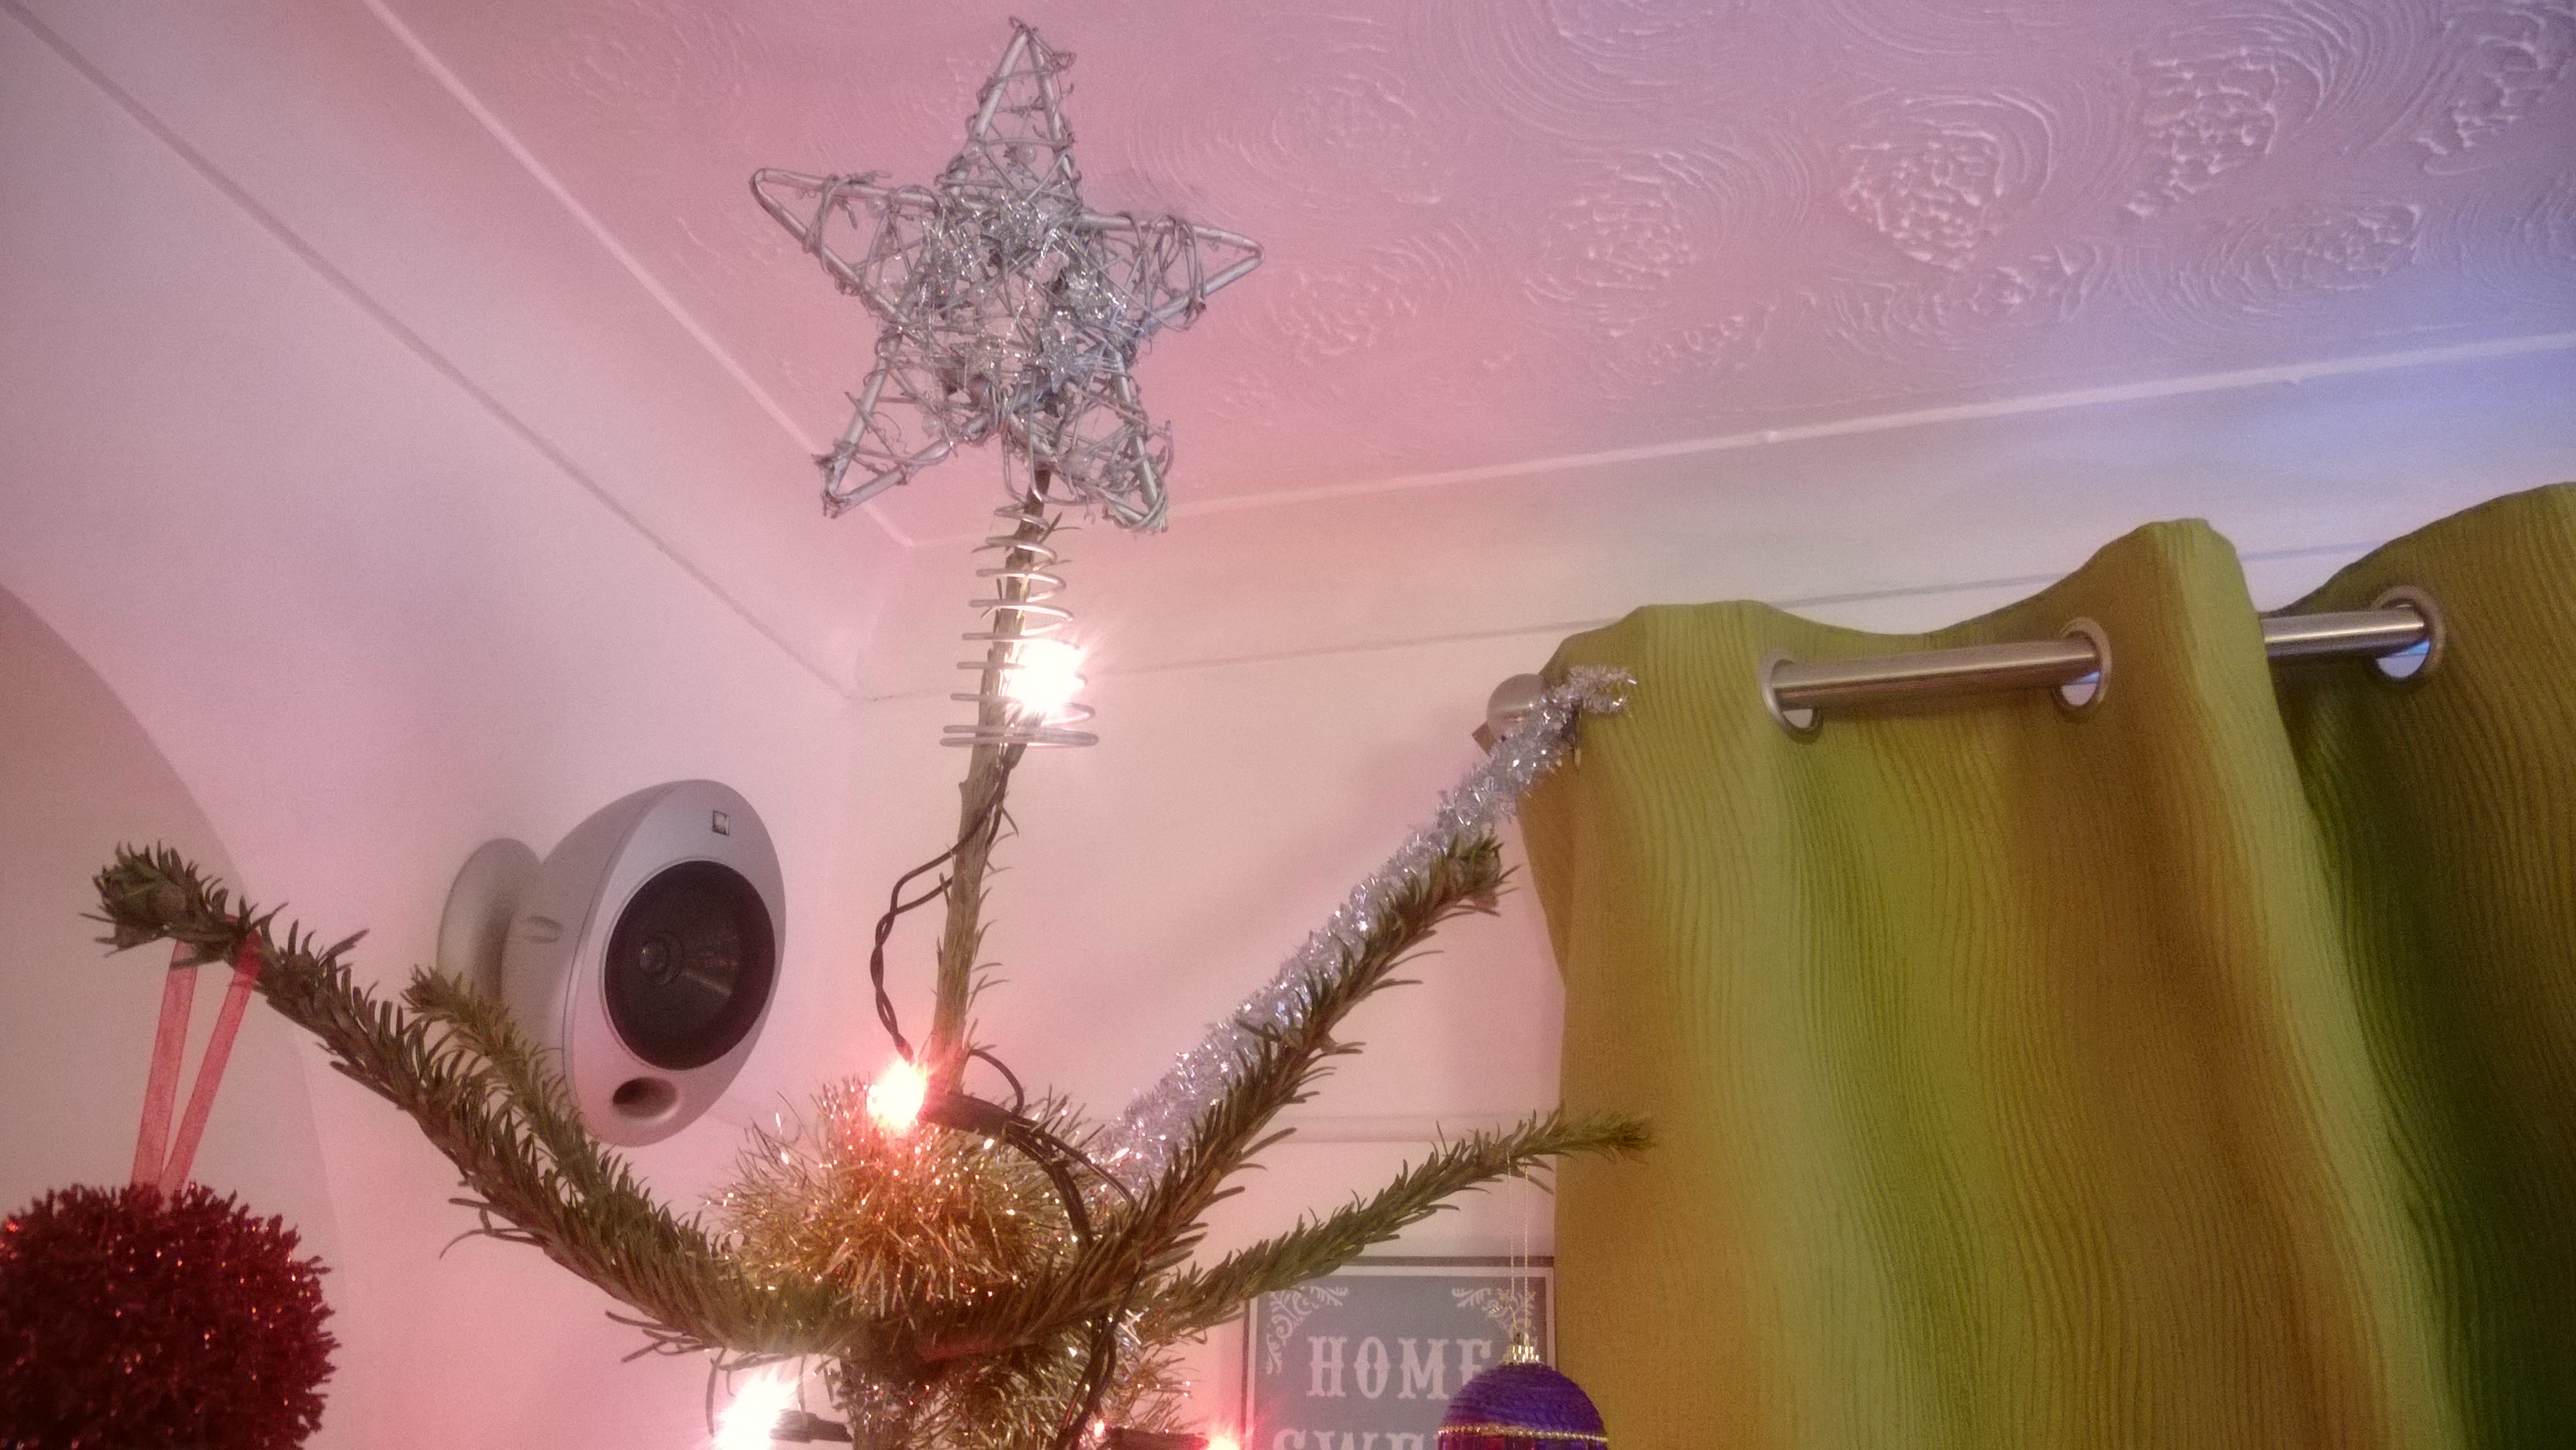
So we took a few precautions. We have tied the top of the tree to the curtain pole with some tinsel, just in case, and we made sure that all the decorations at his level are soft, home-made, or polystyrene inside so that there is no broken glass baubles to worry about! To be honest though he has been pretty good. Occasionally he stops and stares at it and he has tried to pull a few of the decorations off, but after a few remonstrations he is leaving pretty much alone, which is good! Some bits get knocked off sometimes but they are all soft ones so it doesn’t matter.
Last year was a different ballgame entirely, seeing as he was only 6/7 months old at the time and was spending most of his time careering round the house in his walker, we had to get creative in order to protect the tree! After weighing up lots of different options, we decided to make a sort of tree guard, using a big old cardboard box. We obviously wanted it to look nice so I got a bit crafty and made a nice wintry scene. It was slightly odd I’ll admit, and looked like we had a tree in a box, but it did the job and made sure that the tree was safe. For Christmas Day we took it off as he was never going to be in the living room by himself and there was too many bodies for him to be running about in his walker.
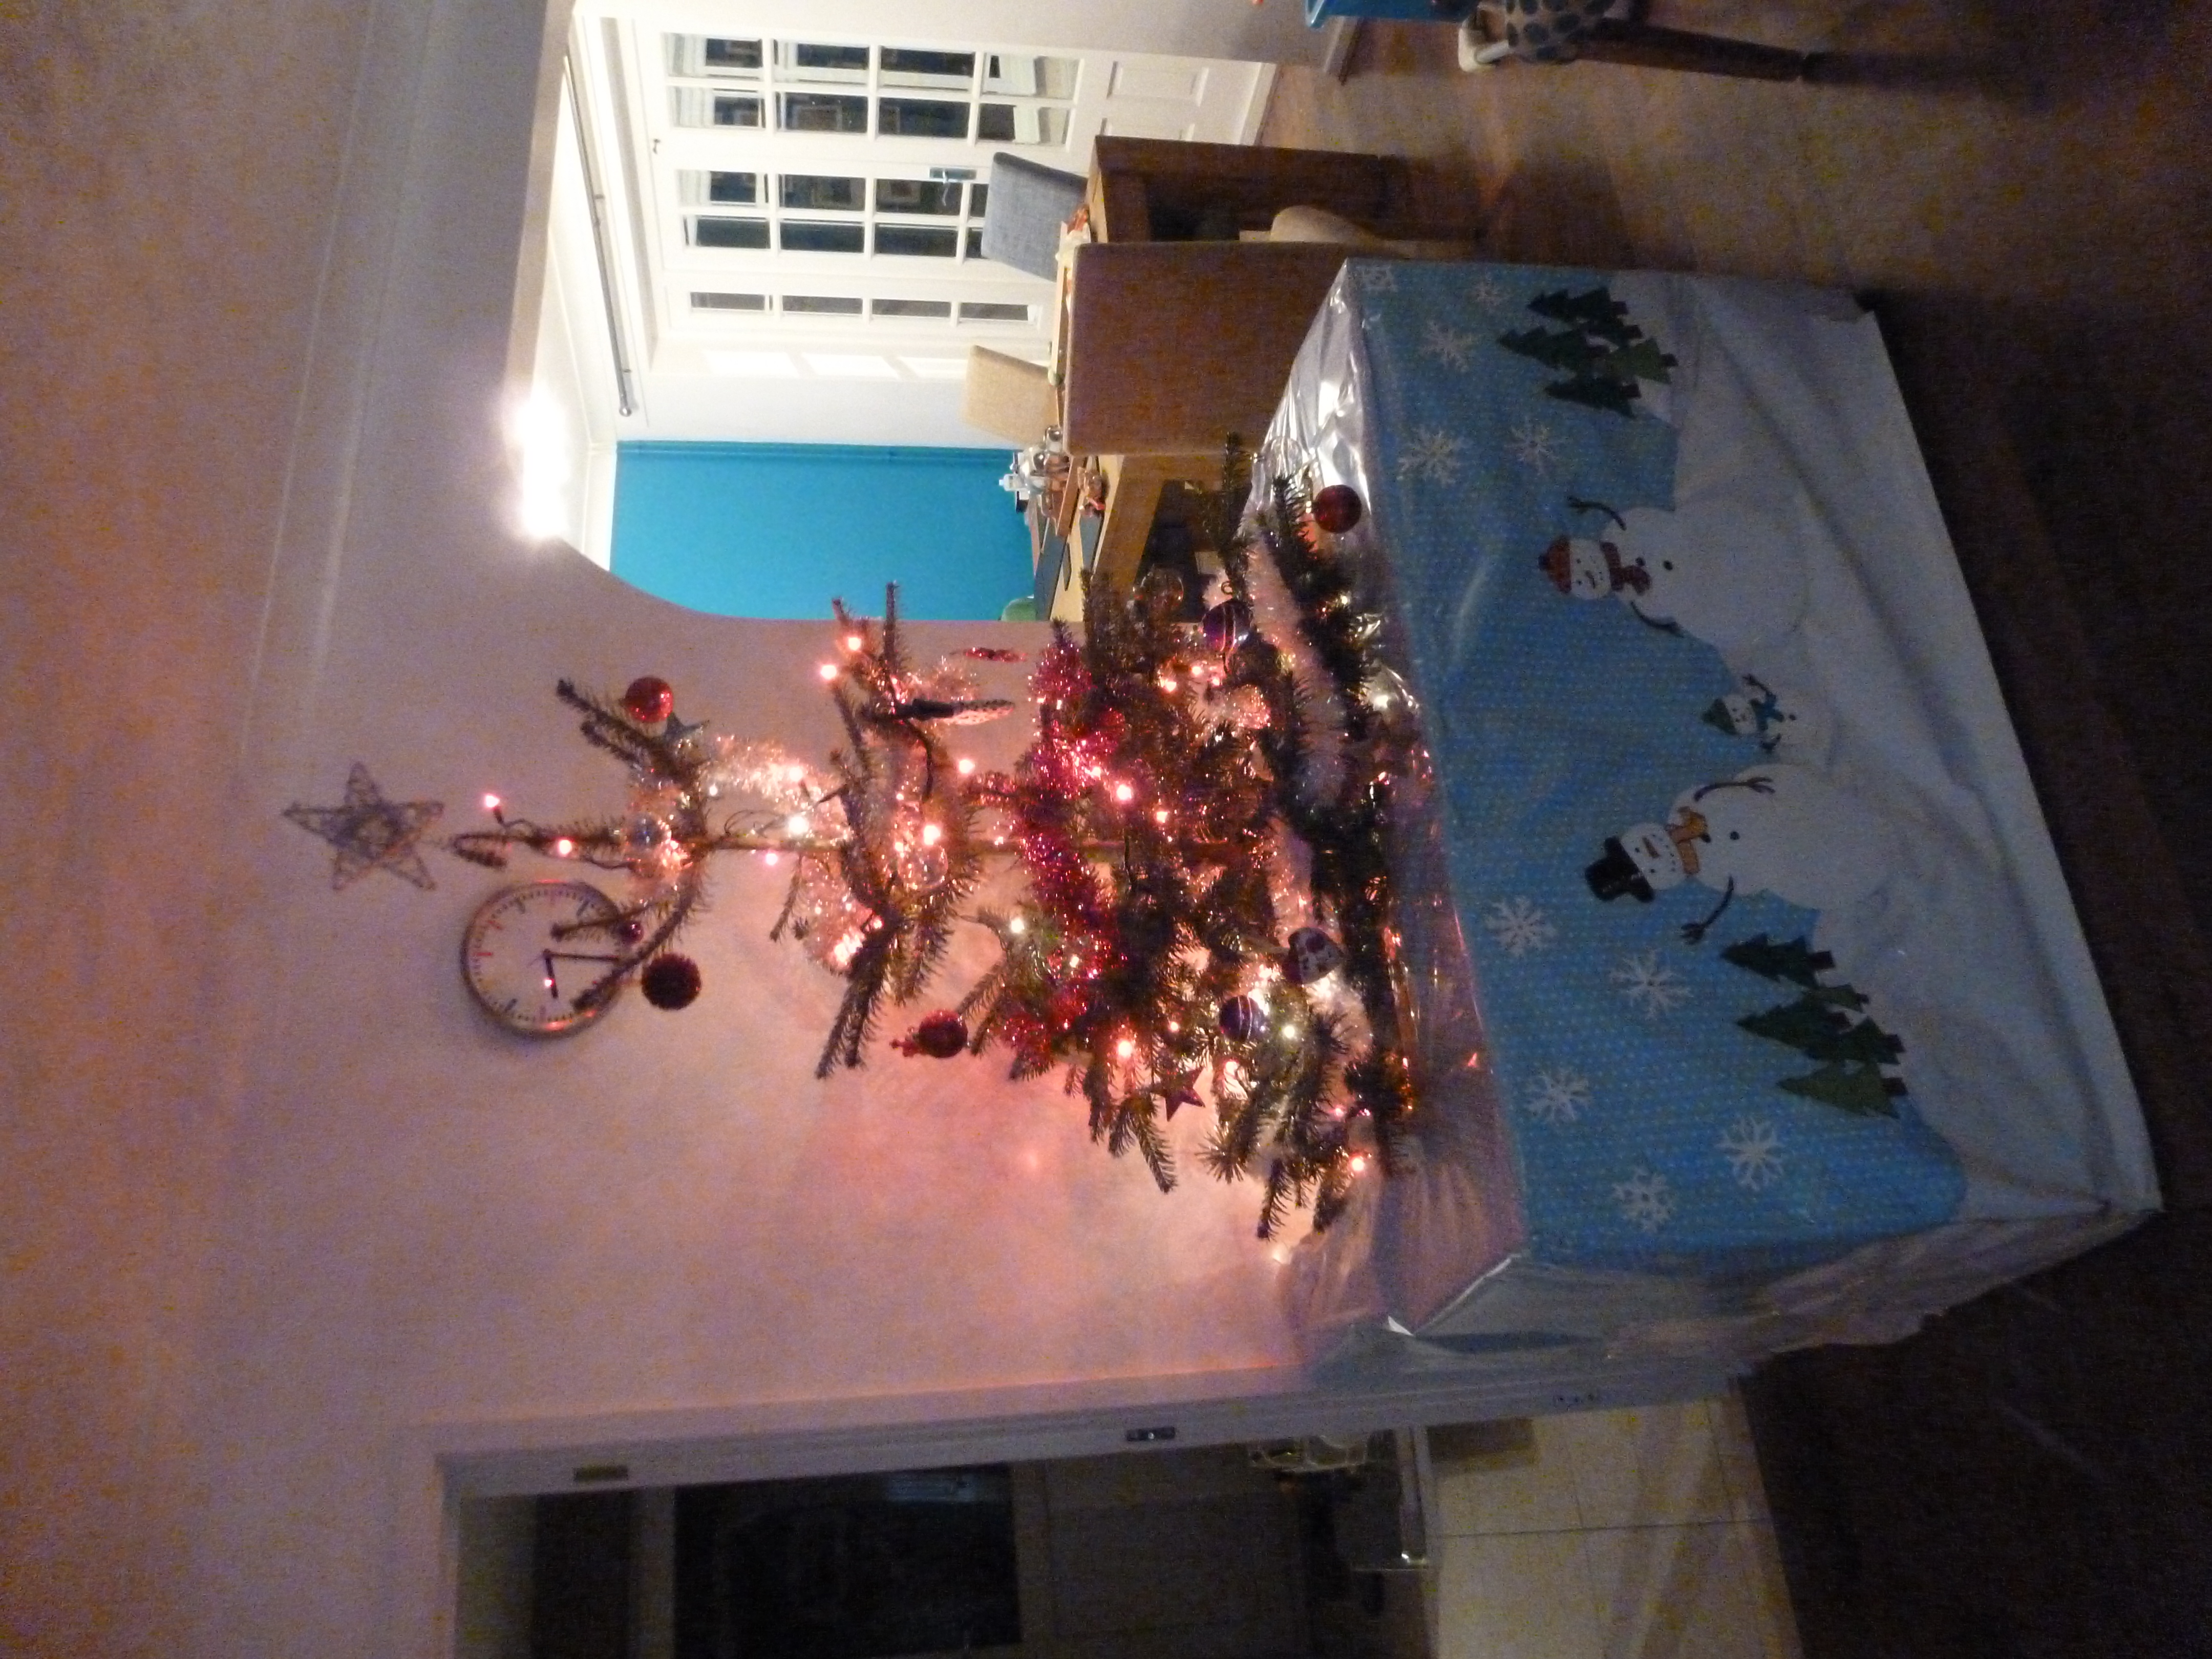
Last year’s tree and tree guard!
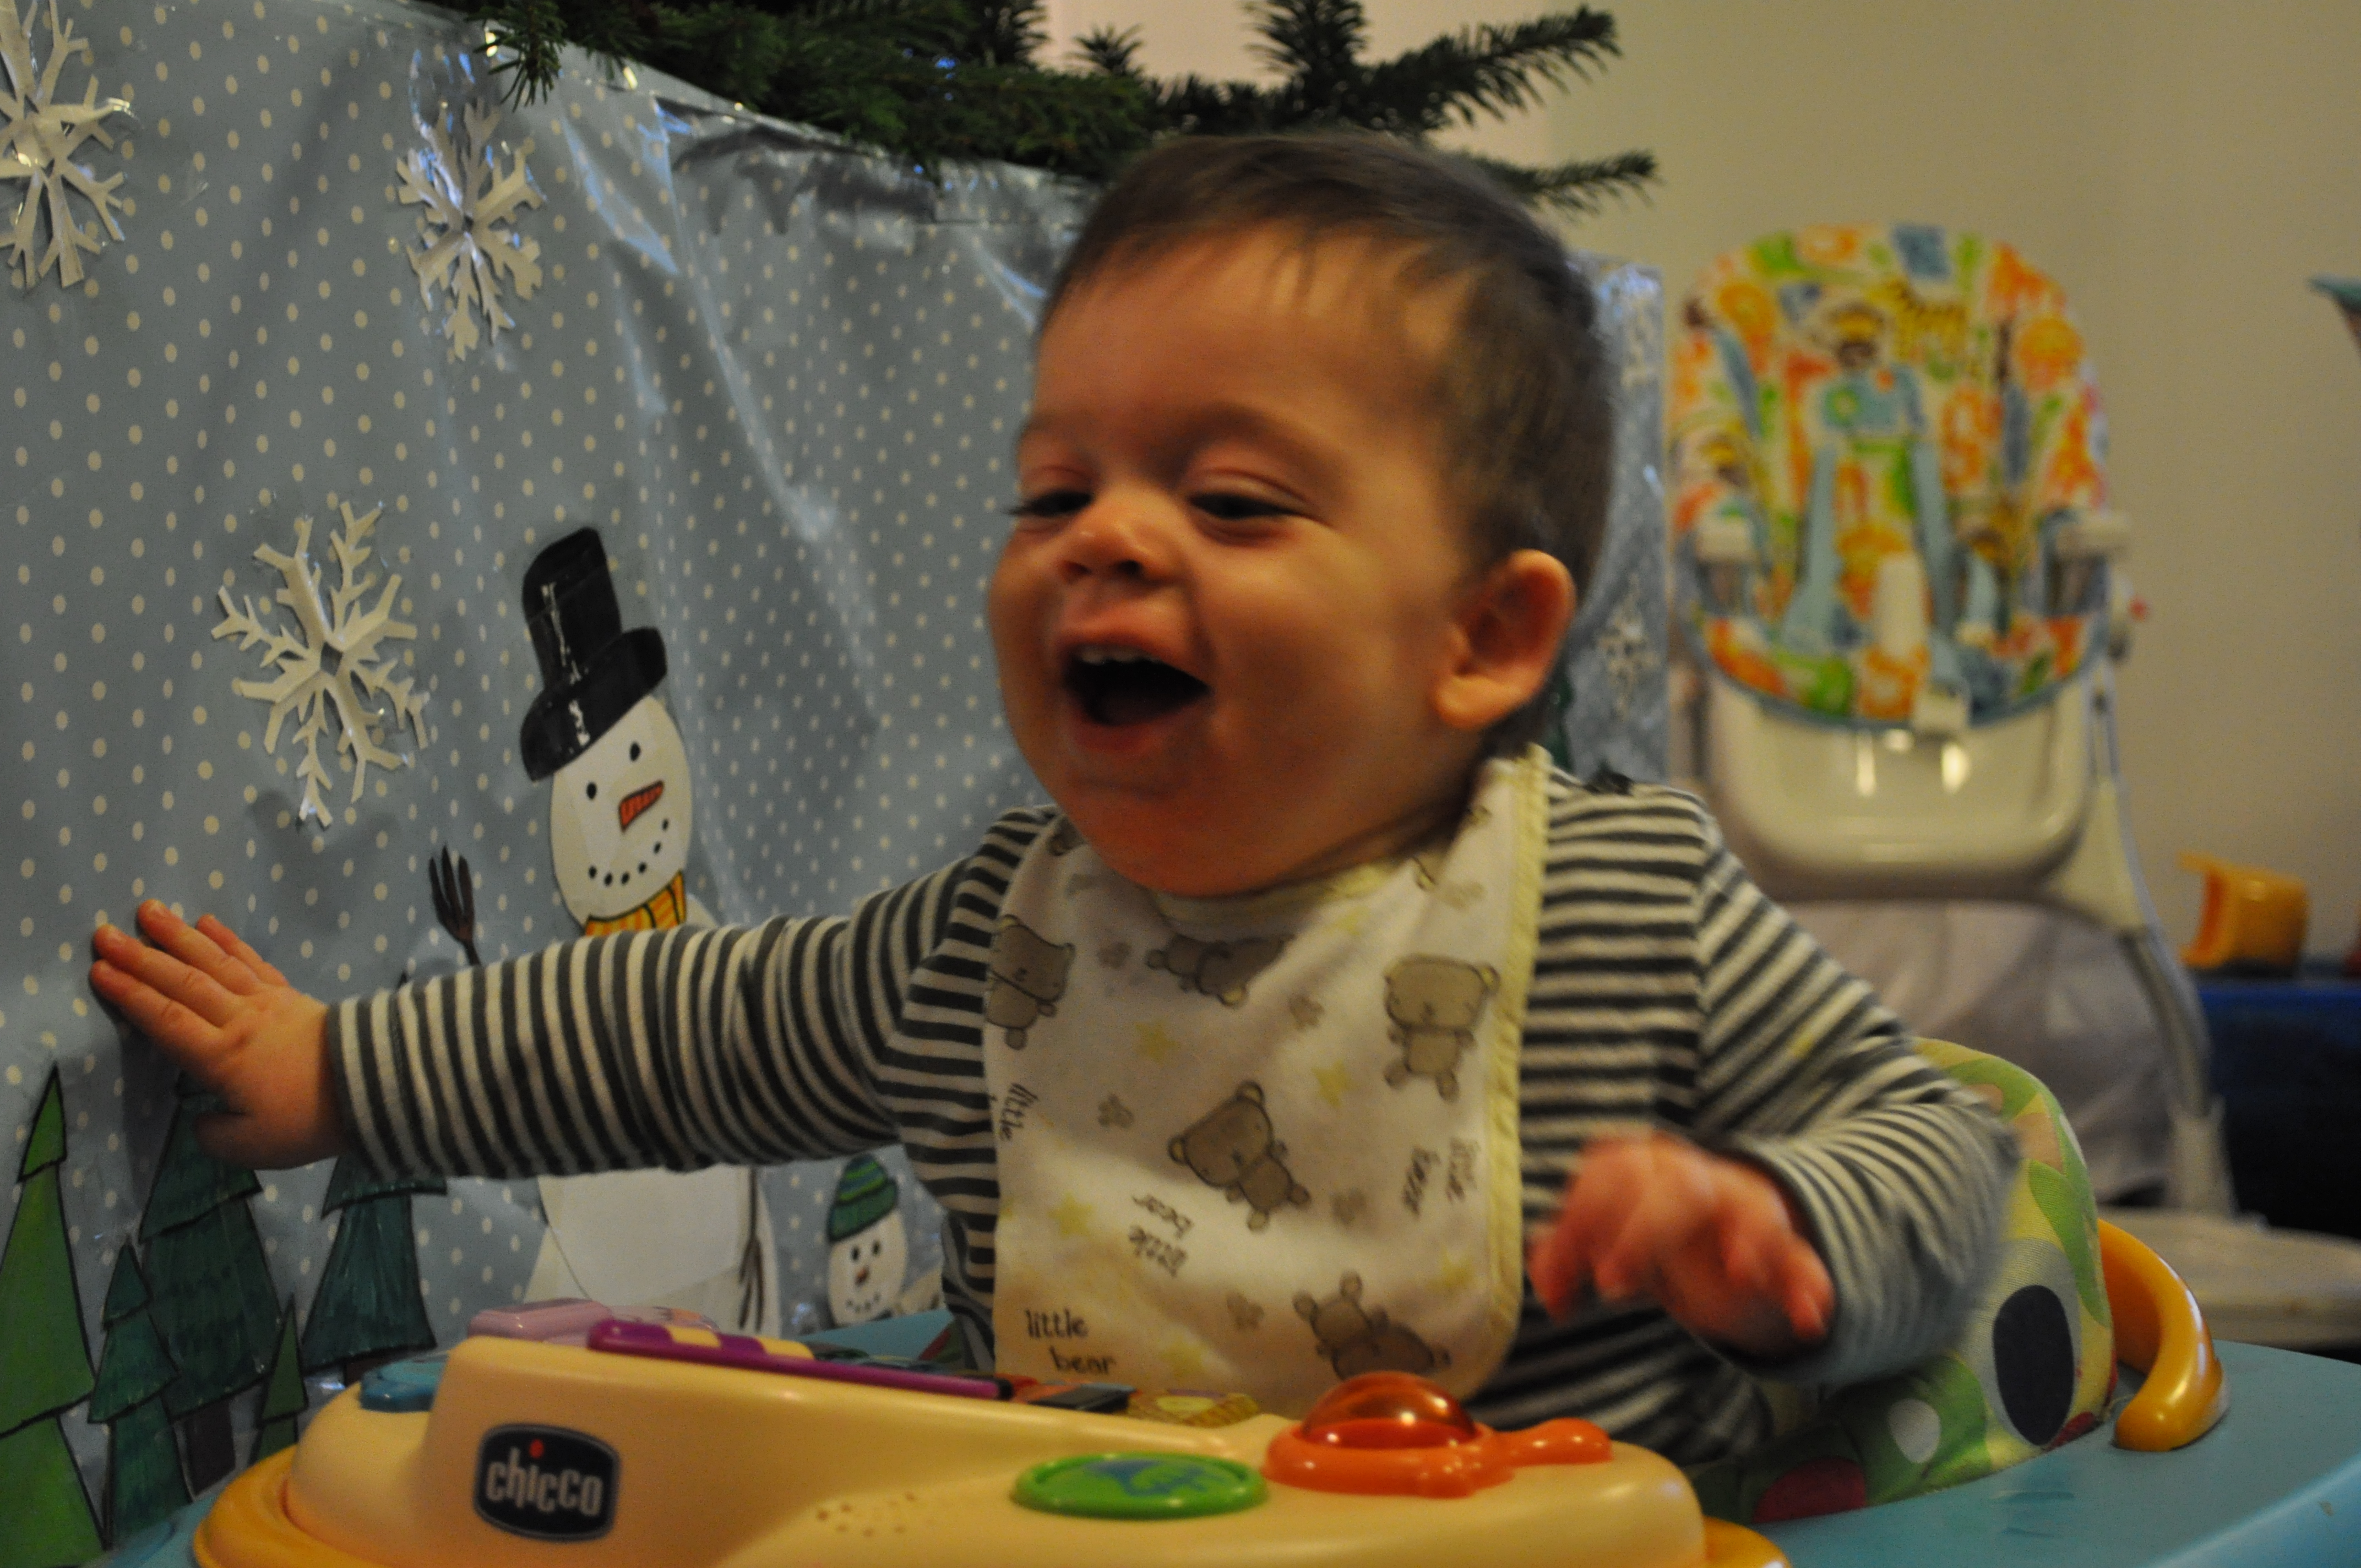
Monkey in his walker last year
How are your Christmas Preparations? Do you childproof your decorations or Christmas trees?
Cute Crochet Christmas Decoration
As part of keeping myself busy, I have been doing some very lovely and cute Christmas Crochet. Only small things that give me a lot of satisfaction for not too many man hours. I wanted to do a lovely decoration for our Christmas tree, my mother in law makes lovely decorations every year and as I have got into crochet this year I have been inspired to make one or two of my own. On browsing the internet for inspiration, I came across these very cute decorations, but I could not find the pattern for them anywhere.

Cute Crochet Father Christmas
First attempt
I was a bit disappointed but carried on looking for other options, but really couldn’t find anything I liked as much. So, after making the lovely reindeer and penguin that I did find patterns for, I decided to be brave and have a go at making a pattern up. My first attempt went ok but wasn’t great and not really the look I was going for, so I had another go and Eureka! I love him, and am really proud of the way he turned out 🙂 So I decided to share this cute pattern with the rest of the world. So any crocheters out there that fancy having a go at making this cutey Santa, the pattern is below.
Our Christmas Tree

Some the patterns I have been using lately have been in American terms so this one is too, but basically all you need to know for this pattern is that an SC is a UK DC.
HAT and HEAD
With White, ch 2
Rnd 1: Work 6 sc in first chain.
Rnd 2: 2 sc in each sc around – 12 sc.
Rnds 3-4: Sc in each sc around.
Rnd 5: Sc2tog around – 6 sc. STUFF BOBBLE OF HAT
Rnd 6: With Red, sc in each sc around – 6 sc.
Rnd 7: *2 sc in next sc, sc in next sc; rep from * around – 9 sc.
Rnd 8: Sc in each sc around – 9 sc.
Rnd 9: *2 sc in next sc, sc in each of next 2 sc; rep from * around – 12 sc.
Rnd 10: Sc in each sc around – 12 sc.
Rnd 11: *2 sc in next sc, sc in each of next 3 sc; rep from * around – 15 sc.
Rnd 12: sc in each sc around – 15 sc.
Rnd 13: *2 sc in next sc, sc in each of next 4 sc; rep from * around – 18 sc.
Rnd 14: sc in each sc around – 18 sc.
Rnd 15: *2 sc in next sc, sc in each of next 5 sc; rep from * around – 21 sc.
Rnd 16: sc in each sc around – 21 sc.
Rnd 17: *2 sc in next sc, sc in each of next 6 sc; rep from * around – 24 sc.
Rnd 18: sc in each sc around – 24 sc.
Rnd 19: *2 sc in next sc, sc in each of next 7 sc; rep from * around – 27 sc.
Rnd 20: sc in each sc around – 27 sc.
Rnd 21: *2 sc in next sc, sc in each of next 8 sc; rep from * around – 30 sc.
Rnd 22: In White, in back loops only *2sc in next sc, sc in next sc; rep from * around – 44 sc.
Rnd 23: *2sc in next sc, sc in each of next 10 sc; rep from * around – 48sc.
Rnd 24: sc in each sc around – 48 sc.
Rnd 25: sc2tog around – 24 sc.
Rnd 26: sc in each sc around – 24 sc. PARTIALLY STUFF HAT
Rnd 27: *2 sc in next sc, sc in each of next 3 sc; rep from * around – 30 sc.
Rnd 28: *2 sc in next sc, sc in each of next 4 sc; rep from * around – 36 sc.
Rnds 29-33: Sc in each sc around. Fasten off A.
Rnd 34: With B, sc in each sc around – 36 sc.
Rnd 35: *Sc2tog, sc in each of next 4 sc; rep from * around – 30 sc.
Rnd 36: *Sc2tog, sc in each of next 3 sc; rep from * around – 24 sc. FULLY STUFF ENTIRE DECORATION
Rnd 37: *Sc2tog, sc in each of next 2 sc; rep from * around – 18 sc.
Rnd 38: *Sc2tog, sc in next sc; rep from * around – 9 sc.
Rnd 37: Sc2tog, around until near enough to close.
Beard
Row 1: With White, ch 15
Row 2: Starting in first ch from hook, Sc in every chain, at the end, ch 2, turn then
Row 3: Sc in every sc, at the end, ch 2 then turn
Row 4: Sc in every sc, at the end, ch 2 then turn
Row 5: Sc in every sc but skip the last sc, slip stitch into chain at end, ch 1 then turn
Row 6: Skip first Sc, sc in every sc but skip the last sc, slip stitch into chain at end, ch 1 then turn
Row 7: Skip first Sc, sc in every sc but skip the last sc, slip stitch into chain at end, Sign off
Hair
Row 1: With White, ch 15
Row 2: Starting in first ch from hook, Sc in every chain, at the end, ch 2, turn then
Row 3: Sc in every sc, at the end, ch 2 then turn
Row 4: Sc in every sc, at the end, ch 2 then turn
Row 5: Sc in every sc, at the end, ch 2 then turn
Row 6: Sc in every sc but skip the last sc, slip stitch into chain at end, ch 1 then turn
Row 7: Skip first Sc, sc in every sc but skip the last sc, slip stitch into chain at end, sign off
Nose
With Red, ch 2
Rnd 1: Work 4 sc in first chain.
Rnd 2: sc in each sc around – 4 sc.
Rnd 3: Sc in each sc around. Sign off
Sew it all together! I Sewed on the hair first, then when I sewed on the beard, I tried to give it a bit of a peak in the middle so that it looks like he is smiling! Then sew on the nose and finally use a bit of black yarn to sew some smiling eyes. Enjoy!
If you do have a go yourself, please share a picture or a link so I can see them too!